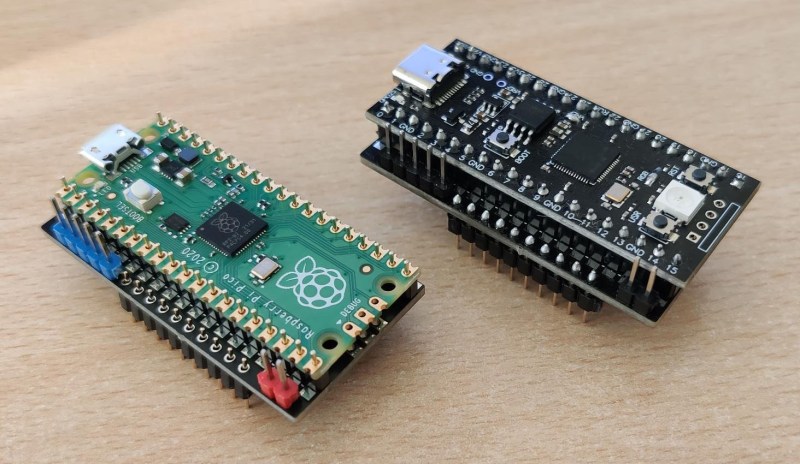
Developer [frntc] has recently come up with a smaller and less expensive way to not only replace the SID chip in your Commodore 64 but to also make it a stereo SID! To top it off, it can also hold up to 16 games and launch them from a custom menu. The SIDKick Pico is a simple board with a Raspberry Pi Pico mounted on top. It uses a SID emulation engine based on reSID to emulate both major versions of the SID chip — both the 6581 and the 8580. Unlike many other SID replacements, the SIDKick Pico also supports mouse and paddle inputs, meaning it replaces all functionality of the original SID!
Sound can be generated in three different ways: either using PWM to create a mono audio signal that is routed out via the normal C64/C128 connectors, an external PCM5102A DAC board, or using a different PCB design that has pads for an on-board DAC and TL072 op-amp. While many Commodore purists dislike using replacement chips, the reality is that all extant SID chips were made roughly 40 years ago, and as more and more of them fail, options like the SIDKick Pico are an excellent way to keep the sound of the SID alive.
If you want to hear the SIDKick Pico in action, you can check out the samples on the linked GitHub page, or check out the video below by YouTuber Wolfgang Kierdorf of the RETRO is the New Black channel. To get your hands on a SIDKick Pico, you can follow the instructions on the GitHub page for ordering either bare PCBs or pre-assembled PCBs from either PCBWay or your board manufacturer of choice.
Thanks [Stephen] for the tip.


It never ceases to amaze me a dual core system on a chip is $5 (or pennies if you use the bare RP2040).
I like seeing these kind of hacks that keep the system going transparently. Very nice.
Y’know, given the advent of Tiny Tapeout, I wonder if we might be about to start seeing small production run custom silicon services which could allow new retro computer chips like SID and VICII etc. to be made to order at reasonable prices…
well that actually is happening regarding the classical AY-3-8913
According to the “Tiny Tapeout 05 Datasheet” (https://tinytapeout.github.io/tinytapeout-05/datasheet.pdf see page 121) which states:
This Verilog implementation is a replica of the classical AY-3-8913 programmable sound generator. With roughly a 1500 logic gates this design fits on a single tile of the TinyTapeout.
Well great minds and all that!
Digital only but I thnk they’re going to be offering mixed analoue/digital soon?
“Unlike many other SID replacements, the SIDKick Pico also supports mouse and paddle inputs, meaning it replaces all functionality of the original SID!”
I was going to ask..
Because, a real analog mouse that uses X/Y paddle inputs is really useful for GEOS.
A joystick mouse just doesn’t do justice.
Otherwise, it’s also nice for PC retro gamers.
The Innovation SSI-2001 sound card uses an SID chip, too. As does (did) “The Entertainer”.
This blog has some more information about it:
http://nerdlypleasures.blogspot.com/2014/01/sid-and-dos-unlikely-but-true-bedfellows.html?m=1
What l wonder, is why the author assumes one would want to store games in this SID chip replacement. I think of useful tools. The drives came with DOS extensions/wedges (no fastloaders) but nobody ever used them. So people on other platforms b!tched about the odd
Load”$”,8
to see a dir. Fine, put the extended DOS software that came on a floppy with the drive, into this SID replacement. Now Dir and $ are easy. While you are at it, why not put in any of the 3 dozen wonderful DOS wedges with speedloaders in. Or any of the other ROM based carts that are also available as .CRT files for Vice (the Commodore emulator). A nice ML monitor would be good. I bet there are Basic extensions. And what about GEOS and C64OS?
The article and video are a bit misleading here, you can put together your programs as you like.
Cartridges (ROM, .CRT) cannot be emulated by anything in the SID socket.
So how does it store games? Would love to know where to read up more on these, and how to place more useful software in there (than games).
You can either put PRGs into the uf2-file and upload them together with the firmware via USB (using a tool that is part of the release), or you can upload PRGs from a disk drive using the built-in configuration tool.