Are you eager to get your feet wet in the keyboard surf, but not quite ready to stand up and ride the waves of designing a full-size board? You should paddle out with a macro pad instead, and take on the foam face-first and lying down.

Naturally, the fewer keys and things you want, the easier it will be to build. But [Robert] is using the versatile Raspberry Pi 2040, which has plenty of I/O pins if you want to expand on his basic plan. Not ready to watch the videos? You can see the schematic and the 3D files on GitHub.
As [Robert] says, this is a great opportunity to learn many skills at once, while ending up with something terrifically useful that could potentially live on your desk from then on. And who knows where that could lead?
Holy Leather Work, Batman!
[Notxtwhiledrive] had long wanted to design a keyboard from scratch, but could never think of a compelling concept from which to get going. Then one day while doing some leather work, it dawned on him to design a portable keyboard much the same way as he would a wallet.
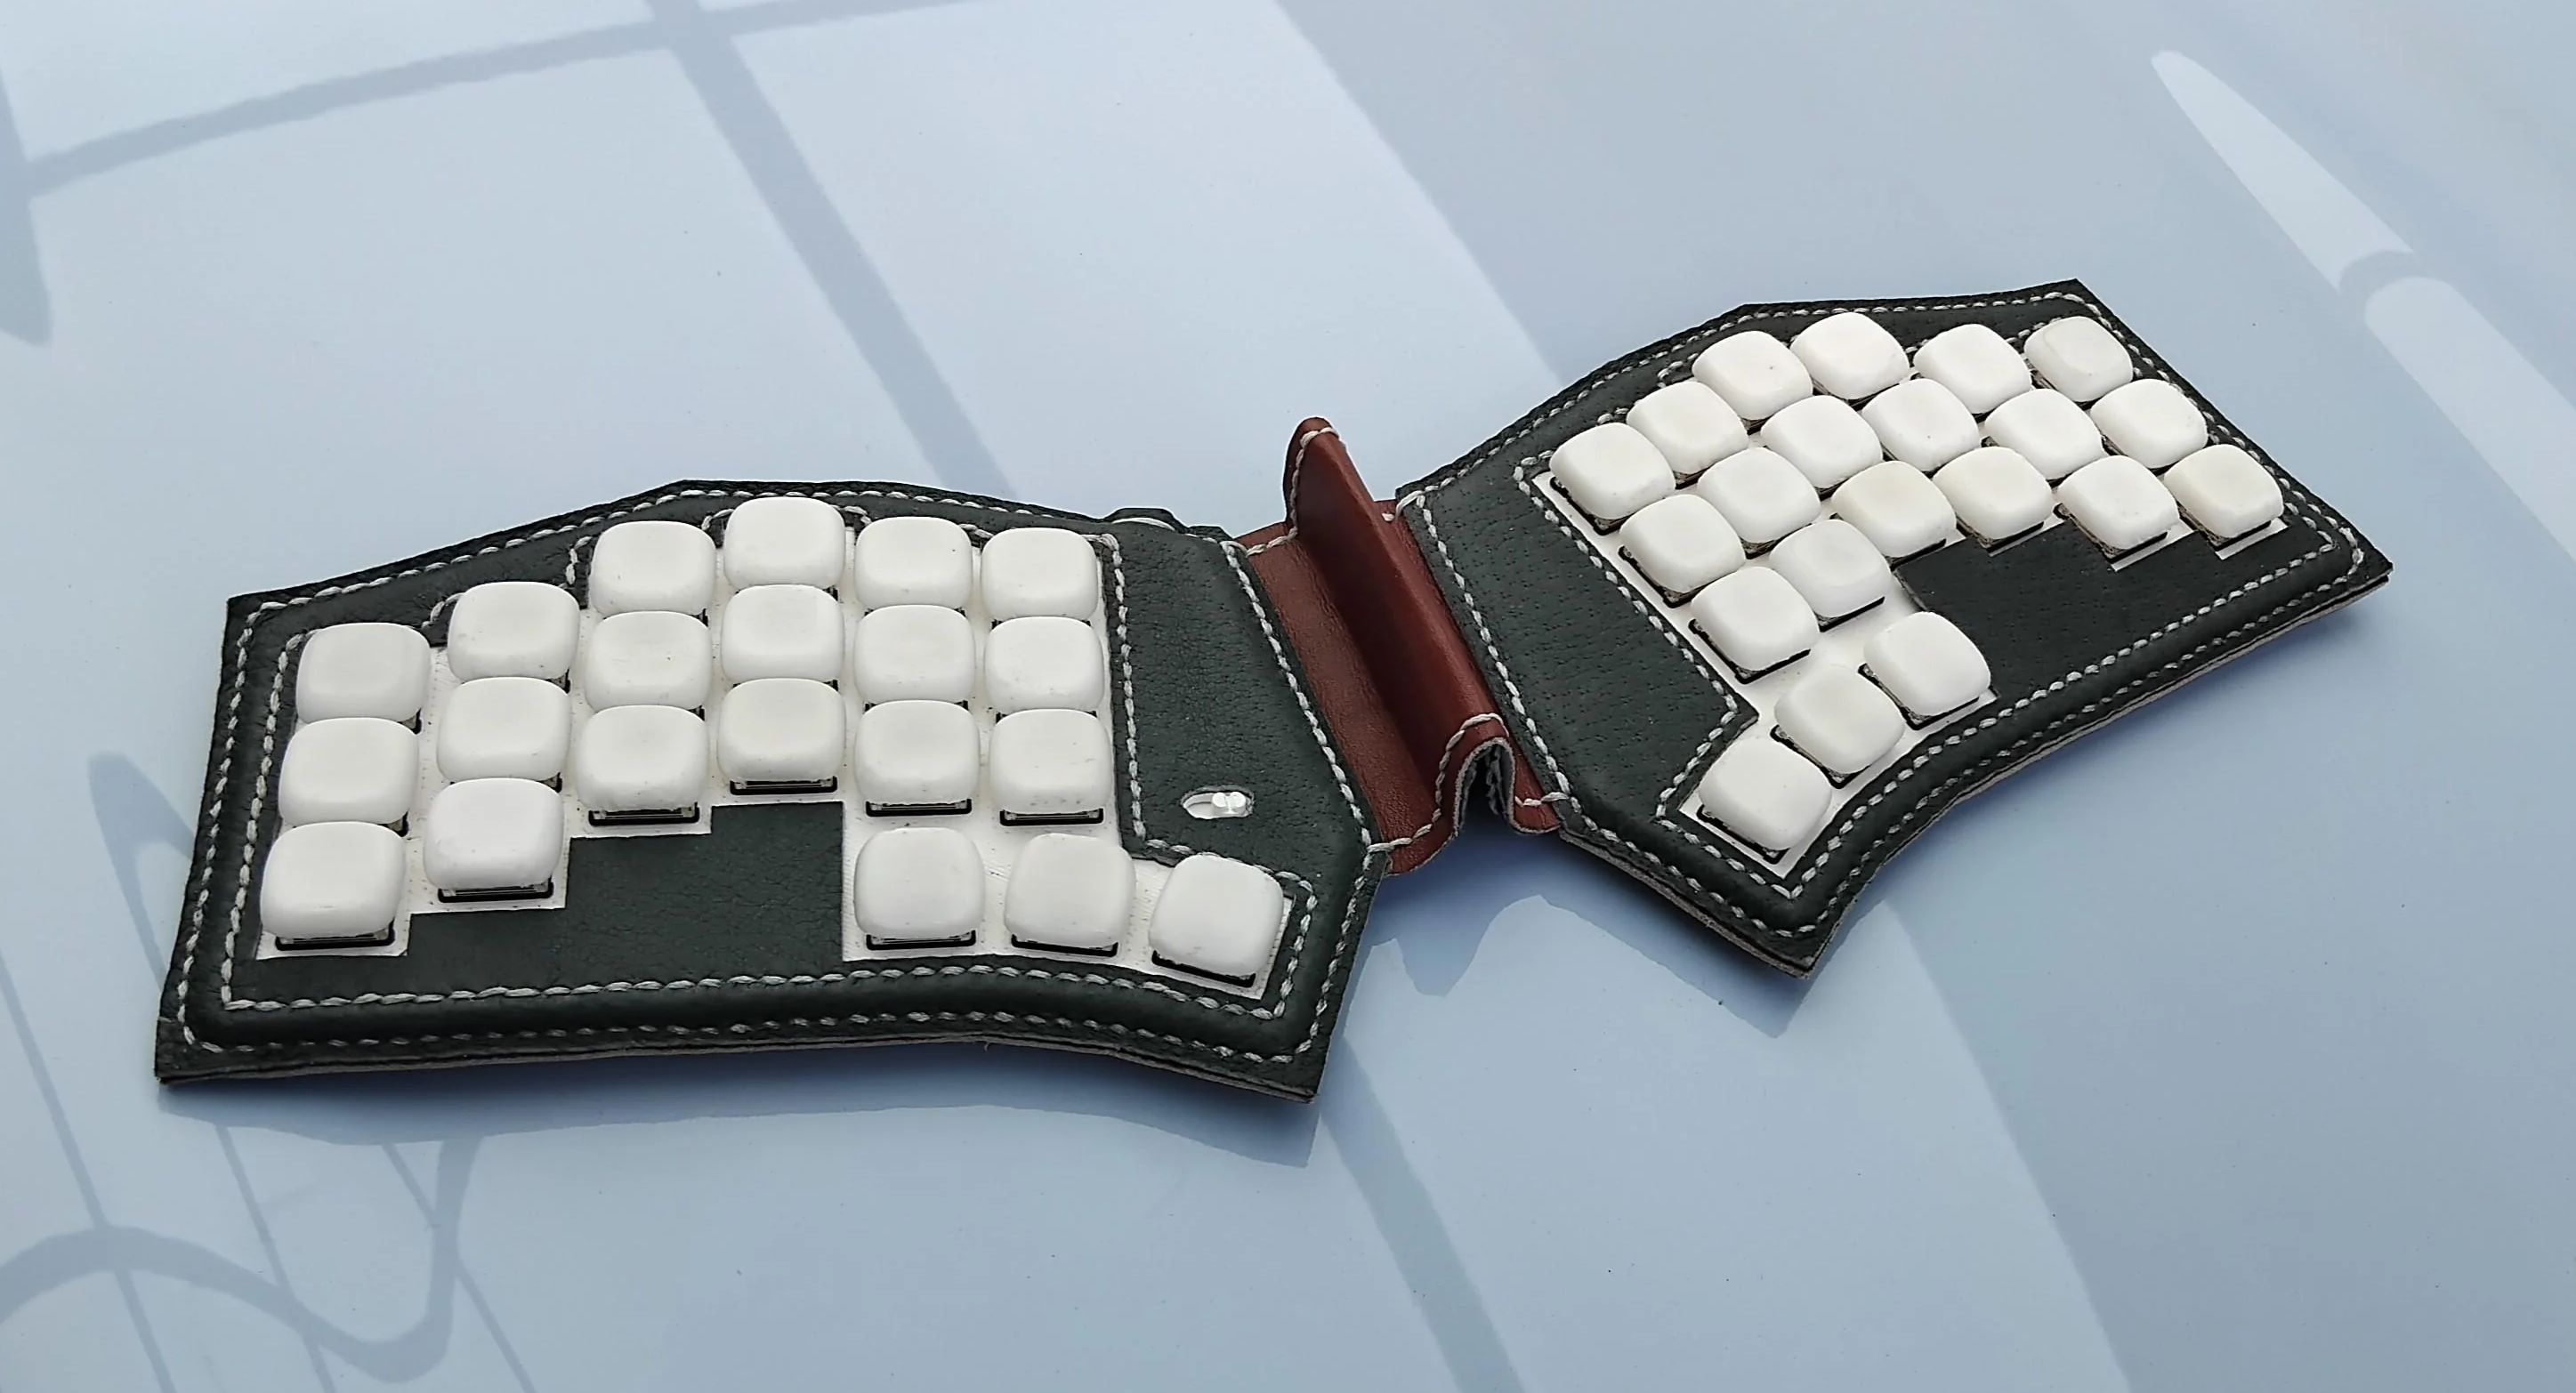
Switch-wise, it has Otemu low-profile reds wearing TPU keycaps. [Notxtwhiledrive] is thinking about making a hot swap version before open-sourcing everything and/or taking commissions. Even better, he apparently recorded video throughout the process and is planning to upload a video about designing and building this beautiful board.
The Centerfold: Levels, the Prototype

Do you rock a sweet set of peripherals on a screamin’ desk pad? Send me a picture along with your handle and all the gory details, and you could be featured here!
Historical Clackers: the Secor
When we last left Historical Clackers, we examined the Williams machine with its curious grasshopper-like type bars. If you’ll recall, the Williams Typewriter Company was acquired by Jerome Burgess Secor, a former superintendent of the Williams Typewriter Company.
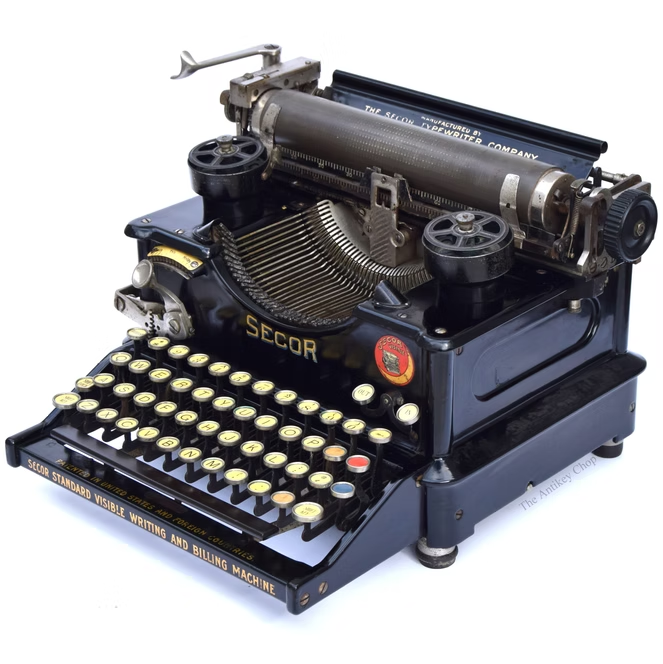
Secor, an inventor in his own right, began working at Williams in 1899. By 1902, he was filing typewriter patents for frontstrike machines that looked nothing like the Williams grasshopper number. By the summer of 1910, Secor took over the failed company.
Though radically different, the Secor typewriters were not radically better than the Williams grasshopper. And though the typist could see more with the Secor, the only real hype surrounded the removable, interchangeable escapement.
The Secor Company produced about 7,000 machines between three models, one with a wide carriage. Between the impending war, competition, and alleged labor issues, the writing was on the wall for the Secor Company, and it folded in 1916.
But you shouldn’t feel sorry for Mr. Secor. His main wheelhouse was mechanical toy and sewing machine manufacture. He did well for himself in these realms, and those items are far more sought after by collectors than his typewriters, interestingly enough.
Finally, a Quick Guide to Cleaning That Awful Keyboard Of Yours
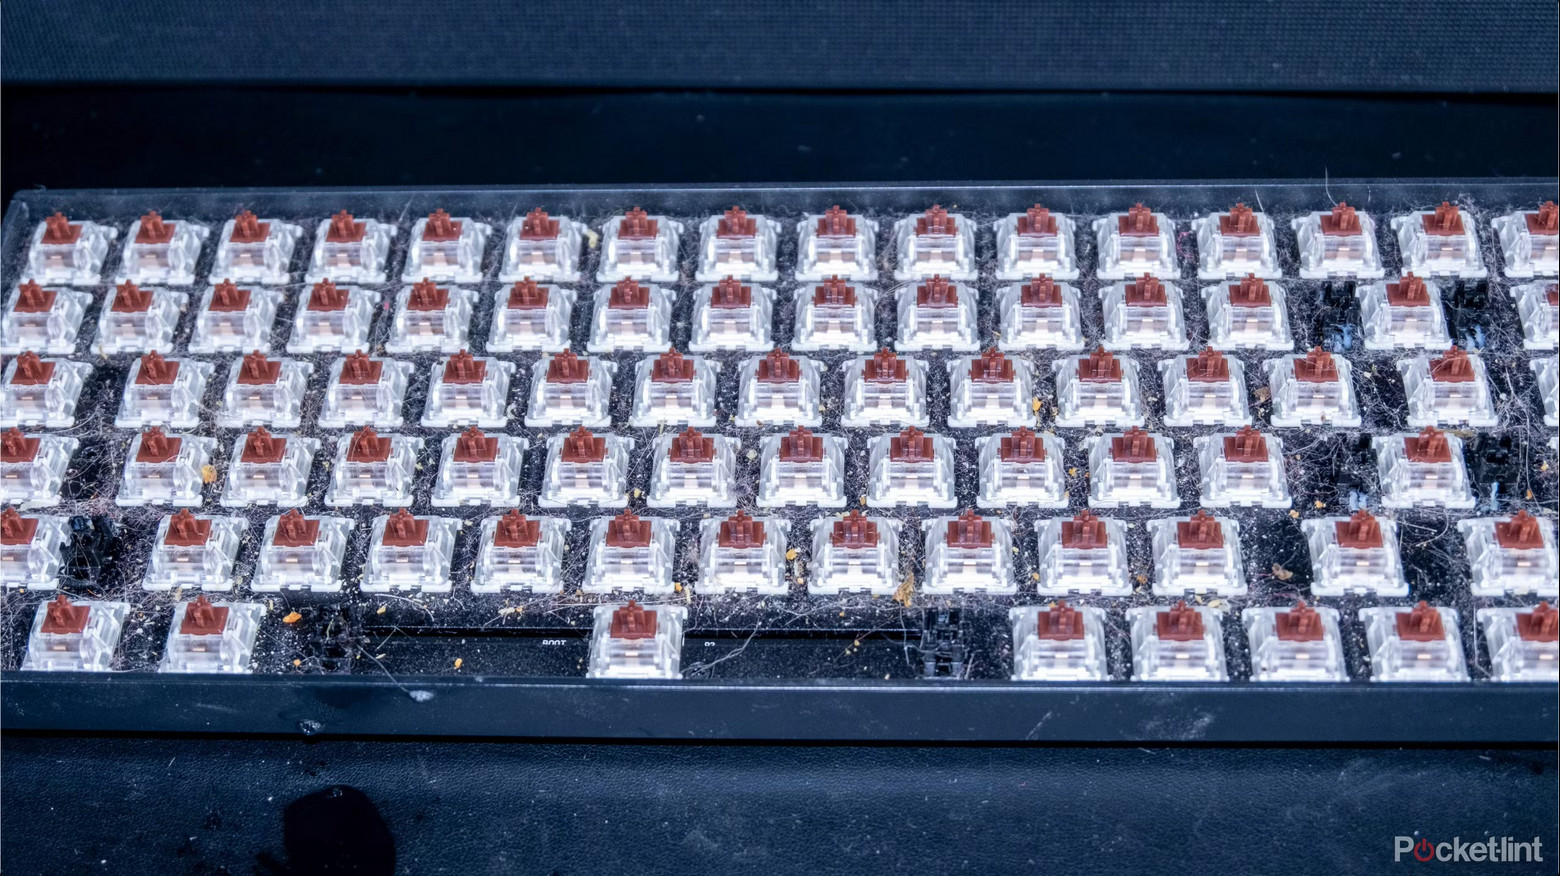
Oh, I’m pointing one finger back at myself, trust me. You should see this thing. I really should go at it with the compressor sometime soon. And I might even take all the steps outlined in this keyboard deep-cleaning guide by [Ben Smith].
[Ben] estimates that this exercise will take 30 minutes to an hour, but also talks about soaking the keycaps, so (in my experience) you can add several hours of drying time to that ballpark. Plan for that and have another keyboard to use.
Apparently he has two cats that sit directly on the keyboard at every opportunity. I’m not so lucky, so although there is definitely cat hair involved, it doesn’t blanket the switch plate or anything. But you should see [Ben]’s keyboard.
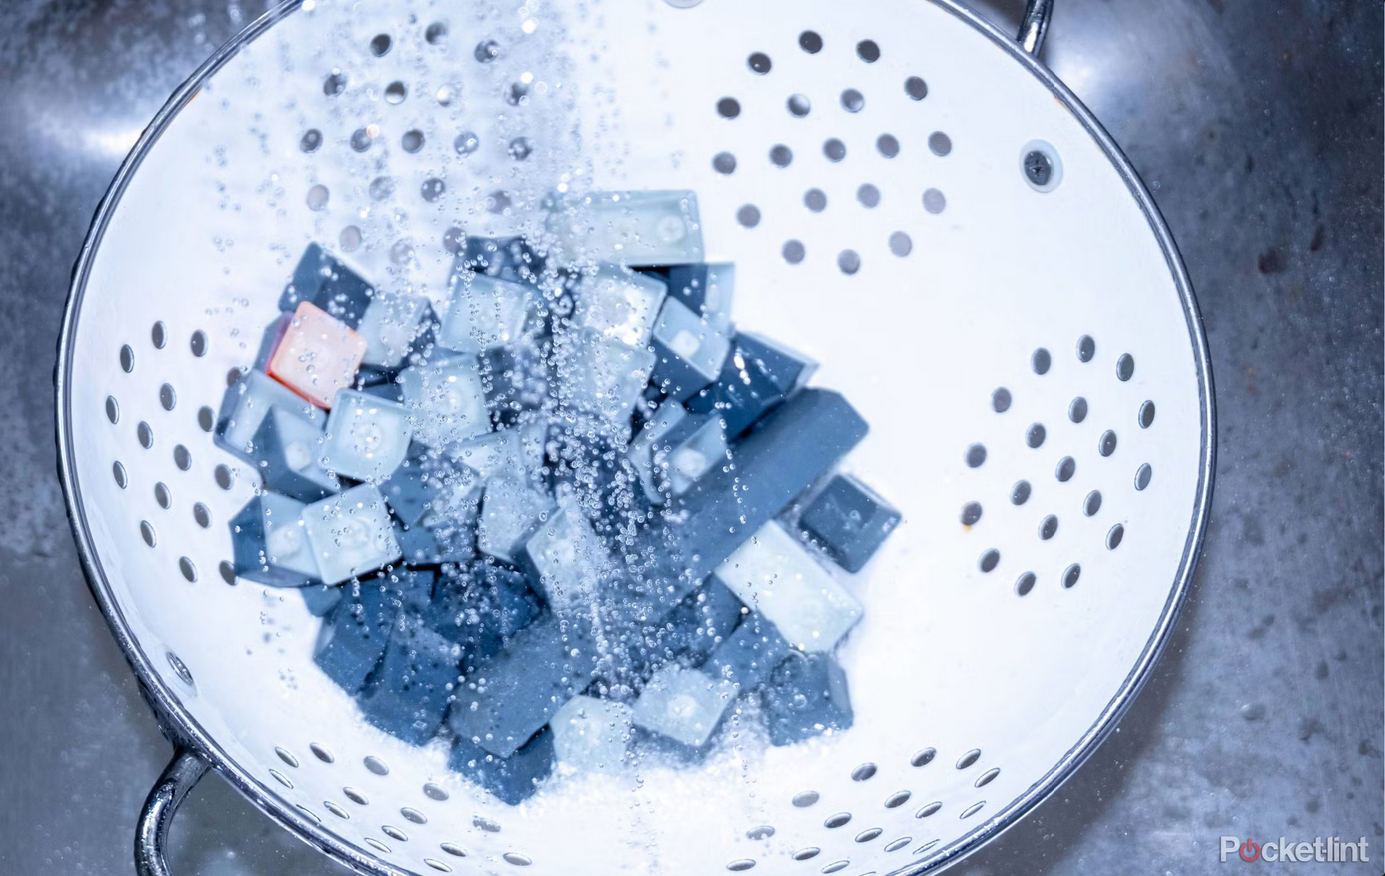
My suggestion — if they’re super gross, put them in something with a lid so you can shake the whole concoction around and knock the dirt off with force.
After about half an hour, use a colander to strain and drain them while rinsing them off. Then let them get good and dry, and put your board back together.
Enjoy the feeling of non-oily keycaps and the sound of full thock now that the blanket of cat hair has been lifted. Rejoice!
Got a hot tip that has like, anything to do with keyboards? Help me out by sending in a link or two. Don’t want all the Hackaday scribes to see it? Feel free to email me directly.


‘canned air’ – is actually green house gas in a can, usually one of the refrigerants that are generally illegal to release from AC systems, but apparently fine to spray out of a can. If you don’t have a compressor, use one of the other mechanical alternatives.
A few years back I bought a “air duster” machine – basically a very high speed fan thing which funnels the air through a narrow tube. About £25 I think, and quickly pays for itself against canned air. It’s also a lot more powerful. Would highly recommend one.
We had to repeatedly refrib and clean an upper mgt secretary’s 84 key IBM kbd in the late 90s. She insisted it was the only one she could use. Unobtainable even then. Formula 409 at half-strengthfor the shell and power vacuum and IPA on the PCB. She always thought she had a new one! We called it Giovanning it after the guy who did it.
That’s… I’m gonna do that to my Model M.
I did that in 1997 as a working student to the CAD workstation keyboards that I was supposed to work at. Grimiest KBs in my life, dozens of contractors hat used them before, and the smell from the lunch particles in the KBs…. I complained.
The machines have been leased, new keyboards not available easily.
I got special flat foam based qtips, an organic orange oil based grease remover (was later removed from the market, too much allergies…), a set of basic tools to disassemble the KBs and the key for the cabinet with the vacuum, and a stiff detailing brush to help with vacuuming.
And once a month, it was my task to clean all the 24 keyboards in the office.
The next morning the office smelled of oranges, everybody was happy, and eating at the desk was banned, and smoking, too. People started buying those plexiglass keyboard covers, and using them.
In my next office, there were only PCs, with the cheapest of KBs.
Cherry G83 can be clipped open, remove the contact foils, PCBs and cable, the rest can go in a dishwasher, use the longest program with the lowest temperature. The enzymes in the dishwasher powder will eat all the grime, fat and dried juices from all of the parts.
When the program ends, remove the KBs from the dishwasher, blow them dry with pressurized air, wipe them with a frottee towel (careful, the clips…) and put them at a vented place to dry out completely before reassembly.
These days, I carry my KB with me.
I replaced the worn out plastic on my keyboard wrist rest and mouse with leather. Got a second hand leather jacket for 3 euros, spread contact glue on both pieces, waited 15 minutes and pressed it together. Turned out great and I’m sure it will last longer than the plastic did.
I didn’t take photos of the keyboard upgrade, but here is a picture of the mouse: https://jpa.kapsi.fi/stuff/pix/nahkahiiri.jpg
Ooh, that looks great! :)
Leather is so much nicer than that awful rubberized coating that either wears off or turns to goo after a few years.
Back in college I got annoyed when I wore out my old mousepad and replaced it with one that kept curling up no matter what I did. I cut a square of thick tooling leather and used it as-is and it worked beautifully. Within a few weeks the region the mouses slid on had been burnished to a shine and the friction was just right. That mousepad lasted me through the rest of college, grad school, and is still perfectly fine over 10 years later.
“Apparently he has two cats that sit directly on the keyboard at every opportunity.”
Bug zapper tennis racket wired for continuous operation lying on the keyboard when not in use = cat problem solved.
A damp microfiber or face cloth and a dinner knife will get the sides of keys quicker than any letter-tip disposable wiper-on-a-stick times many more will ever get done. Vacuuming is better than blowing first to get stuff out not in further. Operate each key whilst sucking at all sides point blank with the hose. Use a small paint brush with the vac. Vacuums are far more common than a compressor or shop air.
One of the best custom keyboards IMHO are so-called MMO mice, with something like 12 sidebuttons.
They are always at hand and are so functional.
Did you ever cover those [Kristina]? Would you accept those as ‘keyboard’? Do you think they will ever become a ‘thing’ like mechanical keyboards are? They are already available at insane prices, so the market is ready for the keyboard games ;).
Oh and last but not least, the quality and feel of the buttons used for such mice are significant.
I don’t think I have covered those before, but perhaps I should! I have a trackball with up/down buttons that I repurposed into Ctrl+C and Ctrl+V because of the whole RSI thing. I would totally use more buttons if they were there. I’ll have to look around for trackballs with tons of buttons.
When I was using my desktop along with my child – who was eating snacks and whatever food while using it – I had to frequently wash the entire keyboard. I removed anything that was not plastic, dumped the rest in a bucket with water and dish soap, used a small brush to rub all surfaces, then cleared and dry, then left the parts to rest for any water left to evaporate, then put back the keyboard.
Do not forget to take a picture of it before dissasembly.
For notebooks I recomand both a vacuum cleaner and any type of compressor/aircan, because I saw many times dust coming of one place to land back 3 keys further, so I’m using the vacuum cleaner closely to where the dirt comes out. After one or two passes, if still dirty you may try using a smooth brush or a well squeezed water wet cloth.