
I modified a printer a few years ago to handle multiple filaments, but I will admit it was more or less a stunt. It worked, but it felt like you had to draw mystic symbols on the floor of the lab and dance around the printer, chanting incantations for it to go right. But I recently broke down and bought a color printer. No, probably not the one you think, but one that is pretty similar to the other color machines out there.
Of course, it is easy to grab ready-made models in various colors. It is also easy enough to go into a slicer and “paint” colors, but that’s not always desirable. In particular, I like to design in OpenSCAD, and adding a manual intervention step into an otherwise automatic compile process is inconvenient.
The other approach is to create a separate STL file for each filament color you will print with. Obviously, if your printer can only print four colors, then you will have four or fewer STLs. You import them, assign each one a color, and then, if you like, you can save the whole project as a 3MF or other file that knows how to handle the colors. That process is quick and painless, so the question now becomes how to get OpenSCAD to put out multiple STLs, one for each color.
But… color()
OpenSCAD has a color function, but that just shows you colors on the screen, and doesn’t actually do anything to your printed models. You can fill your screen with color, but the STL file you export will be the same. OpenSCAD is also parametric, so it isn’t that hard to just generate several OpenSCAD files for each part of the assembly. But you do have to make sure everything is referenced to the same origin, which can be tricky.
It turns out, the development version of OpenSCAD has experimental support for exporting 3MF files, which would allow me to sidestep the four STLs entirely. However, to make it work, you not only have to run the development version, but you also have to enable lazy unions in the preferences. You might try it, but you might also want to wait until the feature is more stable.
Besides, even with the development version, at least as I tried it, every object in the design will still need its color set in the slicer. The OpenSCAD export makes them separate objects, but doesn’t seem to communicate their color in a way that the slicer expects it. If you have a large number of multi-color parts, that will be a problem. It appears that if you do go this way, you might consider only setting the color on the very top-most objects unless things change as the feature gets more robust.
A Better Way
What I really wanted to do is create one OpenSCAD file that shows the colors I am using on the screen. Then, when I’m ready to generate STL files, I should be able to just pick one color for each color I am using.
Luckily, OpenSCAD lets you easily define modifiers using children(). You can define a module and then refer to things that are put after the module. That lets you write things that act like translate or scale that modify the things that come after them. Or, come to think of it, the built-in color command.
Simple Example
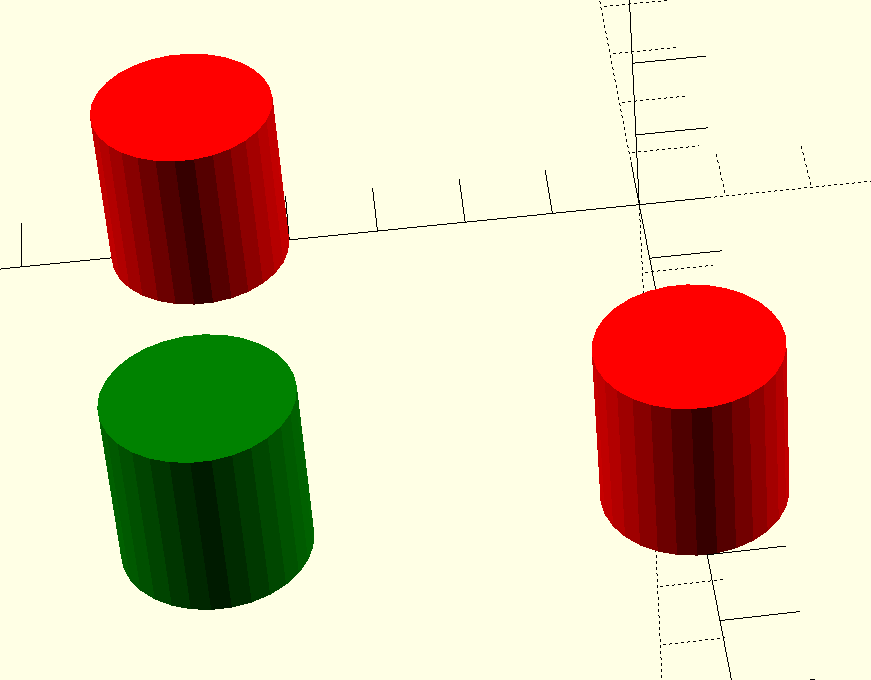
Before we look at color output, let’s just play with the children function. Consider this code:
module redpart() {
   color("red") children();
}

redpart() cube([5,5,5]);
That makes a red cube. Of course, you could remind me that you could just replace redpart() with color("red") and you’d be right. But there’s more to it.
Let’s add a variable that we set to 1 if we don’t want color output:
mono=0;

module redpart() {
   if (mono==0) color("red") children();
   else children();
}

redpart() cube([5,5,5]);
Now We’re Getting Somewhere
So what we need is a way to mark different parts of the OpenSCAD model as belonging to a specific filament spool. An array of color names would work. Then you can select all colors or just a specific one to show in the output.
colors=[ "black", "white", "blue","green"];

// Set to -1 for everything
current_color=-1;
All we need now is a way to mark which spool goes with what part. I put this in colorstl.scad so I could include it in other files:
module colorpart(clr) {
  color(colors[clr])
  if (clr==current_color || current_color==-1) {
    children();
  }
  else {
  }
}
So you can say something like:
colorpart(2) mounting_plate();
This will not only set the mounting_plate to the right color on your screen. It will also ensure that the mounting_plate will only appear in exports for color 2 (or, if you export with all colors).
Some Better Examples
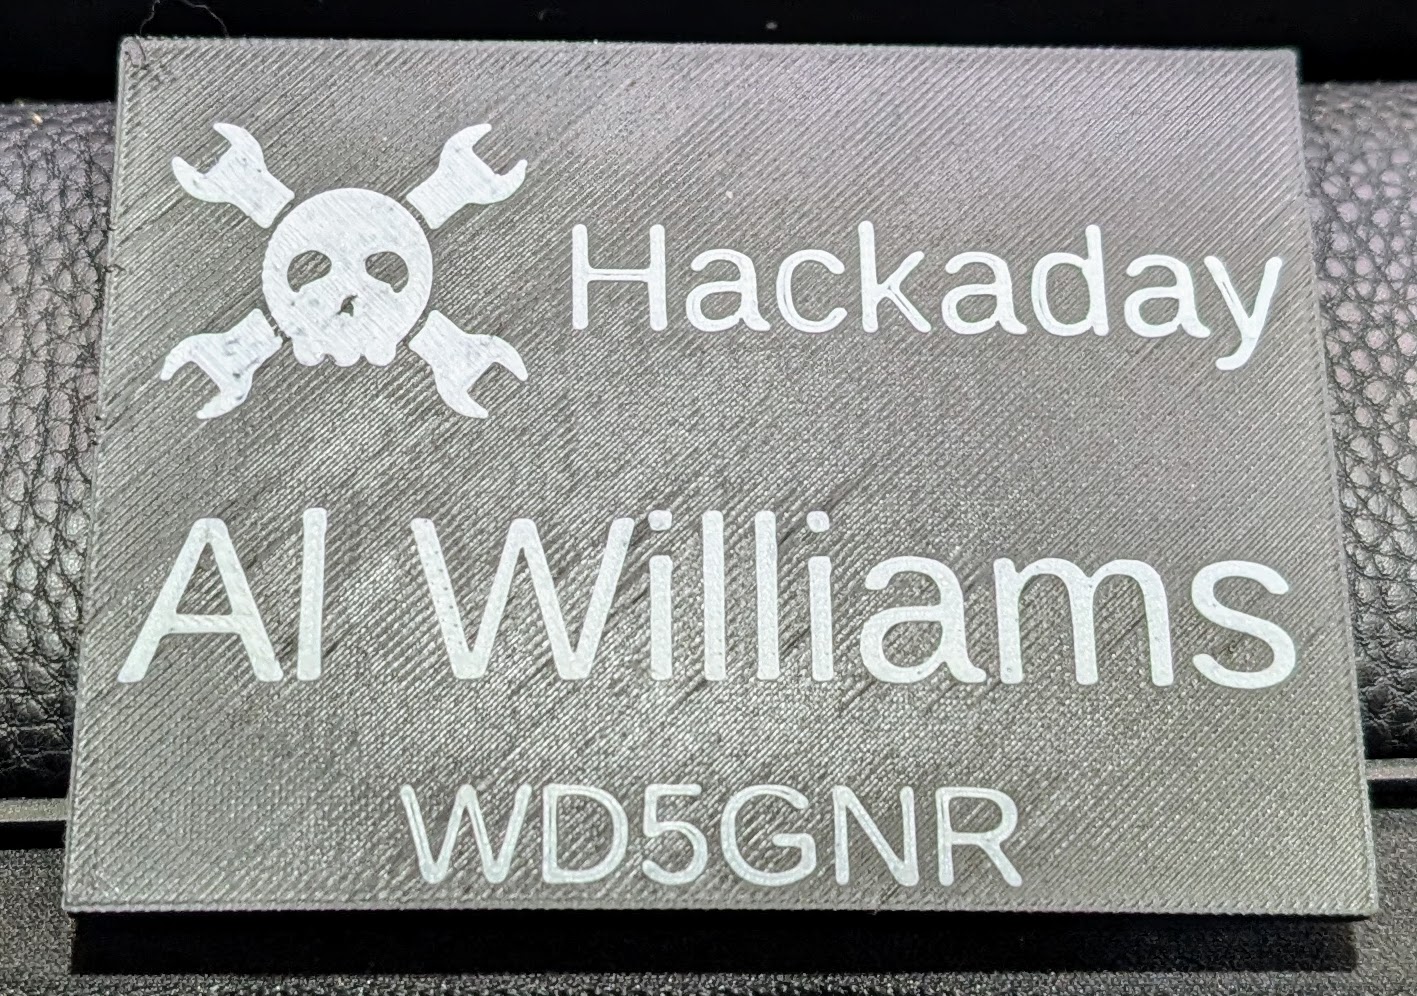
Since Supercon is coming up, I decided I wanted a “hello” badge that wouldn’t run out of batteries like my last one. It was easy enough to make a big plastic plate in OpenSCAD, import a Jolly Wrencher, and then put some text in, too.
Of course, if you print this, you might just want to modify some of the text. You could also make the text some different colors if you wanted to get creative.
Here’s the script:
colors=[ "black", "white", "blue","green"];

// Set to -1 for everything
current_color=-1;

include <colorstl.scad>

colorpart(0) cube([100,75,3]);
colorpart(1) translate([5,40,2.8]) scale([.25,.25,1]) linear_extrude(height=0.4) import("wrencher2.svg");
colorpart(1) translate([37,48,2.8]) linear_extrude(height=0.4) text("Hackaday",size=10);
colorpart(1) translate([3,18,2.8]) linear_extrude(height=0.4) text("Al Williams",size=14);
colorpart(1) translate([25,2,2.8]) linear_extrude(height=0.4) text("WD5GNR",size=8);
Once it looks good in preview, you just change current_color to 0, export, then change it to 1 and export again to a different file name. Then you simply import both into your slicer. The Slic3r clones, like Orca, will prompt you when you load multiple files if you want them to be a single part. The answer, of course, is yes.
The only downside is that the slicer won’t know which part goes with which filament spool. So you’ll still have to pick each part and assign an extruder. In Orca, you flip from Global view to Objects view. Then you can pick each file and assign the right filament slot number. If you put the number of the color in each file name, you’ll have an easier time of it. Unlike the development version, you’ll only have to set each filament color once. All the white parts will lump together, for example.
Of course, too, the slicer preview will show you the colors, so if it doesn’t look right, go back and fix it before you print. I decided it might be confusing if too many people printed name tags, so here’s a more general-purpose example:
colors=[ "black", "white", "blue","black"];
current_color=-1;
include <colorstl.scad>
$fn=128;

radius=25; // radius of coin
thick=3; // thickness of coin base
topdeck=thick-0.1;
ring_margin=0.5;
ring_thick=0.5;
feature_height=0.8;

inner_ring_outer_margin=radius-ring_margin;
inner_ring_inner_margin=inner_ring_outer_margin-ring_thick;

module center2d(size) {
    translate([-size[0]/2, -size[1]/2]) children();
}

colorpart(0) cylinder(r=radius,h=thick);  // the coin base

// outer ring
colorpart(1) translate([0,0,topdeck]) difference() {
   cylinder(r=inner_ring_outer_margin,h=feature_height);
   translate([0,0,-feature_height]) cylinder(r=inner_ring_inner_margin,h=feature_height*3);
}

// the wrencher (may have to adjust scale depending on where you got your SVG)
colorpart(1) translate([0,0,topdeck]) scale([.3,.3,1]) linear_extrude(height=feature_height,center=true) center2d([118, 108]) import("wrencher2.svg");
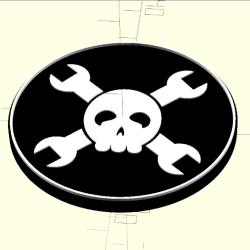
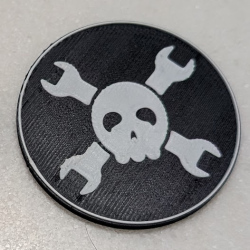
How did it come out? Judge for yourself. Or find me at Supercon, and unless I forget it, I’ll have a few to hand out. Or, make your own and we’ll trade.


One way you can make this slightly better is to use OpenSCAD’s CLI and export with a bash script or similar. Using the CLI you can set variables, thus making it possible to almost fully automate it.
I like the colorpart() function. I want to show where cuts are being made, and your method could be used with the debug and background modifiers.
Oh good. I was trying to design something in OpenSCAD (which I grok way better than FreeCAD) and couldn’t figure this out.
Did you know that FreeCAD has an OpenSCAD workbench so you can create features with scripts?
Does it actually work now? I doubt it.
They are using OpenSCAD runtime to parse the script, but still choke on larger models.
I didn’t have issues with chocking in FreeCad that wouldn’t choke in OpenScad already.
Since it is unable to use GPU acceleration all the performance is based on amount of RAM and single performance, my setup is 32GB of ram and i5-12500 (single core CPU benchmark of 3653)
To high of $fn precision can create issues if you have low RAM using a lot of minkowski with high precision.
I remember using M4 macroprocessor to define such predicates as above.
The bloody “children” is hidden in lowest corner of the cheat sheet.
I worked on something similar many years ago. I wrote a plugin for Cura that could parse comments in OpenSCAD files and then load all the required mehes in one go. You could then arrange everything on the build plate, assigned tools and adjust settings and save everything back to you original file, again as comment.
https://github.com/rmie/CuraOpenSCADPlugin
The code will not work anymore, but I think the idea is more relevant today, with AMs and Tool changes all around, than it was in 2017.
That’s very clever!
Is the preview release creating actual multi-color 3MFs now though?
I switched to the snapshot release some time ago when it started supporting multi-threading because I was getting into complex designs with bezier curves that took forever without that. Now it’s in the release build so I switched back. But I realized then, life is too short to mess around with release OpenSCAD if the snapshot does what you need. If you write your code to that.. by the time you go to revisit a design those features are in the release build anyway so no problem!
https://hackaday.com/2018/02/13/openscad-tieing-it-together-with-hull/ about my favorite OpenSCAD strategy: putting the holes where I want them, and using hull to do the rest.
But like Al’s trick here, the real heavy lifting is done by being able to call children().
Maybe that’s the most underrated OpenSCAD feature?
Hello
I try it but there ist a mistake
Bosl2 ist in librarys
But it can’t Open the <colorstl.scad>
Where ist my fault?
Thank you