A hackerspace is a place that generally needs to be accessed by a wide group of people, often at weird and unusual hours. Handing around keys and making sure everything is properly locked up can be messy, too. To make it easy for hackers to get in to [Peter]’s local hackerspace, a simple electronic system was whipped up to grant access.
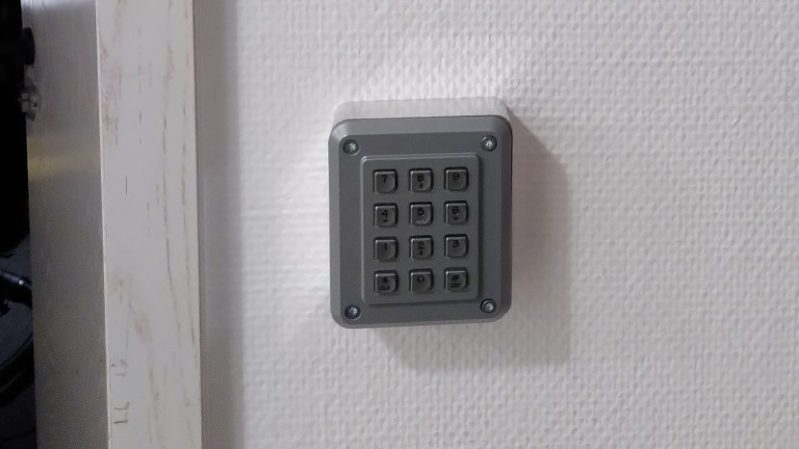
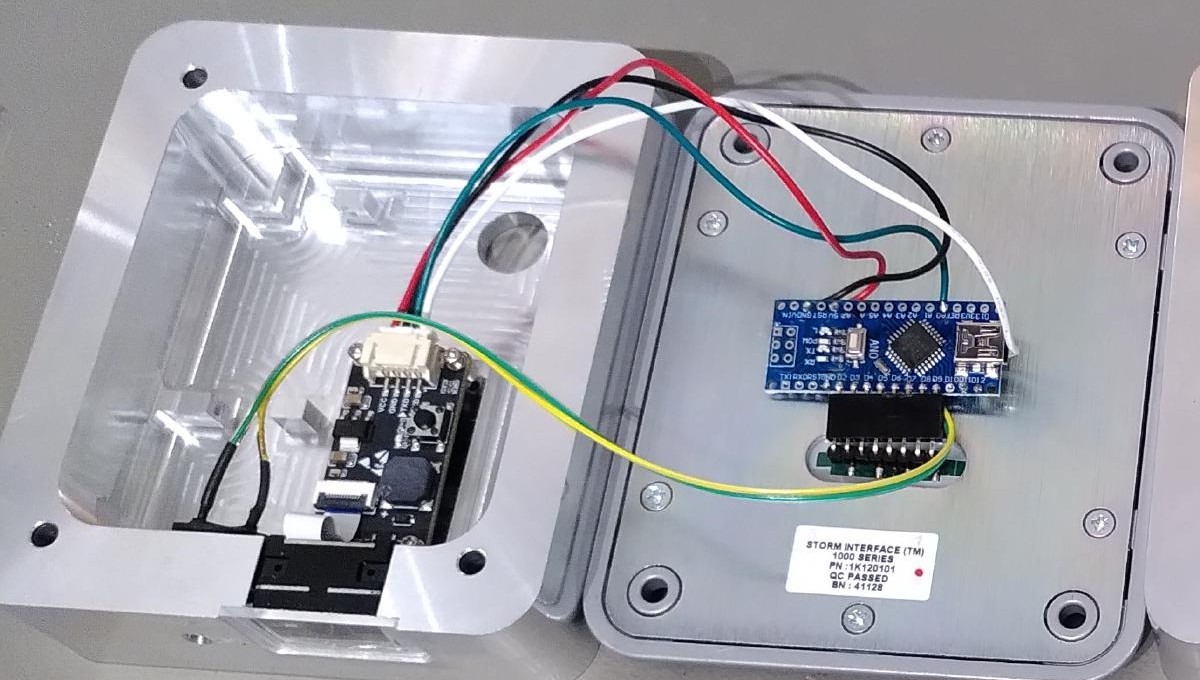
The basic components of the system are a keypad, a QR code and barcode scanner, a stepper motor, an Arduino Nano, and a Raspberry Pi. The keypad is read by an Arduino Nano, which is also responsible for talking to a stepper motor driver to actuate the lock cylinder. A secondary Arduino mounted inside the building is used to control the stepper motor, which actuates the lock cylinder once authentication is complete.
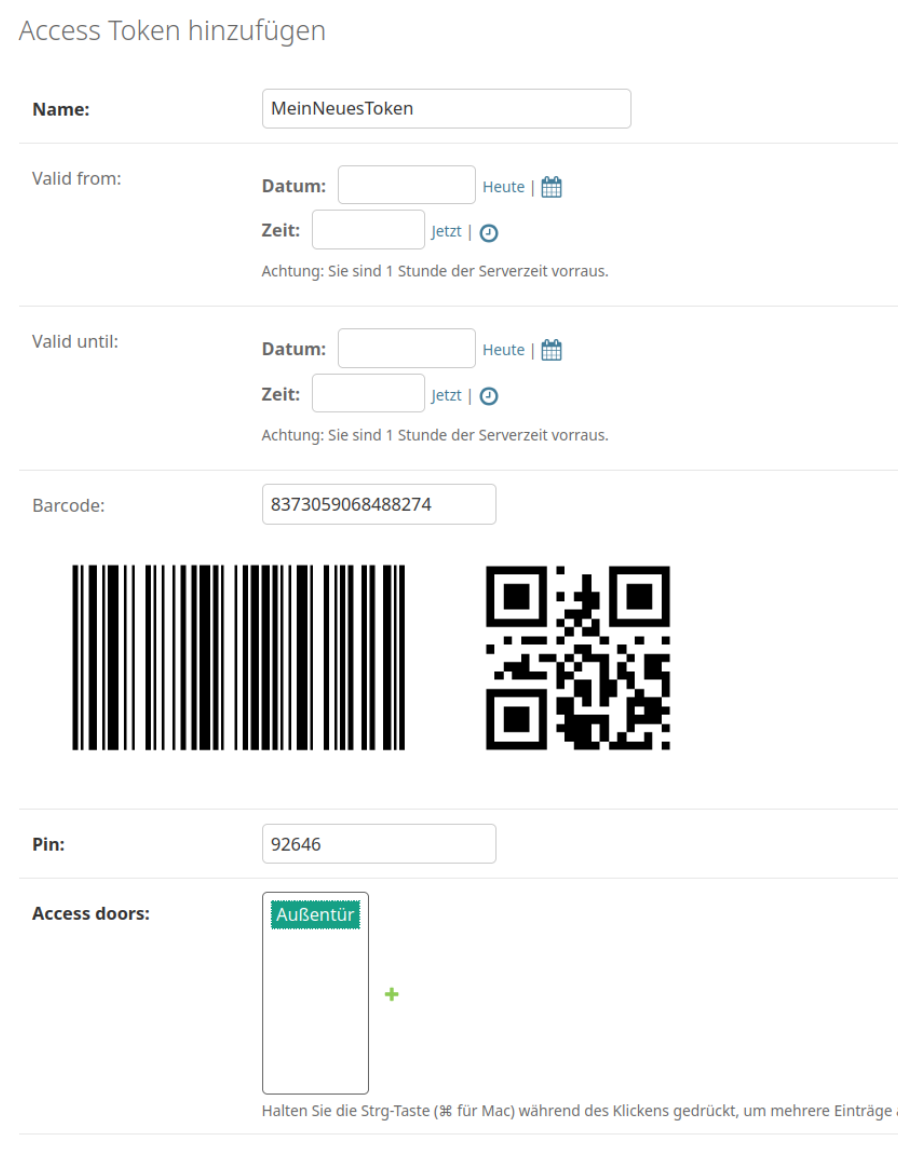
The system works on the basis of two-factor authentication. Regular users authenticate to enter by presenting a QR code or barcode, and entering a matching PIN number. The system can also be set up for PIN-only entry on a temporary basis.
For example, if the hackerspace is running an event, a simple four-digit pin can allow relatively free access for the duration without compromising long-term security. Actual authentication is handled by the Raspberry Pi, which takes in the scanned barcode and/or PIN, hashes it, and checks it against a backend database which determines if the credentials are valid for entry. If so,they command the second Arduino to unlock the door.
While it’s not technically necessary for a project like this — in fact, you could argue it’s preposterously overkill — we have to take particular note of the machined aluminum enclosure for the keypad. Mere mortals could just run it off on their 3D printers, but if you’ve got access to a CNC router and a suitably chunky piece of aluminum, why not show off a bit?
It’s a nifty system that has served the hackerspace well over some time. We’ve featured some neat access control systems before, too. If you’ve got your own solution to this common problem, don’t hesitate to notify the tipsline!


At our hackerspace, we use SSH keys to login to a special user account on the server. It has a script set up to open the locks through Modbus.
For alternative method in case someone cannot use SSH on their phone, we have a phone number + PIN access (I think using some VOIP service).
For more security, the enclosure should not be able to be opened from the keypad side.
For more security it shouldn’t matter whether the enclosure is opened from the keypad side.
Don’t put the verifying-and-opening-mo-tron in the keypad case. A keypad is for pressing buttons, not for security.
I would just put a physical key behind the pad that you would twist to open.
Flip it down and it locks a second system…or the keypad is there for show :)
Actually, the screws are connected to rotary encoders. The keypad is just a decoy. After all, what hacker doesn’t have a screwdriver on them at all times?
nice 👍
Let’s see.
I got the Surge in a pouch on my belt, I can remove the Volty Switch 2 multimeter from inside the Surge, put the bit extender in there and I got the galvanox bit set.
Pretty sure I can open it with or without force.
… and a tamper switch that is triggered if the keypad/cover is removed from the case or the whole case from the wall it’s mounted on.
What was wrong with:
00123456#
*# member login
member-number 00 + totp-token 123456
and
*12345678
** = guest login, single use
The insecure numbers purely for demonstration. People probably can handle Aegis, gwallet, iOS TOTP apps better than fancy barcode generators, etc. The DB checks against the 100 members (00-99) which would already a gigantic hackerspace. Generates the past and current token (60 seconds time to enter a valid code, more than enough).
A fips-198a compliant TOTP can be generated in 16 lines of pure vanilla python.
Looks like it ate up some asterisk and pound as formatting, yuck!
‘”The keypad is read by an Arduino Nano, which is also responsible for talking to a stepper motor driver to actuate the lock cylinder.”
Perfectly disclosed built-in vulnerability !!!
so, get this:
https://www.ebay.com/itm/165752068122
and a Torx bits set, and go there:
50.60289880216728, 8.70102891030175
and you can enter in one minute. Leave the Arduino for the next visitor.
Looking forwarad to seeing you there ;). The pinpad is what is says on the tin: A pinpad.
Decisions are taken on the Pi on the inside and command a different Arduino that controls the motor.
Let’s have a Mate and discuss the thing.
the architecture is way more complex than it looks in this article. the keypad is driven by an arduino, the stepper by another one and a pi is also included, only the keypad-arduino is accessible if you take the keypad apart from the outside.
Since you know our adress now you are welcome to visit us, the first drink is on me.
oh, the location was wrong, here is the correct one: 50.58470635607693, 8.6920197135893
Obligatory XKCD: https://xkcd.com/2170/
“Either you’re handing out raw floating point variables, or you’ve built a database to track individual atoms.”
And what are the failure modes. What happens during, and after, a power outage.
Or even a long network outage, simple things like losing DNS access can cause fascinating unforseen consequences.
This quest is as old as the door locks themselves.
I personally like old school simple solutions that are known to work, in particular, magnets and reed switches placed strategically (so that they cannot be shortened by a powerful magnet). Tiny magnets are embedded in a card in such a way so as to make simple guessing hard, and with some forward (not fast twitch) thinking one can figure out few combinations per card that can be rotated on some kind of irregular basis. A rotary multi-position switch inside the lock would take care of changing combinations as/when-needed. One can even do advanced things like score one of them step switches for automagical changing the combination, ie, wrong combination would change the lock into “safe mode” ie, needing master card to return it into the “regular” mode.
Obviously, this won’t work through metal doors, but the whole idea behind this solution is to end up with a door with no visible means of unlocking it, ie, one has to know where the “reader” is and it can be in a place the least expected.
Things like that had been done before by people smarter than me, so I see no reason not to copy the best : – ]
Decoy keypads with cameras recording wanna be intruders are also not unheard of : -] Some even come with loose screws so the wanna be would try opening it.
If I’d design such system that’s exactly what I would do, camera-recording hotpot with a dialpad that calls the police.
Autocarrot creeps changing the rods I don’t nintendo :- ]
That was “camera-recording honeypot”. I have no idea where the “hotpot” came from.
Use a metal door. Remove the handle from the door. Make it swing outwards. Remove the keypad entirely.
Use your phone to SSH into the door access VM. Once logged in, issue the “open” command, which disengages the bolt. Use your 3D Printed / N52 magnet handle you brought with you – snap it on the door and pull.
And if the VM locks up, well, just build another makerspace!
A locksmith will tell you that a lock keeps out the honest people. Somebody wants in, they’ll get in. Best you can do is delay them, or annoy them enough that they’ll go somewhere else.
I’m not one of Oceans 11 or anything but shouldn’t -all- of the required electronics be on the other side of the door and not on the keypad side?
Placing and activating a Z-Pinch reactor somewhere near would about null any advantages of having it hidden : – ]
Have I got this right? All the electronics, including the Arduino, are in the box on the outside with accessible screws? Did it not occur to them that this is a dumb idea? That only the keypad should be outside the door?
Never mind having the PIN code, you are allowed to access the hackerspace if you can work out how to unscrew the PIN pad and drive the motor directly!
The author of the Hackaday article incorrectly described the project. It’s a little hard to parse from the original article, but there’s one Arduino in the keypad, and another that drives the stepper motor for the lock mechanism, both connected to a Raspberry Pi in the “middle”.
Kind of disappointing that the summary makes the project look like it has such a glaring vulnerability.
I have somewhat limited pi-project experience… but wouldn’t a RaspberryPi have enough GPIO to handle both a 12 pin keypad as input and a relay out signal? Did I miss something? Is arduino programming just that much easier? Was it a matter of the solenoid and keypad projects already being finished, and the Pi chosen to tie them together? Especially since the QR scanner was standard USB, and the Pinpad is be implimented in 7 pins, and both are hardwired… The only real advantage I can see to using an arduino inbetween is if it is a wifi version, so the entire keypad could be self-suficient with a decent li-ion battery PSU (solar, pogo-pin, or induction charging circuit?).