
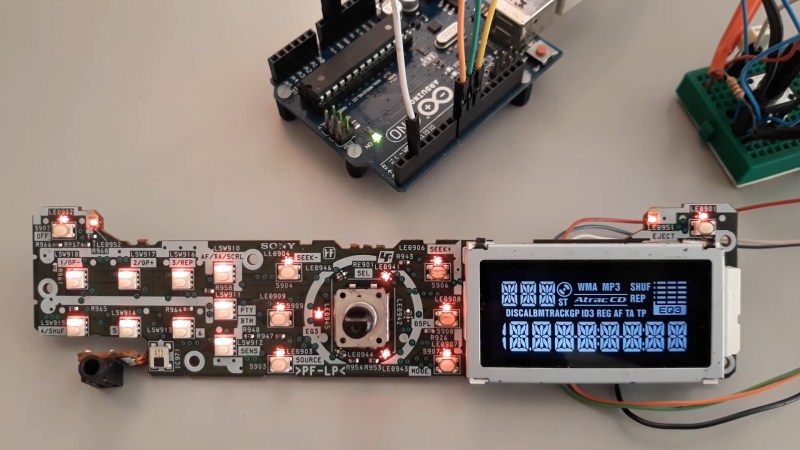
For his own reasons, [Jose Luis Monteiro] (aka [emsyscode]) decided he needed to drive the LCD on a Sony CDX-A250 car stereo’s front panel using an Arduino. There’s probably a sweet project in the works, or perhaps he just wanted to see if it could be done. Either way, more power to [Jose], because he totally pulled it off and put the results up on GitHub for all to enjoy. There’s also a project video showing how he did the reverse-engineering, which you can see below.
The driver for this diminutive LCD is a chip obviously labeled LC75826W, and that’s what the Arduino ends up talking to. Thankfully, there was a datasheet available for that part, which gave [Jose] a great starting point for figuring out how to use it. While [Jose] is working with the LC75826W driver, he’s quite explicit in his GitHub repo that this repository is not a driver library for that chip. The code only targets the specific LCD on the CDX-A250 head unit. Still, if you’ve got a different oddball LCD that uses this driver, [Jose]’s code is a great place to start, and since it’s under an MIT license, you can fork to your heart’s content.
Kudos to Sony for not obfuscating the part or using a chip-on-board black blob — you can reverse-engineer an LCD driven by one of those, but it’s a lot more work. If you’re wondering how and why those black blobs come to be, we’ve got you covered.












Rats. I had one of those stereos in my old car. I should have replaced the even older radio it originally came with before I sold it.
I love the various form factors of car dash-displays, the old radar like toggle of home stereo systems decades ago.
I wanted a Starship bridge with every kind of light…
There’s something beautiful about those old displays.
The technology limitations gave them character, diversity and originality.
Nowadays full-color, high-res screens running Android underneath are boring in comparison. Sure they look more modern, but also like a future no one asked for.
There is even more to it: With LCDs, you could decide on which color your background illumination has, which can be a peculiar, intense color or something classic like amber. Most consumer LCDs just don’t produce colors that well, which makes them very boring.
And finally, there is VFDs which produce the light in a fluorescent process. You see the depth, the subtle glow of the segments. It has its own magic. I want more magic, not more boring LCDs with poor viewing angles, poor contrast, poor colors, and too bright a backlight.
It does drive me nuts that the default LED lighting for everything seems to have settled upon “macular degeneration blue.” However that’s fixable as well if you have a soldering iron. I busted open my old stereo and replaced all the LEDs with red ones.
They look cheaper, which is the same thing as “more modern” now. “Everything is computer” touch screens were just a cost-saving measure.
Amazing how the display of the video-thumbnail as shown on the hackaday page here is slightly off from what it actually is. In other words: Stop using those cheap ass AI thumbnails that only appear to look good. They are so obviously fake it makes you wonder about the content it represents. The effort of doing this project is instantly downgraded by a cheap AI image even before I could press the “play” button.
Why is a still image from the video or a ordinary photo of the project on the bench no longer good enough, it makes me sad. It makes you wonder what actually is the goal here, the project itself or the views?
Regrading the project, it certainly is interesting in many ways, so regarding that, well done.
I am still on a hunt to find who actually made those parallel pseudo-card edge connectors. They’re featured in several Japanese radios from that period up to late 00s.
Seen in Sanyo, Sony, Panasonic, Clarion, JVC, Kenwood and probably others.
All service manuals found list their own part numbers rather than the underlying manufacturer….the hunt continues.