So I made an awful, kludgey, “there I fixed it” level repair, and I need to come clean. This is really a case of an ill-advised ground.
My thirteen-year-old daughter asked for help repairing her Macbook charging cable. Macbook chargers really aren’t meant to flex around a lot, and if you’re the kind of person who uses the laptop on, well, the lap, with the charger in, it’s gonna flex. Sooner or later the insulation around the plug housing, where it plugs into the laptop, cracks and the strands of wire can be seen. This type of cable consists of an insulated lead wire surrounded by a stranded ground wire. The problem with this configuration is that the stranded ground also gets flexed until it breaks, one strand at a time, until the cable stops working.
So it was with my daughter’s Macbook cable. I didn’t have the money to buy her a new one, and I figured we could repair the break. We busted out her WLC100 and sat down to get our solder on. She started off working while I supervised, then I took over later on.
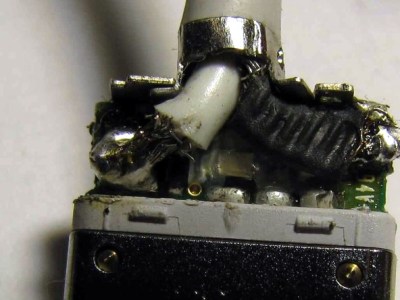
We began by using an Xacto to cut away enough insulation to expose about half an inch of the stranded wire. We pulled the wire away from the insulated lead wire and twisted it into a single stranded wire parallel to the lead wire. Grabbing for the iron, we tinned the ground and soldered a length of 22-gauge solid wire to it. The way the ground connects to the plug is by passing through a conductive ring. My idea was to solder the other end of the 22-gauge wire to the metal ring. Here’s where things started to go wrong. This is, by the way, the part where I took over so you can blame me and not my kid.
My daughter was using the WLC100’s default tip. I should have grabbed my own iron, a WES51, or at least swapped in its ninja-sharp tip. The WLC100’s default tip is a big fat wedge and it was too big to put next to the plug, and the conductive ring quickly got covered in melted plastic and I couldn’t solder anything to it. Worse, I had accidentally burned through the insulation protecting the lead wire, and had to cover it in electrical tape.

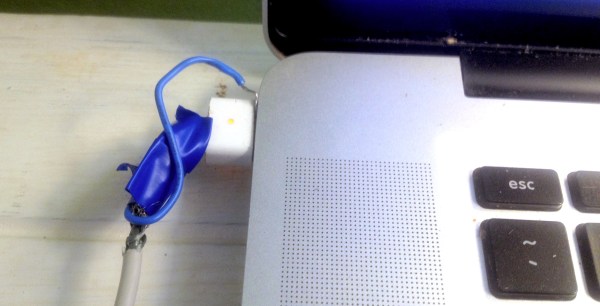
What now? We were left with not being able to use the cable at all. One option was to wait until the goop had cooled and burnish it clean with a Dremel, then attempt to re-solder using an appropriate tip. However, that sounded like a lot of work. The solid wire was still securely soldered to the ground, so instead of trying to attach it to the cable side of the plug, I could connect it to the computer side, by shoving it into the socket alongside the plug. The business end of the plug has a big silver ground surrounding small gold positive leads, and touching the ground with the wire should work just fine, right?
It did. The computer charged up as happy as you’d like. And yet, I was left with the distinct feeling the solution could have been, I don’t know, cleaner. Certainly, the iFixit route shown here comes out much cleaner by sliding off the housing, clipping the damaged wire, and beginning anew. Clean as this is, it’s just waiting to happen the same way again.
So, brethren and sistren, lay on with brickbats and tell what I did wrong. What approaches have you used to fix cables broken where they meet the plug housing, and how do you improve the situation for the future?


