Tile-Based Macro Pad Keeps Getting Better

If there’s one thing we love to see around here, it is the various iterations of a project. If you keep up with Keebin’, you know that [Michael Gardi] created a tile-based macropad after developing a tile system for yet another project. This macro pad would have 3D-printed tiles next to the keys that would not only make them easy to relabel, but give [Michael] a novel way to change the function when changing the tile using magnets and Hall effect sensors.

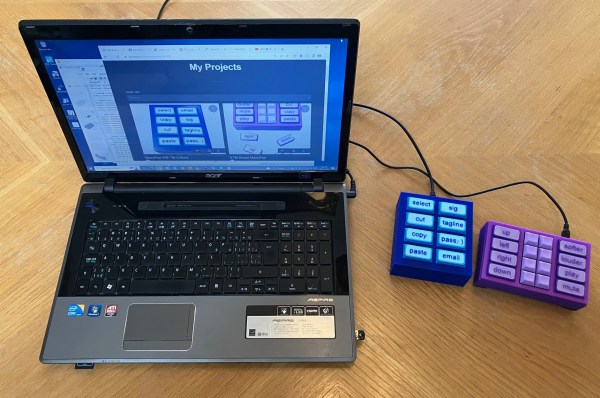
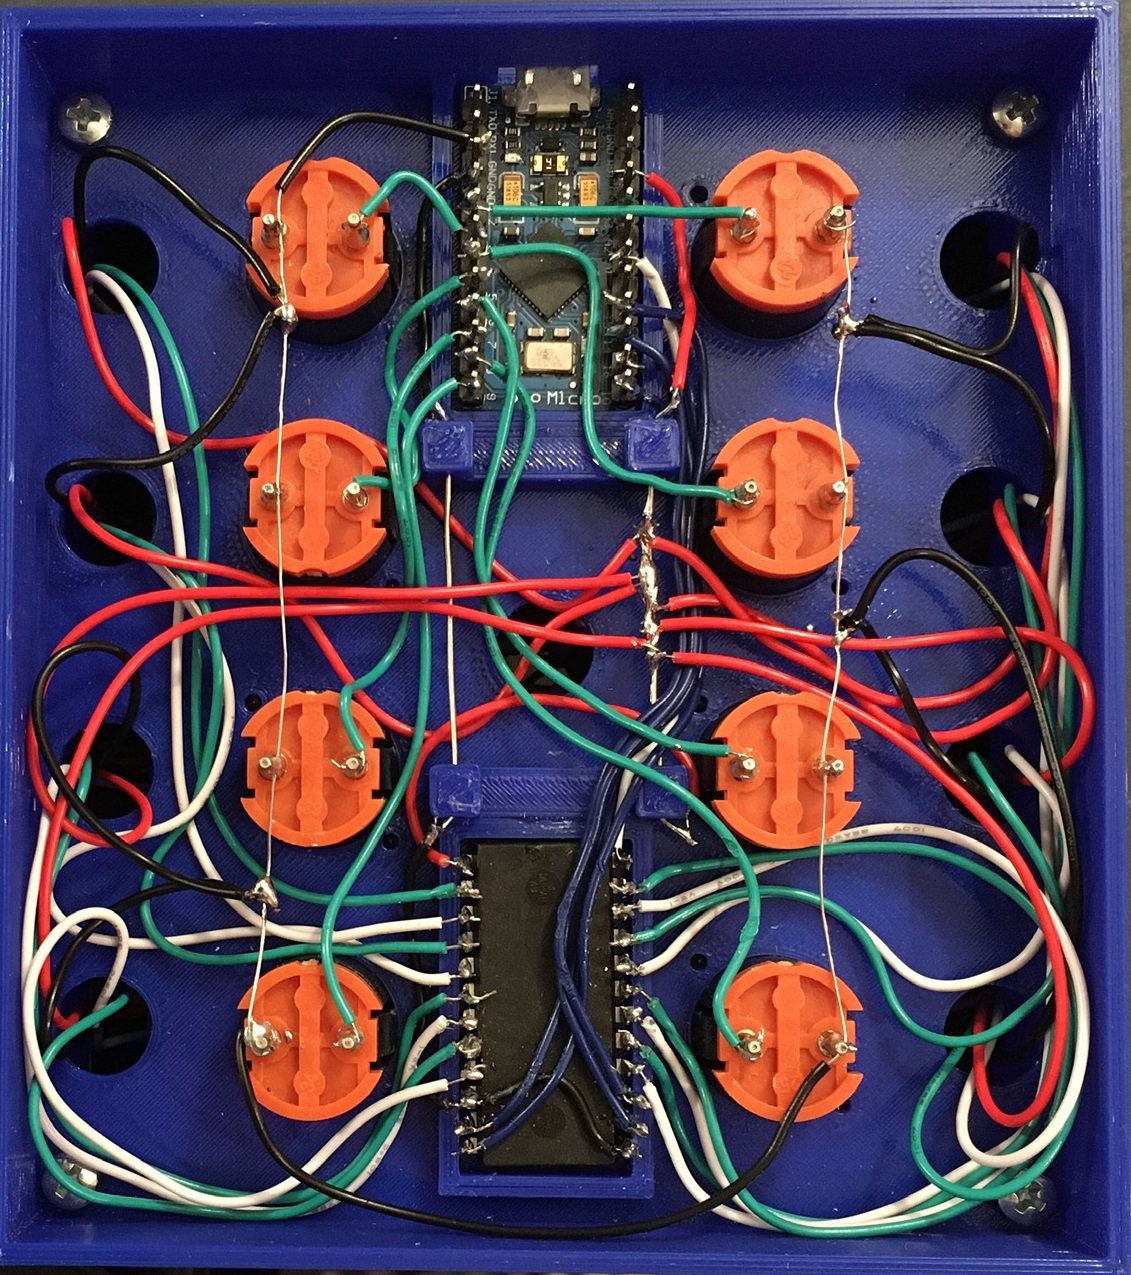
Well, fast forward to [Michael] actually using the thing, and he’s found that, more often than not, he’s pressing the tiles instead of the keys next to them. So it was time for another iteration: a macro pad with tile buttons. Much like the previous iteration, this one uses a Pro Micro for a brain and a handful of very cool Futaba MD switches that bear Cherry MX stems.

Those Futaba switches are activated by tile holder buttons, which were quite the feat to create. These tile holder buttons each contain two Hall effect sensors and have a Cherry MX-style recession on the other side to connect to the Futaba. Unfortunately, some usage has already damaged the connections, so the next iteration will include small PCBs for surface-mount Hall effect sensors and a main PCB, as well.

[Michael] can make these pretty cheaply, but are they cheap enough to be given away?

Illustrated Kristina with an IBM Model M keyboard floating between her hands.

Keebin’ With Kristina: The One With The Cat Keyboard

Special thanks to [Maarten], who stumbled upon this old gem of a geekhack thread by [suka]. It’s essentially a show and tell of their DIY keyboard journey, complete with pictures. [suka]’s interest started with a yen for ergonomic keyboard layout alternatives. They soon found the geekhack forum and started lurking around, practicing layouts like Neo and AdNW, which [suka] still uses today.

A pair of num pads wired up to a Teensy becomes a keyboard.When it was time to stop lurking and start building something, [suka] got plenty of support from the community. They knew they wanted a split ortho with a trackpoint and plenty of thumb keys. [suka] started by building them from old Cherry keyboards, which are easier to come by in Germany.

The first build was a pair of num pads turned landscape and wired up to a Teensy, but [suka] wanted those sweet, clacky Cherry MX switches instead of MLs. So the second version used a pair of sawed-off num pads from old MX boards.

When the Truly Ergonomic came out, it got [suka] interested in one-piece splits. Plus, they were tired of carrying around a two-piece keyboard. So their next build was a sexy monoblock split with a laser-sintered case and keycaps. But that was ultimately too uncomfortable, so [suka] went back to split-splits.

Everyone takes a different path into and through this hobby, and they’re all likely to be interesting. Is yours documented somewhere? Let us know.

What Could Have Been: The Dygma Raise

I do some streaming here and there, mostly for the sense of focus I get out of being live on camera. I like to find out what my people in chat are clacking on, and one of them told me they have a staggered split called the Dygma Raise. I hadn’t heard of it before that day, but this keyboard has been around for a few years now.

This same person told me that Dygma might make an ortholinear version sometime soon, but apparently Dygma wanted it that way from the beginning. According to the timely video below sent to the tips line by [deʃhipu], Dygma’s original plan was a split ortho with few keys and presumably a layer system.

Continue reading “Keebin’ With Kristina: The One With The Cat Keyboard”