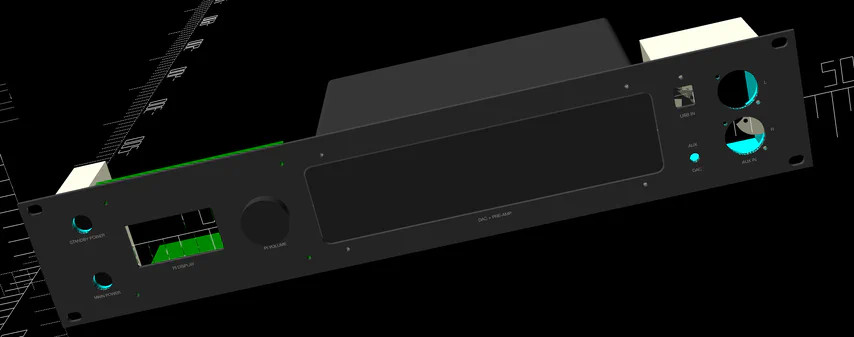
Closeup of a rackmounted custom HiFi setup

Rackmount All The Things, Hi-Fi Edition

For those who love systems and structure, owning a 19-inch rack with just one slot filled is just not it. But what if the rest of your gear isn’t 19-inch? Well, then you go out and make it so, just like [Cal Bryant] did recently.

The goal was to consolidate multiple devices — DAC, input selector, streamer, and power routing — into a single 2U rackmount unit. His first attempts involved drilling 1U panels to attach gear with removable faceplates. That worked, but not all devices played nice. So his next step became a fully custom enclosure with CAD-modeled brackets and front panels.

OpenSCAD turned out to be a lifesaver, letting [Cal] design modular mounting solutions. Exporting proper circles for CNC turret punching however appeared to be a nightmare. It was FreeCAD to the rescue for post-processing. After some sanding and auto-shop painting, the final faceplate looked factory-made.

Custom switch boxes for power and audio routing keep things tidy, housing everything from USB to XLR inputs. A 4-pole switch even allows seamless swapping between his DAC and DJ controller, while UV-printed graphics bring the finishing touch to this project. For those looking to clean up their Hi-Fi setup (or just love modding for the sake of it), there’s a lot to learn from this build.

If buying a rack is not within your budget, you could start with well-known IKEA LACK furniture.

3D Printed Server Case Holds 14 Raspberry Pis

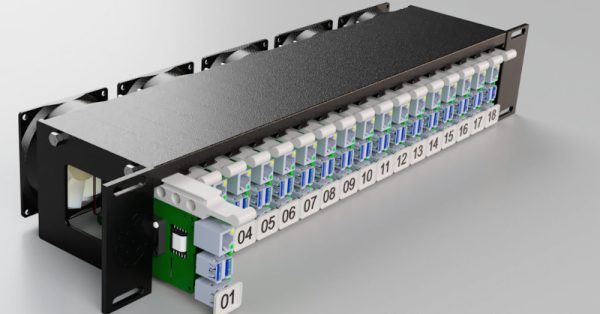
If you ever need to cluster up to 14 Raspberry Pis and an equal number of 2.5 inch hard drives, you might want to look at the Raspberry Pi Server Mark III case from [Ivan Kuleshov]. The original Mark I design came from Thingiverse, but the Mark III is a complete redesign.

The redesign allows for more boards along with a reduction in the number of parts. That takes less plastic and less time to print. The design is also modular, so there should be new components in the future.

Continue reading “3D Printed Server Case Holds 14 Raspberry Pis”

A Modular Game Boy Synthesizer

Euro

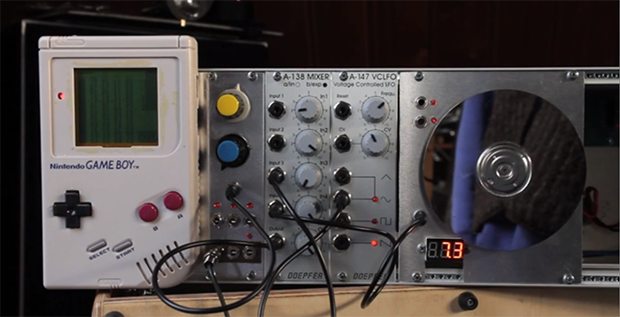
Synth heads and electronic music aficionados the world over love a good rackmount synth. These days, though, synthesis tends more toward small, digital, and ‘retro’ rather than the monstrous hulking behemoths of the 60s and 70s. [gieskes] might be ahead of the curve, here, as he’s built a Game Boy module for his eurorack synthesizer.

The software running on [gieskes]’s Game Boy is the venerable Little Sound DJ (LSDJ), the last word in creating chiptunes on everyone’s favorite 8-bit handheld. As with any proper Game Boy used in chiptunes, there are a few modifications to the 1980s era hardware. [gieskes] tapped into the cartridge connector with a ‘repeat’ signal that provides slowed down, noisy signals for LSDJ. There’s also pitch control via CV, and the audio output is brought up to 10Vpp

In the video below, you can see [gieskes]’ euroboy in action with a few Doepfer synth modules. There’s also a very cool pulse generator made from an old hard drive in there, so it’s certainly worth the watch.

Continue reading “A Modular Game Boy Synthesizer”

Raspis And Arduinos For FM Broadcast Streaming

radio

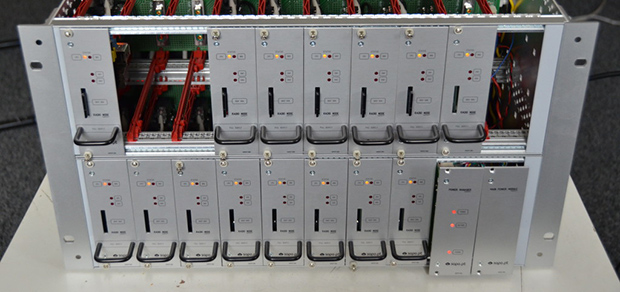
The biggest Internet provider in Portugal needed a system to turn FM broadcast stations in Angola, Cabo Verde, and Mozambique into a web stream. Like every good project, the people in charge of the engineering turned to Hackaday staples – Raspberry Pis, Arduinos, and TP-Link routers, all stuffed into an awesome modular rackmount cabinet

Each module in this gigantic rackmount system includes an Arduino, a Raspberry Pi, a Silicon Labs Si4705 FM receiver chip, and a TI USB audio capture chip that allows the Pi to turn the audio out from the radio receiver into an audio stream. All the Pis are connected to a 24 port Ethernet switch and to a separate master Raspi that converts data received from each module into an icecast stream.

The engineering behind each module is pretty impressive – they’re all hot swappable, have remote shutdown capability, and have voltage divider on the backplane to detect where in the rack it’s placed. It’s a very cool piece of engineering and a very cool example of using off-the-shelf hardware to do something that could be much, much harder.