Pi Pico Makes SSTV Reception A Snap

There’s a paradox in amateur radio: after all the time and effort spent getting a license and all the expense of getting some gear together, some new hams suddenly find that they don’t have a lot to talk about when they get in front of the mic. While that can be awkward, it’s not a deal-breaker by any means, especially when this Pi Pico SSTV decoder makes it cheap and easy to get into slow-scan television.

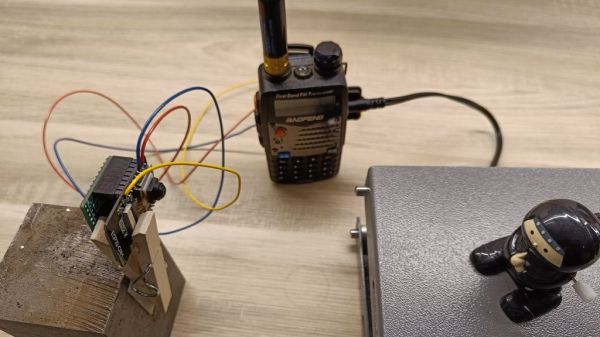
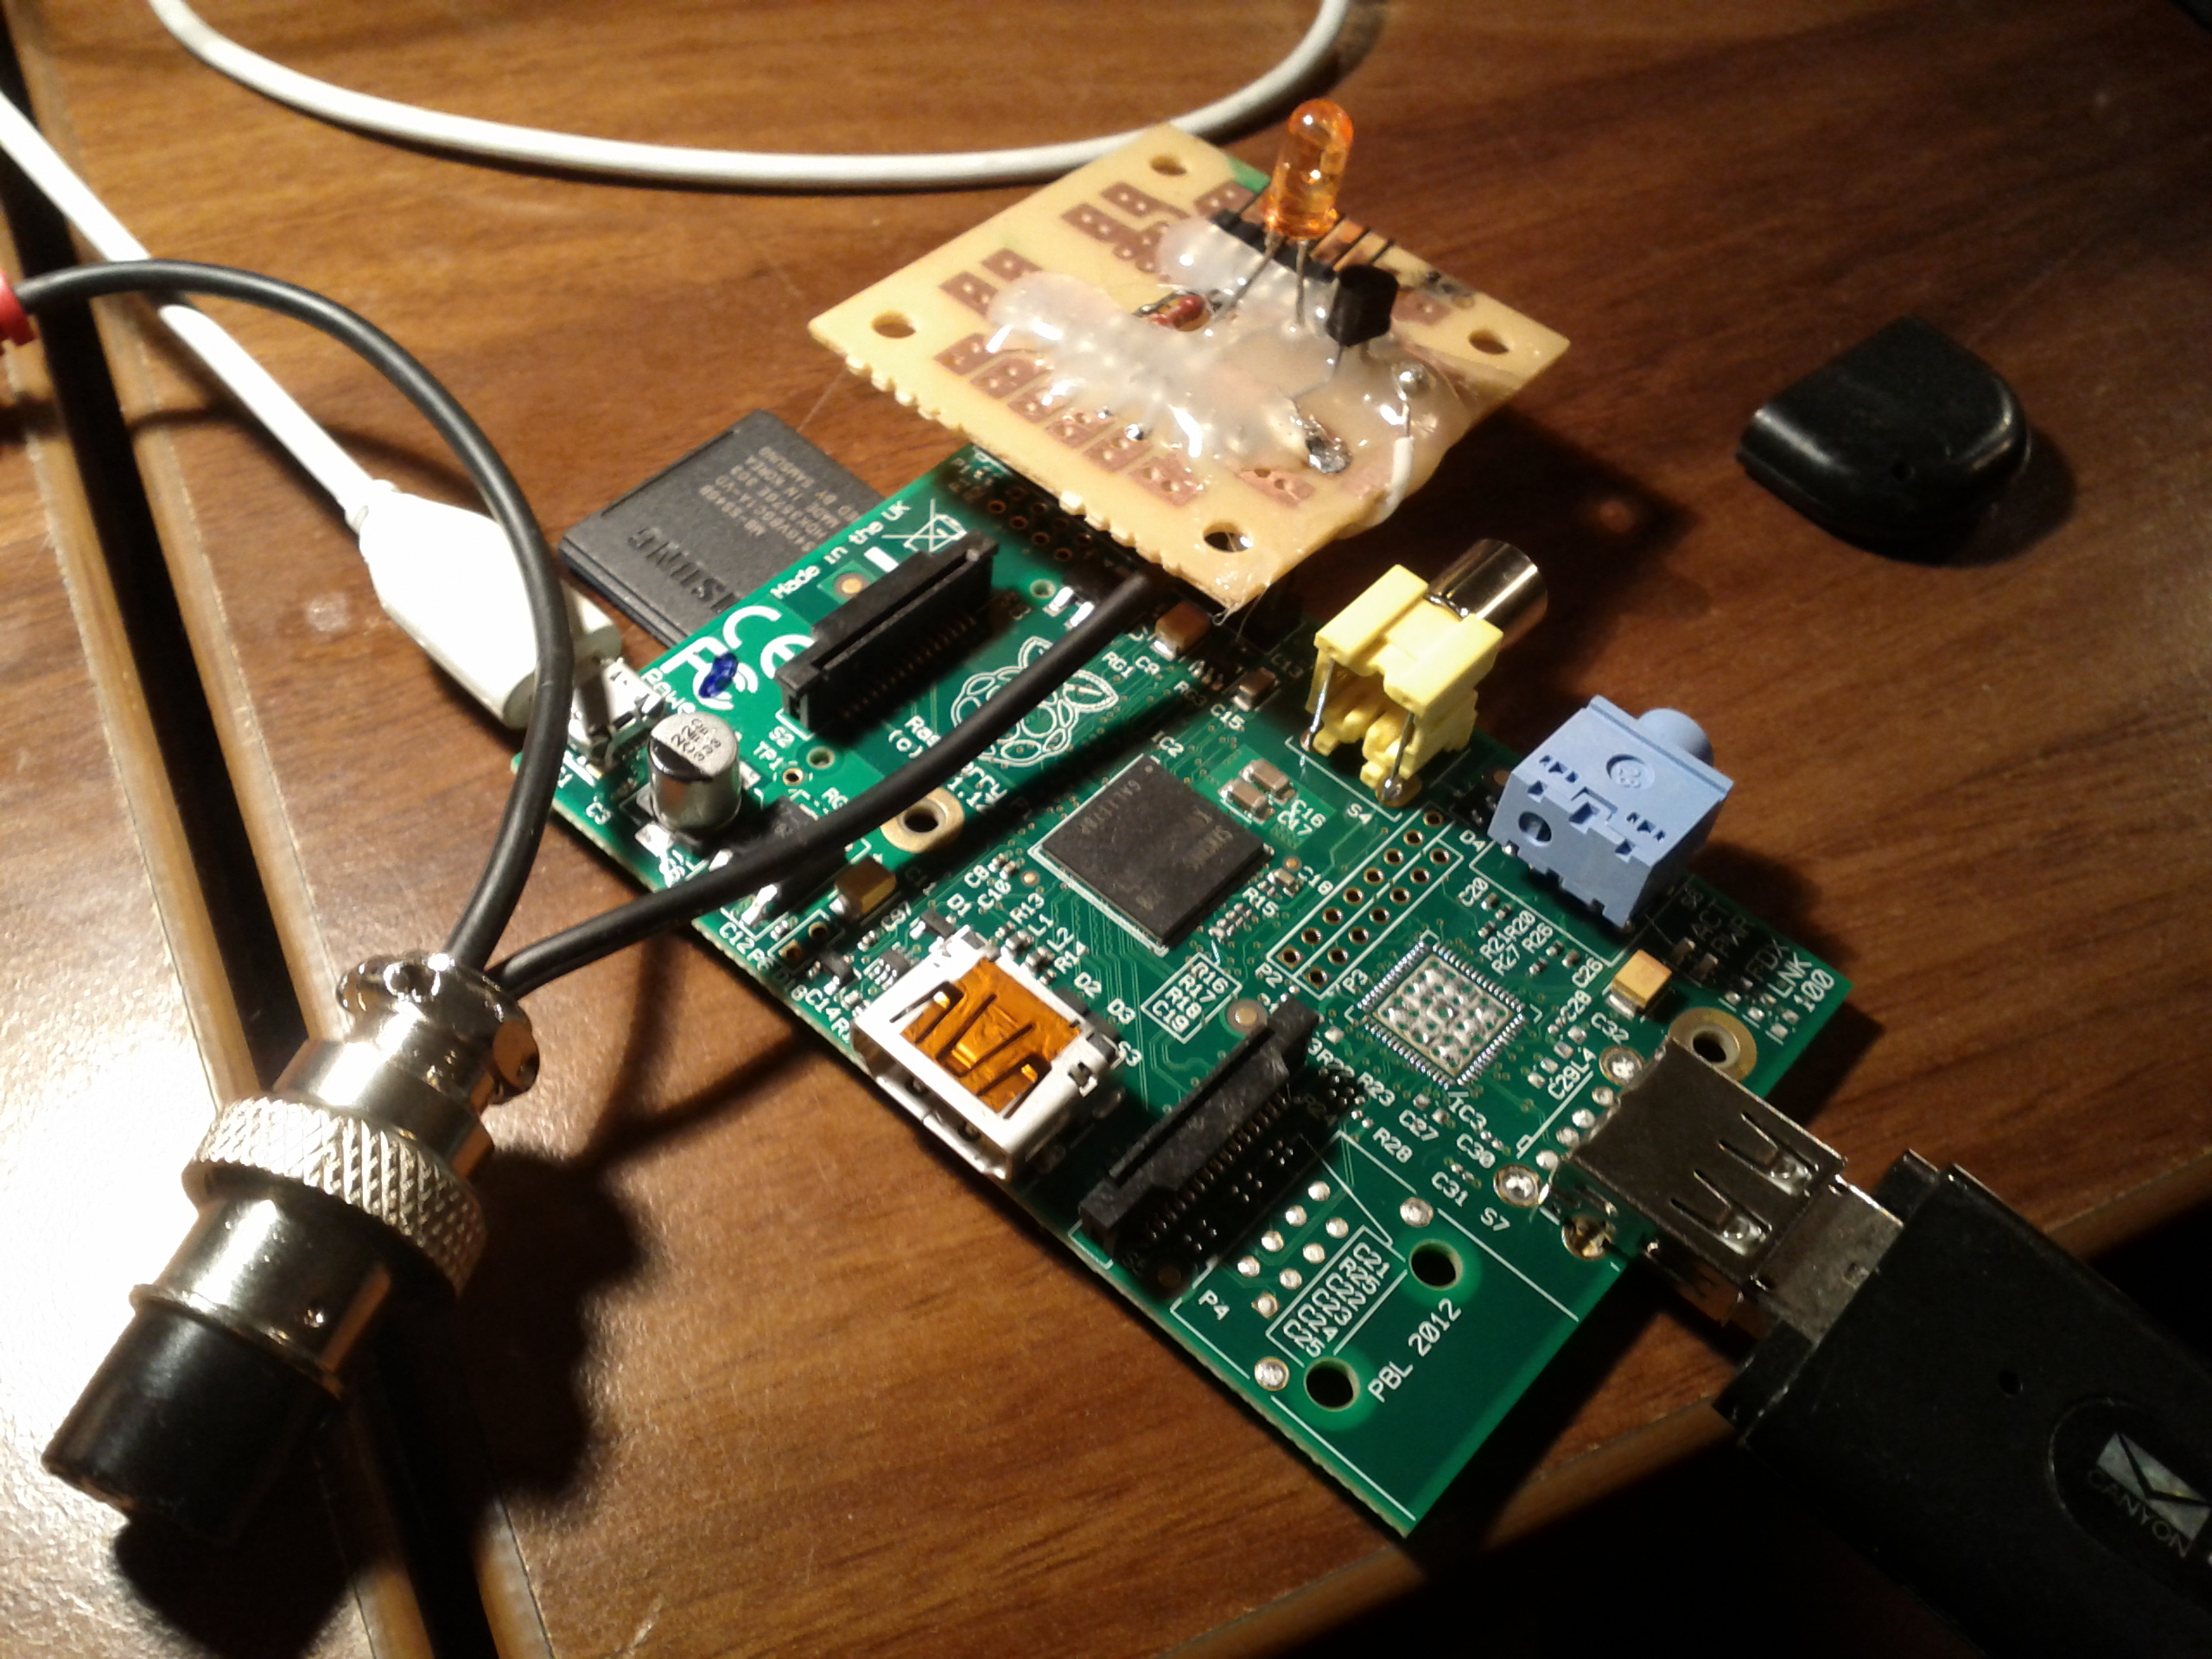
There’s not much to [Jon Dawson]’s SSTV decoder. Audio from a single-sideband receiver goes through a biasing network and into the Pico’s A/D input. The decoder can handle both Martin and Scottie SSTV protocols, with results displayed on a TFT LCD screen. The magic is in the software, of course, and [Jon] provides a good explanation of the algorithms he used, as well as some of the challenges he faced, such as reliably detecting which protocol is being used. He also implemented correction for “slant,” which occurs when the transmitter sample rate drifts relative to the receiver. Fixing that requires measuring the time it took to transmit each line and adjusting the timing of the decoder to match. The results are dramatic, and it clears up one of the main sources of SSTV artifacts.

We think this is a great build, and simple enough that anyone can try it. The best part is that since it’s receive-only, it doesn’t require a license, although [Jon] says he’s working on an encoder and transmitter too. We’re looking forward to that, but in the meantime, you might just be able to use this to capture some space memes.

Continue reading “Pi Pico Makes SSTV Reception A Snap”

This Standalone Camera Gets The Picture Through With SSTV

These days, sending a picture to someone else is as simple as pulling out your smartphone and sending it by email or text message. It’s so simple a child can do it, but that simple user experience masks a huge amount of complexity, from the compression algorithms in the phones to the huge amount of distributed infrastructure needed to connect them together. As wonderful and enabling as all that infrastructure can be, sometimes it’s just too much for the job.

That seems to have been the case for [Dzl TheEvilGenius], who just wanted to send a low-resolution image from a remote location. It turns out that hams solved that problem about 70 years ago with slow-scan television, or SSTV. While most of the world was settling down in front of “I Love Lucy” on the regular tube, amateur radio operators were figuring out how to use their equipment to send pictures around the world. But where hams of yore had to throw a considerable amount of gear at the problem, [Dzl] just used an ESP-32 with a camera and some custom code to process the image. The output from one of the MCU’s GPIO pins is a PWM audio signal which can be fed directly into the microphone input of a cheap portable transceiver.

To decode the signal, [Dzl] used one of the many SSTV programs available. There’s no mention of the receiver, although it could be pretty much anything from another Baofeng to an SDR dongle. The code is available in the article, as is an audio file of an encoded image, if you just want to play around with the receiving and decoding side of the equation.

We could see something like this working for a remote security camera, or even for scouting hunting spots. If you want to replicate this, remember that you’ll need a license if you want to transmit on the ham bands — relax, it’s easy.

SSTV Beacon Based On A Raspberry Pi

The Budapest hackerspace did some joint work with a local ham radio club and created an SSTV beacon housed inside a CCTV case that takes an image of its environment and transmits it using slow-scan television over ham bands.

As the title says, the build uses a Raspberry Pi to process the image taken from its camera and then transmits it over the air using a Ricofunk UHF transceiver with a main frequency of 433.425MHz. On the software side, PySSTV is used to convert images to frequency/time tuples, UNIXSSTV then creates the actual audio file and finally sox plays it. To avoid screwing up the Raspberry SD card, every part of the filsystem is either mounted in read-only mode (things like /home and /usr) or uses a ramdisk (things like /tmp and logs).

The plans, schematics and source code are available, so they hope that other hackerspaces will join the ranks!