DIY SMD Stencils Made With A Craft Cutter

Unless you’d like to spend hours with a toothpick and a tub of solder paste, stencils are the way to go whenever you’re placing SMD parts. While most commercial and industrial SMD stencils are made out of laser cut stainless steel, [Peter] figured out a piece of plastic and a $300 craft cutter is equally well suited for the job.

[Peter] has spent some time making SMD stencils out of polyester film in the form of overhead transparency sheets. This turned out to be a wonderful material; it’s dimensionally stable, commonly available, and just the right thickness suggested for SMD stencils. The polyester film was cut on a Silhouette Cameo, basically a desktop-sized vinyl cutter aimed at the craft market.

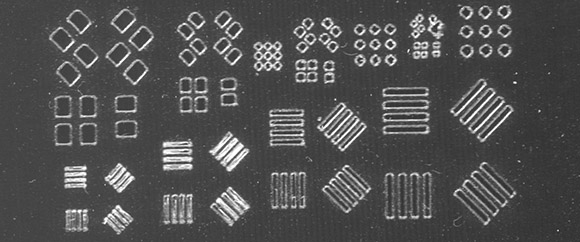
Stock, the Silhouette Cameo rounds off corners, not something [Peter] wanted with features only fractions of a millimeter. He came up with a tool to convert the paste layer of a Gerber file into separately drawn line segments, allowing him to cut SMD stencils for 0.3 mm pitch components.

It’s a great piece of work to make very fine pitch stencils, but we’re wondering if this tool could be used on the much less expensive Cricut paper and vinyl cutter that is unfortunately locked down with some very restrictive software.

DIY Pick And Place Builds Boards, Is Awesome

In what can probably be attributed to the pains of placing a lot of SMD components, [gravelrash] built his own home-made pick and place machine.

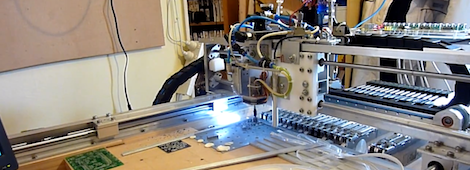
Instead of being frustrated with tweezers, stereo microscopes, and having an inordinate amount of concentration, [gravelrash] built a pick and place machine from a Chinese CNC router. The build doesn’t use automated feeders for its reels of parts. Instead,[gravelrash] picked up five manual feeders from eBay, allowing his pick and place to hold 25 different reels of components.

There is, of course, a vacuum pump for sucking up SMD parts and a two-axis gantry capable of moving components from reel to board. The software is Mach3, a program normally used with spinning cutters to mill away wood, metal and plastic. [gravelrash] replaced this motor with a few vacuum controlled needles to pick up, move, and drop components onto the board.

While the build may not be as fast as some other pick and place machines we’ve seen, it’s almost as fast as hand-placing components with the added bonus of not tearing your hair out over very tiny parts.

Tip ‘o the hat to [Alexander] for sending this one in.

Continue reading “DIY Pick And Place Builds Boards, Is Awesome”

Building Up An Inventory Of SMD Parts

Once you’ve been tinkering around with electronics for a while, you’ll realize the through-hole components that make breadboarding a circuit so easy won’t cut it anymore. Surface mount parts are the future, and make it incredibly easy to build a semi-professional mockup at home. The question arises, though: how do you store thousands of surface mount parts smaller than a grain of rice?

As [George] was building up his SMD inventory, he came across a few clever solutions. The first was a binder sold by Adafruit (and others) that holds strips of cut tape SMD components. [George] wanted something a little more modular, and when he came across an eBay auction for 5000 0805 resistors and 3000 0805 caps, he needed to find a storage solution.

[George] ran across these tiny modular boxes while shopping at Adafruit. These boxes are completely modular, interlock with each other, and have a hinged lid that will hopefully prevent the eventual, ‘SMD parts everywhere’ spill everyone his likely to have.

After printing out some labels for his boxes, [George] had a very tidy solution to his SMD organization problems. We’re wondering what other Hackaday readers use to organize their parts, so if you have a better solution send it in.

Prototyping With Very, Very Small ICs

Gone are the days when all the cool chips are able to be thrown into a breadboard very easily. [starlino] was working with a circuit that uses an accelerometer, but unfortunately these chips come in hard to solder LGA-16 packages. [starlino] figured out a way to prototype with these packages that doesn’t require a custom breakout board or spending any time watching a reflow oven.

[starlino]’s LGA-16 adapter board began with a piece of perf board drilled out to form a space that perfectly fits his accelerometer. A piece of tape is placed over the pads of the chip and perf board, and the gap between the chip and board is filled in with a two-part plumbers putty.

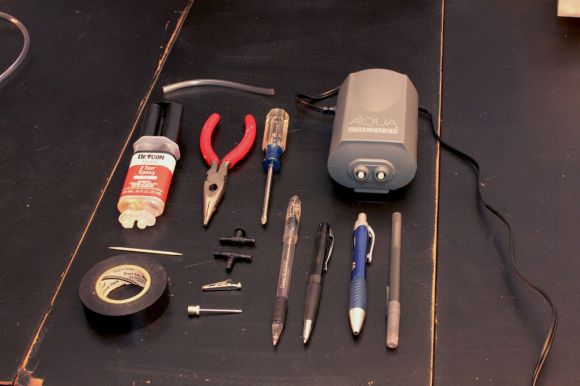
Once the putty has cured, the leads on the acclerometer are connected to the pads on the board with a silver conductive pen. After putting a few header pins in the corners of the board, [starlino] soldered the pads to the pins and had a permanent breakout board for a very small accelerometer.

It’s not by any means a pretty build, but after [starlino] sealed the entire build in liquid electrical tape and installed it in a DIP socket, he had a completely functional accelerometer in an easy to prototype package. Not bad for a breakout board that can be built from stuff just lying around a workbench.

Manga Guide To SMD

For those that have always felt a bit treppidatious when approaching SMD, you can relax. Here’s a simple guide to walk you through your first shaky steps into surface mount devices. Distributed freely under the creative common license, the Manga Guide to SMD is an 18 page comic that has a goal of making SMD producers out of all of us. There’s a good visual explanation of what SMT is and why we use it, as well as a thorough walk through of how to solder the tiny devices with your soldering iron. They don’t go into dealing with a small reflow oven in this issue.

If this fits well with your learning style, you might also be interested in the Manga Guide to Electricity.

Build A Stereo Microscope From Binoculars And A Camera Lens

Here’s an oldie but a goodie. [RunnerPack] stumbled upon an article from 2001 about building a stereo microscope from a pair of binoculars and a camera lens. With a ring light attached to the end of the camera lens, we couldn’t think of a better microscope for SMD work.

To mount the binoculars to the camera lens, [Giorgio Carboni] made a very nice adapter containing four prisms. These prisms are very carefully aligned and glued down with a little bit of epoxy. By using an 8×30 pair of binoculars and a 35-100 mm camera lens, [Giorgio] was able to get a magnification factor of 10-57x. With a macro lens this factor can be increased (a 28mm lens bumps it up to 71x, but a lot more light is needed).

The pedestal is just a few ground rods and ground steel rods, something that requires a bit of machining. Since 2001, though, a lot of tinkerers have 3D printers so it could be possible to build a more easily manufactured version of the focusing apparatus.

[RunnerPack] had a pair of binoculars and a camera lens handy and tried a mono version of this build. He says he was blown away, but unfortunately didn’t provide any pictures. If you decide to build this project, be sure to snap a few pics and send it in on the tip line.

SMDuino Helps Arduino Fit Into Tight Places

[Adam] was tired of plopping the same components over and over into his Arduino-based designs. He spent part of his weekend laying out a small board that would host everything he needed and could be built as a single component for all future projects. Above you can see the project he calls SMDuino, an Arduino clone that can be used as a surface mount part.

The contacts on four sides of the board break out the pins. They’ve been designed with 0.1″ pitch which means they will work with standard pin headers. But since they’re plated through from top to bottom they are easy to solder to surface mount pads as well. The project is open source, so you can order your own boards (he used DorkBot PDX) or email him if you want to get in on a pre-order. That is for unpopulated PCBs only. But there’s few components used here so it’s pretty inexpensive to throw together. You’ll need four caps, four resistors, a crystal, an LED, the ATmega*8 of your choice (an ATmega328 is used here), and a low dropout regulator. Of course it is possible to go without the crystal oscillator.

Does this remind anyone else of the Basic Stamp 2?