Primer Tutorials For Arduino IR Remote Cloning And Keyboard Simulation

We’ve featured loads of IR Arduino projects and they are all exciting and unique. The projects spring from a specific need or problem where a custom infrared remote control is the solution. [Rick’s] double feature we’re sharing in this article is no exception, but what is interesting and different about [Rick’s] projects is his careful and deliberate tutorial delivery on how to copy infrared remote codes, store the codes with a flavor of Arduino and then either transmit or receive the codes to control devices.

In the case of his space heater an Arduino was used to record and later retransmit the “power on” IR code to the heater before he awakes on a cold morning. This way his room is toasty warm before he has to climb out from under the covers, which has the added benefit of saving the cost of running the heater all night. Brilliant idea if you don’t have a programmable heating system. Maybe he will add a temperature sensor someday so it doesn’t have to run on strictly time.

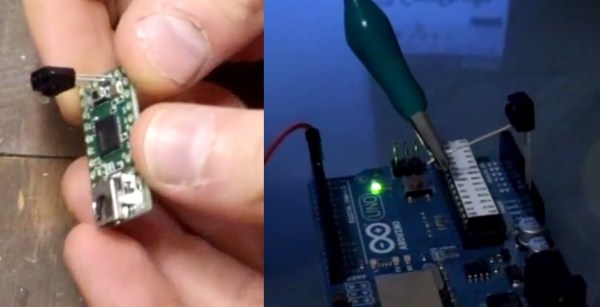
A more complicated problem was controlling DVD playback software on his computer remotely. [Rick] says he sits at a distance when watching DVDs on his computer but his computer doesn’t have a remote control like a normal TV. Arduino to the rescue again! But this time he pulls out a Teensyduino because of its added feature of being able to emulate a keyboard and of course the computer DVD playback software accepts keyboard commands. Once again he used the “IRremote.h” library to record certain button codes from an old remote control before adding the retrieved codes to a Teensyduino setup and programmed to receive and decode the remote’s IR signals. The Teensyduino then maps the IR codes to known keyboard shortcuts and transmits the simulated keyboard shortcut commands to the computer via its USB cable where the DVD playback software recognizes the key commands.

As always [Rick] shares all his libraries and sketches on his blog so follow the above links to download the files. You will not miss a single step if you follow his excellent videos below. Plus, here are some other ways and other tools for using an IR remote with your Arduino and cloning an infrared remote.

Continue reading “Primer Tutorials For Arduino IR Remote Cloning And Keyboard Simulation”

Teamspeak Button Uses Tattoo Machine Foot Switch

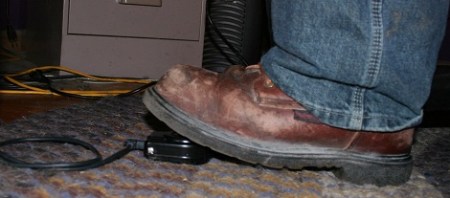
As an avid gamer, [Pat Norton] uses Teamspeak with his friends when playing World of Warcraft. [Pat]’s friends were annoyed with the voice-activated option for Teamspeak and the constant squeaking of dog toys, and [Pat] was annoyed with the questionable usability of a push-to-talk key. Dissatisfied with his options, [Pat] built footswitch-controlled teamspeak button using a Teensyduino and a broken tattoo machine foot switch.

The Teensyduino is an incredibly small Arduino compatible board that was perfect for this project. Since the teensyduino can operate as a USB Human Interface Device, it’s very easy to have the board appear as another keyboard to the computer. After borrowing some code from the hardware button of a DIY photobooth, [Pat] hooked up the foot switch to two pins of the board. From there, it was very to adapt the code so the foot switch would act as a third ‘Control’ button. The results look very professional, like a factory-made game controller. We’ve seen a few foot switch keyboard devices before, and while this probably isn’t the most efficient way to have a foot switch button control something on a computer, it’s certainly the smallest we’ve seen.

Apple ][ Converted Into USB Keyboard

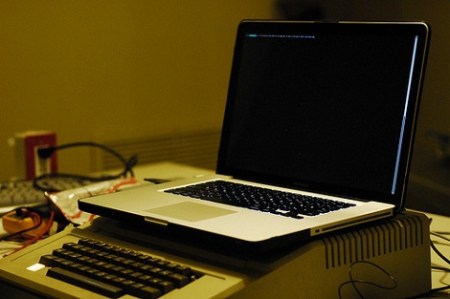
Sometimes it’s apparent that there is no practical use for something featured on Hack a Day, but we don’t know if [Andrew Filer]’s Apple ][ USB keyboard qualifies for this.

After reading through the very thorough documentation available in electronic and dead tree formats, [Andrew] decided that Apple ][ would make a great USB keyboard. Unlike modern keyboards, vintage computers like the TRS-80, Commodore 64, and the Apple ][ return the 7-bit ASCII value of the key instead of a scan code. The ASCII codes generated by the keyboard were sent through a Teensyduino running [Andrew]’s keyduino sketch.

Modern PS/2 keyboards use MAKE and BREAK scan codes sent from a microcontroller that reads the keyboard matrix. For example the MAKE code for the letter ‘A’ is 1C, while the BREAK code is F0 1C. There is a reason for this design, but for the DIYer, interfacing a keyboard becomes a challenge without a separate microcontroller. We’re thinking [Andrew]’s keyduino could be a great way to put a keyboard in a project, but we’re not about to tear up our Apples and C64s to get a keyboard.