Homebrew Stream Deck Pedal Emulates The Real Thing

Pedals are a great way to control functions on your computer. You’re rarely using your feet for anything else, so they can handle some tasks, freeing up your hands. This Elgato Stream Deck controller from [DDRBoxman] does just that.

[DDRBoxman] wanted to control Elgato Stream Deck much like the offical pedal sold by the company. Thus, some hacking was in order. Using Wireshark with the Elgato pedal helped to determine the communication method of the real hardware.

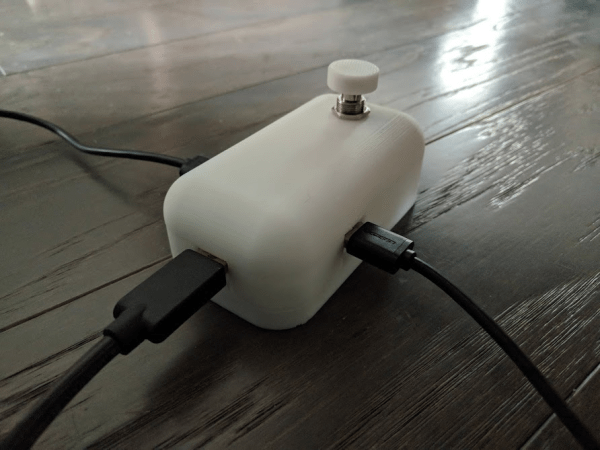
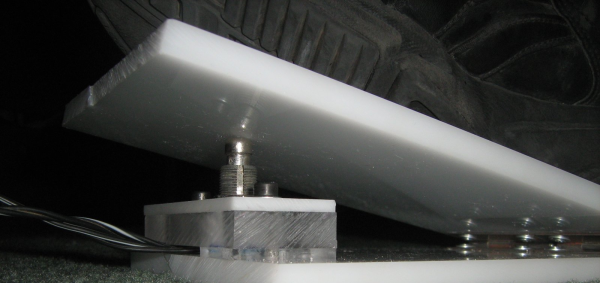
Once the protocol was figured out, it was just a task of getting the Raspberry Pi Pico to replicate the same functionality. With the help of the tinyusb library, [DDRBoxman] was able to emulate the real Elgato device successfully. Paired with a 3D-printed footswitch design from Adafruit, and the project was functional and complete.

We’ve seen great foot pedal devices over the years, from a simple macro device to a super-useful page turner for sheet music. If you’ve been hacking away at your own nifty input devices, be sure to drop us a line!

KVM Foot Switch In A Few Steps

[Radishmouse], despite the handle, is not a mouse guy. Give him a keyboard and he will get around just fine in any OS or program. As it is, he’s got a handful of ThinkPads, each running a different OS. He wanted to be able to switch his nice mechanical keyboard between two laptops without the hassle of unplugging and replugging the thing. His solution: a DIY KVM foot switch.

He’s been learning about electronics and 3D design, and this problem was the perfect opportunity to dig in and get his hands dirty. After learning enough about the USB protocol and switches to figure out what had to happen, he made a prototype from a pâte tub. Though undeniably classy, this vessel would never survive the rigors of foot-stomping in feline territory. Fortunately, [radishmouse] has also been learning about 3D design. After some trial and error, he came up with a sturdy, curvy 3D-printed two-piece enclosure. We particularly like the blocks built into the bottom piece that shore up the USB ports.

There are lots of reasons to build input controls for those under-utilized appendages at the ends of your legs. You could control your ‘scope with a probe in each hand, or use a foot switch to relocate an inconvenient power button.

Via [r/functionalprint]

diy foot switch

Foot Pedal Switch Specifically Made For PCB Drilling

Using the Toner-Transfer and Etch method for making prototype circuit boards is fairly common. One downside to this process is that any holes still need to be drilled. [Giorgos] hand drills boards all the time. He has a Dremel with a drill press attachment but he still prefers using a small pen-style mini drill to make the holes. There is one problem with this tool though, the on/off switch is in an non-ergonomic location. After flipping the switch tens of times during a drill job, [Giorgos] has felt some digit discomfort. He knew there had to be a better way.

His solution: a foot pedal on/off switch. This isn’t some off-the-shelf foot switch, [Giorgos] made it from parts and pieces kicking around in one of his junk drawers. The foot pedal frame is made from acrylic sheet. A couple of hinges allow the pedal to press down on an old switch, very similar to the ones found in guitar effect pedals. This switch was heavy-duty and had a strong spring that easily pops the switch and pedal back up after being pressed.

Wiring was easy, the positive lead of the DC wall wart was split and attached to the pedal’s switch. Pressing the switch makes or breaks the power connection, turning the hand-held drill on and off. [Griorgos] solve his ergonomic problem and cleaned out his junk drawer without spending a dime. We’d say that’s a triple win!

Building A Clutch For Vim

Whether you’re using emacs, vi, or vim, your fingers will be performing acrobatics on your keyboard because of the mouseless interface. [alevchuk] thought his feet could be used as a way to reduce the amount of keystrokes, so he built the vim clutch. It’s a USB-enabled foot pedal that will insert characters before the cursor in vim.

Vim requires the user to type the letter ‘i’ to insert text before the cursor. [alevchuk] thought this function could be easily replicated by a foot pedal, so he found an extremely cheap USB foot pedal to serve as his vim clutch. Ideally, the pedal should send ‘i’ when it is pressed and Esc when it’s released. [alevchuk] took two pedals, programmed one to send ‘i’ and the other to send Esc, and put them in the same enclosure.

The result is a working clutch for inserting before the cursor in vim. [alevchuk] is looking into a three-pedal model to add inserting at the beginning and end of the line to his vim clutch, so we’ll keep an eye out for when he posts that build.

Teamspeak Button Uses Tattoo Machine Foot Switch

As an avid gamer, [Pat Norton] uses Teamspeak with his friends when playing World of Warcraft. [Pat]’s friends were annoyed with the voice-activated option for Teamspeak and the constant squeaking of dog toys, and [Pat] was annoyed with the questionable usability of a push-to-talk key. Dissatisfied with his options, [Pat] built footswitch-controlled teamspeak button using a Teensyduino and a broken tattoo machine foot switch.

The Teensyduino is an incredibly small Arduino compatible board that was perfect for this project. Since the teensyduino can operate as a USB Human Interface Device, it’s very easy to have the board appear as another keyboard to the computer. After borrowing some code from the hardware button of a DIY photobooth, [Pat] hooked up the foot switch to two pins of the board. From there, it was very to adapt the code so the foot switch would act as a third ‘Control’ button. The results look very professional, like a factory-made game controller. We’ve seen a few foot switch keyboard devices before, and while this probably isn’t the most efficient way to have a foot switch button control something on a computer, it’s certainly the smallest we’ve seen.

Passive MIDI Foot Switch

foot

[Matt] was looking into some software that allows him to use his audio card as a means to control analog audio devices. After seeing how it worked, he got an idea to try to do the opposite.  He is sending a signal into his audio input, and piping it to a pice of MIDI software. The input he has chose is a foot switch. To create the signal, he simply needed to supply voltage while the switch was depressed. You can see above that he used a battery and a simple contact switch to send the signal. He then piped it to a virtual MIDI port using Maple Virtual MIDI Cable. Unfortunately, this isn’t suitable for knobs, but that may be next on his list.