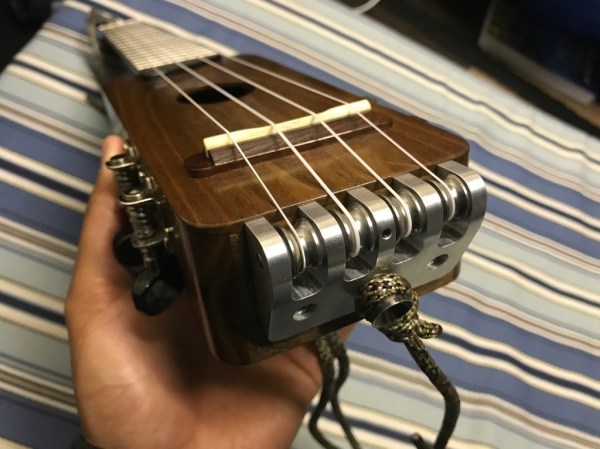
A walnut ukulele with an aluminum piece routing strings at it's base which is facing the camera. The neck of the instrument extends away from the viewer and is held at an angle by a hand with striped sheets in the background.

Travel Uke From A Fallen Tree

When faced with what to build from the trimmings of the walnut tree in her yard, [Amy Qian] decided to build a headless travel ukulele. [via MAKE:]

Headless instruments relocate the tuners to the body of the instrument, and [Qian] had to do a fair bit of trimming and whittling on the body to make the tuners fit just right and still be operable via four scoops cut into the sides. After some initial troubles with the amount of friction on the strings produced by the mandrel, she replaced it with a set of ball bearings and a holder she machined out of aluminum.

We love how [Qian]’s extensive build log goes through the entire process of making this diminutive instrument from trimming dead walnut branches to building a playable instrument. Little details like the maple strip in the neck and the cocobolo accents really take this far beyond the cigar box instruments that start many down the path of luthiery.

Looking for more musical hacks? How about this set of Commodore 64s turned into an accordion or this Baguette Theremin?

Upcycled Practice Amp Build Goes To Eleven

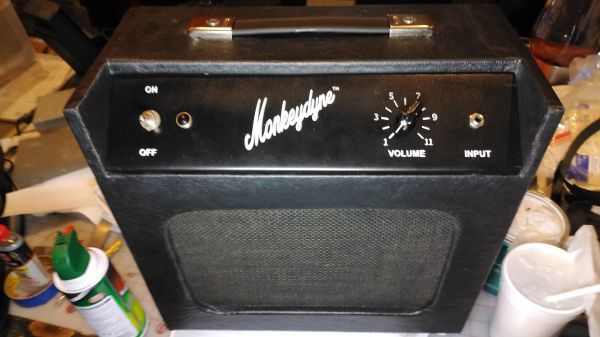
What do you call someone who gives the toddler in your life a musical instrument as a gift? In most cases, “mortal enemy” is the correct answer, but not everyone feels quite so curmudgeonly, and might even attempt to turn up the volume a bit. Such is the case with this wonderfully detailed practice amp for the grandkids’ electric ukelele.

The aptly named [packrat] [Professor Mayhem] really made this build a tour de force of scrap bin sourcing. The amp is built around a module salvaged from an old TV, a stereo Class-D amp that was modified to provide 30 watts output and a volume control. The driver came from a flood-damaged speaker unit, and the power supply from a gutted wall wart. The case was built with scrap plywood and covered with pebble-grain fabric to give it that pro audio look, while the chassis for the electronics was bent from a piece of sheet steel.

But it’s the tiny details that really sell this project. Everything from the pilot light to the pointer knob screams 1970s, as do the painstaking front panel lettering and vinyl “Monkeydyne” logo. [Professor Mayhem] even went the extra mile to create an etched-brass serial number plate, a mock specs and safety label, and even a QA inspection tag that was (sort of) stapled inside the cabinet.

We tip our hats to [Professor Mayhem] for this four-month labor of love and obvious nostalgia trip, which the kids are sure to love. [Professor Mayhem] does admit that some will argue with his decision to use a Class D amp and a switch-mode power supply, but let’s be real — for the application, it’s probably more than sufficient.

Thanks for the tip, [packrat].