This is the fourth article in a series examining the process of turning an electronic project into a marketable kit.We’ve looked at learning about the environment in which your kit will compete, how to turn a one-off project into a costed and repeatable unit, and how to write instructions for your kits that will make your customers come back for more. In this article we will draw all the threads together as we think about packing kits for sale before bringing them to market.
If you had made it this far in your journey from project to kit, you would now have a box of electronic components, a pile of printed instructions, and a box of plastic bags, thin card boxes, or whatever other retail packaging you have chosen for your kit. You are ready to start stuffing kits.
It’s All In The Presentation

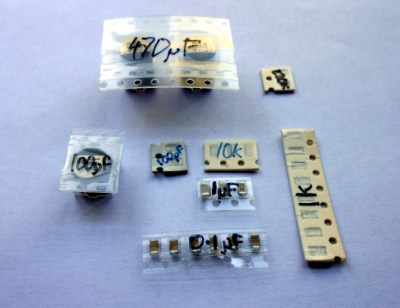
Your priorities when stuffing a kit are to ensure that your customer receives all the components they should, they can easily identify each component, and that the whole kit is attractively presented such that it invites them to buy or build it when they first see it. This starts before you have packed any components, you must carefully prepare each component into units of the required number and label them if they are otherwise not easy to identify. Pre-cut any components supplied on tape, and write the part number or value on the tape if it is not easily readable. You may even have to package up some difficult-to-identify components in individual labeled bags if they can not have their values written on them, though this incurs an extra expense of little bags and stickers. Some manufacturers will insist on using black tape on which an indelible pen doesn’t show up!
Take care cutting tapes of components, it is sometimes easy to damage their pins. Always cut the tape from the bottom rather than the side with the peelable film, and if necessary carefully bend the tape slightly to open up the gap between components for your scissors.
If you start by deciding how many kits you want to stuff in a sitting, list all the kit components and prepare that number of each of them in the way we’ve described. Then take the required number of packages or bags, and work through each component on the list, stuffing all the bags with one component before starting again moving onto the next. In time you will have a pile of stuffed kits ready to receive their instructions and labeling.
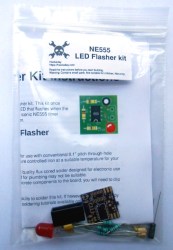
The next step will be to fold your instruction leaflet and pack it in the kit. Take a moment to consider how it can be most attractively presented. For example with a kit packaged in a click-seal plastic bag it makes sense to fold the leaflet such that the colour photo of a completed kit is visible from the front. And when you place it in the bag make sure that the PCB is visible top-outwards in front of it. A customer looking at your kit wants to immediately see what they are likely to create with it.
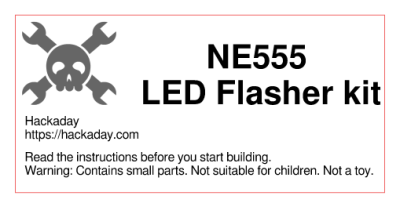
 You can now seal the bag or box, the kit is packed. It only remains to give it a label that has all the pertinent information and is attractive to the customer. You will probably want to put your logo or web address on the label as well as any small print required, alongside the most important feature — the kit description. We’ve put a warning about small parts and curious children, you may also want to put any reglatory or compliance information here. For example in Europe you might have a CE mark and a WEEE logo. Once you have your design sorted you can run it up in your favourite label designing software – we used gLabels – and print as many as you like on sheets of sticky labels. We strongly suggest buying good quality branded labels, the extra money is well worth it when you consider that they will have much more reliable glue, and the extra cost per individual kit will be marginal. Pick a label size which fills a decent space and is easy to read on your packaging without being too big, we used 70mm x 37mm laser labels of which 24 can be had on a single sheet.
Your First Finished Product

It’s an exciting moment when you apply a label to your first fully packed kit and see for the first time what your customers will see: a finished product. You aren’t quite done though, because there is still the small matter of quality control. Take a kit or two from your batch at random, and count all their contents off against your list of what they should contain. This should help you ensure you are packing the kits correctly. Finally, give a completed kit to a friend who has never seen it before, and tell them to build it as a final piece of quality control. They are simulating your customer in every way, if they have no problems then neither should anyone who buys the kit.
Once you’ve built your batch of kits, you will now have the stock you will send out to your customers. Imagine yourself as a customer, if you order a kit you will expect it to arrive in pristine condition. You should therefore now take care of this stock of kits to ensure that it does not come to any harm, its packaging is as crisp and new when you send it out as when you packed it, and it has not attracted any dust while in storage. We would suggest having a separate plastic box for the stock of each kit in your range, and protecting the kits from dust with a lid, or by storing them inside a larger plastic bag.
As we’ve worked through this series of articles, we’ve tried to give you a flavour of the process of bringing an electronic kit from a personal project to the masses. We’ve looked at learning about the market for your kit, we’ve discussed turning a project into a product before writing the best instructions possible and now stuffing your first kits ready for sale. In the next article in the series we’ll talk about how you might sell your products, the different choices open to you for online shops, marketplaces, and crowdfunding.


Tandy have a good way of packaging kits. All the components are in a strip in the order you put them together. The only picture I can find is for an discontinued Raspberry Pi kit http://raspi.tv/2012/gertboard-kit-is-here
I’m not sure about the section advising putting a CE mark on the bag, seemingly without having first tested it for compliance. Surely you’d have to test the LED flasher to ensure it was compliant before sticking a CE marking on and selling it?
You can’t CE mark a kit as the only part of the regulations that would be covered by a low voltage electronic kit would be emissions. You can not be certain that an assembled kit would meet CE requirements as the assembler may make an error or substitute a part.
Yes you can, and yes you should. Most small kit manufacturers don’t bother, but if you read the letter of the law then as a consumer product it should be CE marked. The kit is the product, not the final assembled item. There’s a hell of a lot more to CE marking than the Low Voltage Directive.
Happily as I have pointed out in another answer, you can self-certify, and there is a lot of info out there on the www on how to do that.
Oh and WEEE does not apply to electronic components only finished products. If your kit included a ready made power supply unit for example then the supplier would need to be registered as a WEEE producer but parts are exempt.
Yet again, kits lie in a grey area being a finished product albeit one made from a collection of components. When if you ship less than several tonnes of WEEE qualifying product a year it only costs you 30 quid to register and you simply need to fill in one form a year. I prefer to do that than risk prosecution over something so easy.
You can self-certify for CE marking, keep a data file of all the evidence you have to back up your claim that it complies, state that it does, and mark it. Simpler than the CE marking industry would have you believe if you are careful that your product does not fall into any of the product categories with mandatory expensive testing. Give it a search and read up on it, it’s unexpectedly straightforward.
Speaking from the USA perspective. I’m sure it’s the the responsibility builder of the kit to insure that the assembled kit meets FCC part 15, not the supplier of the kit. Sure it’s in the best interests of the kit supplier to insure that a kit when constructed as instructed shouldn’t violate Part 15. Most likely the worst a sloppy assembler or builder could expect from the FCC is an order to cease using the offending equipment. Unless the user’s intent was using more power in one of the various license free radio services than is permitted. Of course I could be wrong, so don’t depend on me.
So, why *doesn’t* Hackaday sell electronic kits?
They do, this for example http://store.hackaday.com/products/hackaday-tv-b-gone-kit
It’s on clearance, which may tell you something about the desirability of getting into this business.
IMO that at this is on clearance probably has little to say about the public’s interest in electronic kits. Sure it could be reflecting that there’s little general interest in electronic kits. Could be Hackaday’s price is higher than similar kits. Than there is the kit itself; could be that there aren’t enough butt holes out there that, believe the world revolve around them to the point, they feel it’s their right to control what doesn’t belong to them. When it comes to kits one has to find and fill a niche. Ham radio clubs to develop and markets successfully as fund raisers for the club. Providing kits is a goes way of indocrtinating others to participate in your particular interests. There many kit providers will settle for not loosing money, and may tolerate some loss if they feel strongly enough about recruiting others. All in all this is a decent article on the topic, even if interest may not be broad.
Some android phones appeared with IR blasters so basically there’s an app for that now. Thus making the TV B Gone not a clear cut example.
3 markets for kits IMO
#1 Beginners, and older kids/teens… Kit needs to be simple, copious handholding instructions, and “pocket money priced”, meaning the average older kid could afford to buy one every so often. This is where I’ve seen EVERY hobby screw up, (I have a lot of interests) typically a store keeps going for years, then they have a downturn, and what do they do, decide, hey, the money is in the high priced, high end stuff, so they switch to catering to big spenders…. then they’re closed in a year because they’ve pissed off everyone who came in to pick up bits and pieces, casually interested passers by go “This looks cool” then realise counter guy is talking you into a thousand dollar spend to get started.. yyyyyNO. Anyway, cheaper, simpler stuff is the “gateway drug” to any hobby, and if you don’t have it, you will not have a customer base in future.
#2 Intermediate kits for people who’ve graduated from training wheels kits, which will include people who did some electronics years ago and are coming back to it. These need to have practical applications and blinky lights won’t cut it. Maybe things like water level alarms. There will be price sensitivity in this market, you are in danger of losing them to homebrew, so “modules” that lend themselves useful to being building blocks of more complex projects could also be a winner here.
#3 Highly advanced kits…. yeah, I don’t think there’s any market in the middle, electronics geeks develop and wanna do their own thing, they might be making their own simple boards by now, building circuits off the interwebs, hacking up their own stuff… BUT… highly advanced designs that need complex PCBs and an array of parts that makes your head ache that you have to deal with more than 2 suppliers, the kind of project that you know to do yourself would take a year of experimenting and fails and burned parts. The kind of parts that are hard to find single unit, and they want $30 a piece, when the bulk rates drop quickly to $5. These kits satisfy the requirement of saving time, saving trouble and resulting in a sophisticated product.
Okay I derped, there is a market in the middle I forgot about, heathkit used to do well in it. Test equipment that doesn’t need test equipment to align it. Also other tools. I swear there’s a market for a temp controller timer, to turn generic toaster oven into reflow oven kit.
The may sell a few, but not *make* them :)