You probably think of them as “Ziploc” bags, but, technically, the generic term is zipper bag. Everything from electronic components to coffee beans arrive in them. But they weren’t always everywhere, and it took a while for them to find their niche.
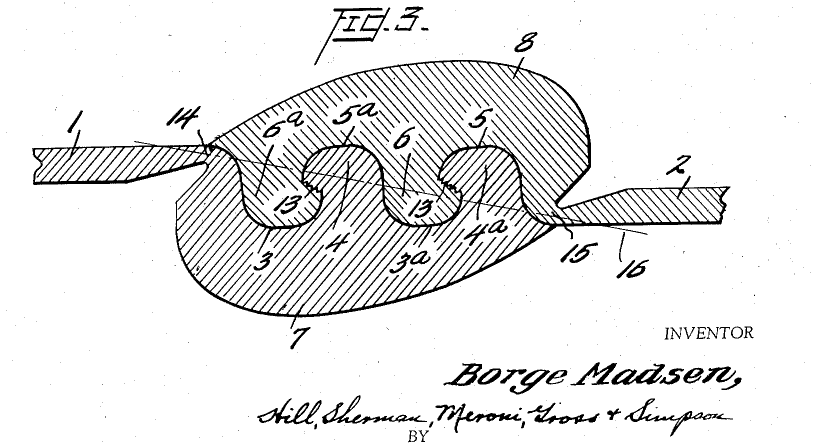
Image from an early Madsen patent
A Dane named Borge Madsen was actually trying to create a new kind of zipper for clothes in the 1950s and had several patents on the technology. The Madsen zipper consisted of two interlocking pieces of plastic and a tab to press them together. Unfortunately, the didn’t work very well for clothing.
A Romanian immigrant named Max Ausnit bought the rights to the patent and formed Flexigrip Inc. He used the zippers on flat vinyl pencil cases and similar items. However, these still had the little plastic tab that operated like a zipper pull. While you occasionally see these in certain applications, they aren’t what you think of when you think of zipper bags.
Zipping
Ausnit’s son, Steven, figured out how to remove the tab. That made the bags more robust, a little handier to use, and it also rendered them less expensive to produce. Even so, cost was a barrier because the way they were made was to heat seal the zipper portion to the bags.
That changed in the 1960s when the Ausnits learned of a Japanese company, Seisan Nippon Sha, that had a process to integrate the bags and zippers in one step which slashed the production cost in half. Flexigrip acquired the rights in the United States and created a new company, Minigrip, to promote this type of bag.
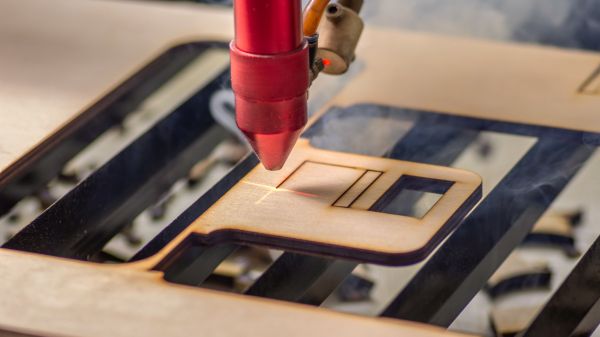
Laser cutting equipment runs the gamut in terms of cost, with low-end, almost disposable units that can be had for a song to high-power fiber lasers that only big businesses can afford. But the market has changed dramatically over the years, and there’s now a sweet-spot of affordable laser cutters that can really do some work. And while plenty of hobbyists have taken the plunge and added such a laser cutter to their shops, still others have looked at these versatile tools and realized that a business can be built around them.
For the next Hack Chat, we’ll be sitting down with Jonathan Schwartz. He started with laser cutters at his maker space, and quickly became the “laser guy” everyone turned to for answers. With about 10 years of experience, Jon set up American Laser Cutter in Los Angeles, to provide bespoke laser engraving and cutting services. He has built a business around mid-range laser cutters, and he’s ready to share what he’s learned. Join us as we talk about the machines, the materials, and the services that are part of a laser cutting business, and find out some of the tricks of the laser-jockey’s trade.
Click that speech bubble to the right, and you’ll be taken directly to the Hack Chat group on Hackaday.io. You don’t have to wait until Wednesday; join whenever you want and you can see what the community is talking about.
A lot of today’s most successful tech companies have creation myths that include a garage in some suburban neighborhood where all the magic happened. Whether there was literally a garage is not the point; the fact that modest beginnings can lead to big things is. For medical instrument concern Incuvers, the garage was actually a biology lab at the University of Ottawa, and what became the company’s first product started as a simple incubator project consisting of a Styrofoam cooler, a space blanket, and a Soda Stream CO2 cylinder controlled by an Arduino.
From that humble prototype sprang more refined designs that eventually became marketable products, setting the fledgling company on a course to make a huge impact on the field of cell biology with innovative incubators, including one that can image cell growth in real time. What it takes to go from prototype to product has been a common theme in this year’s Hack Chats, and Noah, Sebastian, and David from Incuvers will drop by Wednesday to talk about that and more.
Click that speech bubble to the right, and you’ll be taken directly to the Hack Chat group on Hackaday.io. You don’t have to wait until Wednesday; join whenever you want and you can see what the community is talking about.
Today I don’t have a hack for you. I have a story, one that I hope will prove useful to a few of you who are considering a move to Asia to chase opportunities here.
Seven years ago, I was a pretty stereotypical starving hacker. I had five jobs: A full-time dead-end job in biotech, and four part-time or contract gigs that were either electronic hardware design or programming. I worked perhaps 50 hours a week, and was barely past the poverty line – I was starting to wonder why I spent so much time in school. I saw the economic growth in Asia as an attractive but risky opportunity.
Check out that image above…France? No, this is Shenzhen and let’s face it: many exciting things are made there (even the copies). After a short visit to the region, I decided to take that risk but not in Shenzhen. I sold everything I owned and moved from Canada to Vietnam and started a company. Over the last seven years things have worked out well, although I certainly wish I had known more about the process before I got on a plane. This article is about the general path I took to get where I am. Obviously I don’t know the legal framework of every country in Asia, but speaking in generalities I hope that I can cover some interesting points for the curious and adventurous.
While there are plenty of hackers that hack just for the love of it, it’s no secret that many of us are looking to hit it big someday. Tales of the businesses like HP and Apple that started in someone’s garage inevitably lead to musings like, “Hey, I’ve got a garage!” and grand plans to turn that special idea into the Next Big Thing™. Many will try, most will fail for one reason or another, but hope springs eternal, and each new widget seems to start the entrepreneurial cycle again.
But for as much pressure as we may feel to be the next Packard, Wozniak, or Musk, not everyone is cut out to be the boss. Some of us have no interest in or aptitude for business — we don’t want to hire or fire people, we don’t want to wheel and deal, and we certainly don’t want to worry about salesmanship. Some of us just want to abstract all that complexity away and just find a job, preferably one that leverages the things we love to do. Continue reading “Ask Hackaday: Selling Yourself As A Hacker”→
If you had made it this far in your journey from project to kit, you would now have a box of electronic components, a pile of printed instructions, and a box of plastic bags, thin card boxes, or whatever other retail packaging you have chosen for your kit. You are ready to start stuffing kits.
It’s All In The Presentation
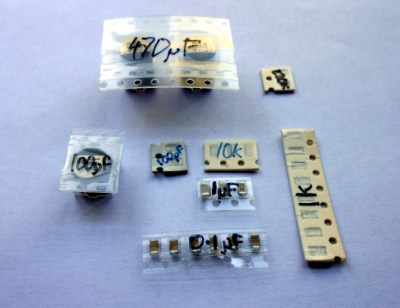
Label all your hard-to-identify components, your customers will appreciate it.
Your priorities when stuffing a kit are to ensure that your customer receives all the components they should, they can easily identify each component, and that the whole kit is attractively presented such that it invites them to buy or build it when they first see it. This starts before you have packed any components, you must carefully prepare each component into units of the required number and label them if they are otherwise not easy to identify. Pre-cut any components supplied on tape, and write the part number or value on the tape if it is not easily readable. You may even have to package up some difficult-to-identify components in individual labeled bags if they can not have their values written on them, though this incurs an extra expense of little bags and stickers. Some manufacturers will insist on using black tape on which an indelible pen doesn’t show up!
Take care cutting tapes of components, it is sometimes easy to damage their pins. Always cut the tape from the bottom rather than the side with the peelable film, and if necessary carefully bend the tape slightly to open up the gap between components for your scissors.
If you start by deciding how many kits you want to stuff in a sitting, list all the kit components and prepare that number of each of them in the way we’ve described. Then take the required number of packages or bags, and work through each component on the list, stuffing all the bags with one component before starting again moving onto the next. In time you will have a pile of stuffed kits ready to receive their instructions and labeling.
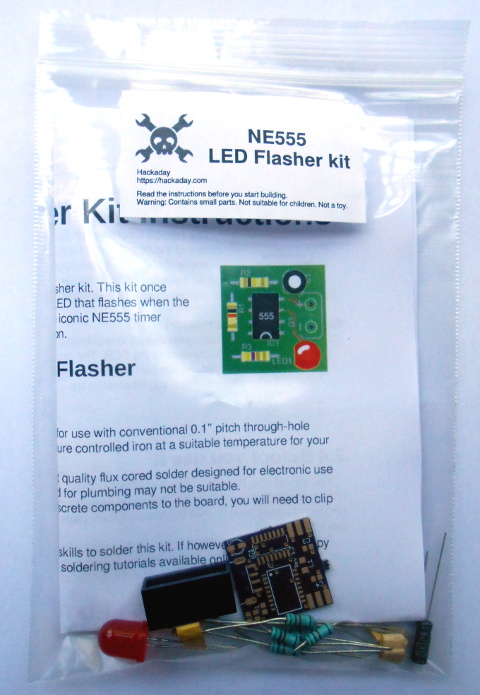
The next step will be to fold your instruction leaflet and pack it in the kit. Take a moment to consider how it can be most attractively presented. For example with a kit packaged in a click-seal plastic bag it makes sense to fold the leaflet such that the colour photo of a completed kit is visible from the front. And when you place it in the bag make sure that the PCB is visible top-outwards in front of it. A customer looking at your kit wants to immediately see what they are likely to create with it.
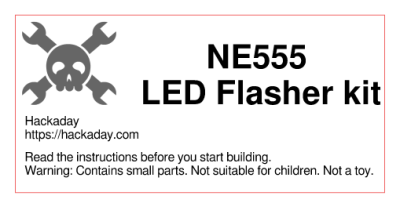
You can now seal the bag or box, the kit is packed. It only remains to give it a label that has all the pertinent information and is attractive to the customer. You will probably want to put your logo or web address on the label as well as any small print required, alongside the most important feature — the kit description. We’ve put a warning about small parts and curious children, you may also want to put any reglatory or compliance information here. For example in Europe you might have a CE mark and a WEEE logo. Once you have your design sorted you can run it up in your favourite label designing software – we used gLabels – and print as many as you like on sheets of sticky labels. We strongly suggest buying good quality branded labels, the extra money is well worth it when you consider that they will have much more reliable glue, and the extra cost per individual kit will be marginal. Pick a label size which fills a decent space and is easy to read on your packaging without being too big, we used 70mm x 37mm laser labels of which 24 can be had on a single sheet.
Your First Finished Product
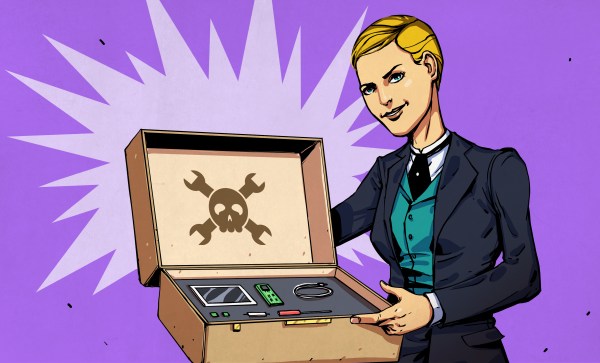
If Hackaday made electronic kits, they might look a little like this.
It’s an exciting moment when you apply a label to your first fully packed kit and see for the first time what your customers will see: a finished product. You aren’t quite done though, because there is still the small matter of quality control. Take a kit or two from your batch at random, and count all their contents off against your list of what they should contain. This should help you ensure you are packing the kits correctly. Finally, give a completed kit to a friend who has never seen it before, and tell them to build it as a final piece of quality control. They are simulating your customer in every way, if they have no problems then neither should anyone who buys the kit.
Once you’ve built your batch of kits, you will now have the stock you will send out to your customers. Imagine yourself as a customer, if you order a kit you will expect it to arrive in pristine condition. You should therefore now take care of this stock of kits to ensure that it does not come to any harm, its packaging is as crisp and new when you send it out as when you packed it, and it has not attracted any dust while in storage. We would suggest having a separate plastic box for the stock of each kit in your range, and protecting the kits from dust with a lid, or by storing them inside a larger plastic bag.
As we’ve worked through this series of articles, we’ve tried to give you a flavour of the process of bringing an electronic kit from a personal project to the masses. We’ve looked at learning about the market for your kit, we’ve discussed turning a project into a product before writing the best instructions possible and now stuffing your first kits ready for sale. In the next article in the series we’ll talk about how you might sell your products, the different choices open to you for online shops, marketplaces, and crowdfunding.
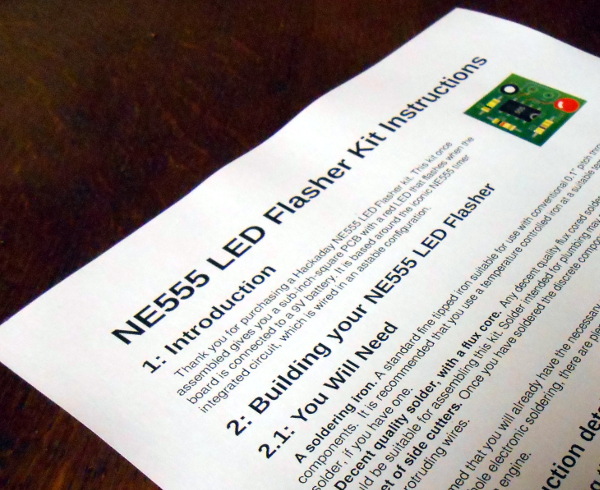
A printed copy of the instructions for our example kit
We’ve had two previous articles in this series on turning a personal electronic project into a saleable kit, in which we’ve examined the kit market in a broader context for a new entrant, and gone on to take a look at the process of assembling the hardware required to create a product. We’ve used an NE555 LED flasher as a simple example , from which we’ve gone through the exercise of setting a cost of production and therefore a retail price.
The remaining task required to complete our kit production is to write the documentation that will accompany it. These will be the instructions from which your customers will build the kit, and their success and any other customers they may send your way will hang on their quality. So many otherwise flawless kits get this part of the offering so wrong, so for a kit manufacturer it represents an easy win into which to put some effort. Continue reading “From Project To Kit: Instructions Are Everything”→


 You can now seal the bag or box, the kit is packed. It only remains to give it a label that has all the pertinent information and is attractive to the customer. You will probably want to put your logo or web address on the label as well as any small print required, alongside the most important feature — the kit description. We’ve put a warning about small parts and curious children, you may also want to put any reglatory or compliance information here. For example in Europe you might have a CE mark and a WEEE logo. Once you have your design sorted you can run it up in your favourite label designing software – we used