Minicut2d And Omniwheel Robot

You’d think we would be done with the World Maker Faire posts by now, but no! We keep looking at our memory cards and finding more awesome projects to write about.

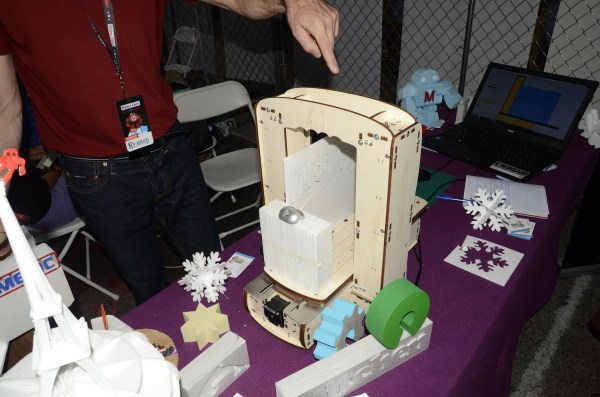
[Renaud Iltis] flew over from France to show off MiniCut2D, his CNC hot wire foam cutter. MiniCut2D uses X and Y, and Z stMINICUT2epper motors much like a 3D printer. Rather than print though, it pulls a heated nichrome wire through styrofoam. Foam cutting is great for crafts, but it really takes off when used for R/C aircraft. [Renaud] was cutting some models out of Depron foam in his booth. [Renaud] has set up FrenchFoam.com as a central location for users to upload and share designs in DXF format.

One of the neater features of MiniCut2D is that it can be loaded with a stack of foam boards to make several cuts at once. Not only is this a time saver when cutting repeating designs like wing ribs, but it also ensures the cut pieces are identical. Hey, even CNCs make mistakes once in a while.

 Omniwheel Robot

vic

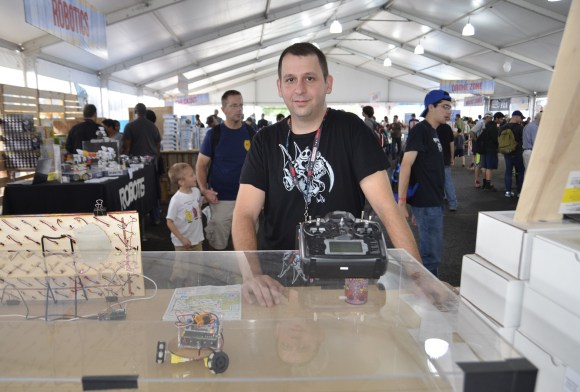
In the MakerShed booth, we found [Victor Aprea] showing off Wicked Device’s new product, the Omniwheel Robot. Omniwheel utilizes a holonomic drive with omnidirectional wheels. The kit comes with a Nanode Zero, Wicked Devices’ own Arduino Uno clone, a motor control board, 3 motors, 3 omnidirectional wheels, and a whole list of hardware. The only thing needed to complete the kit is a radio control unit and receiver. Omniwheel may be simple, but we found driving it around to be mesmerizing – and a bit challenging. It’s a good thing [Victor] brought that plexiglass cover, as we bumped it a few times.

We’d love to see one of these little bots with a couple of sensors and autonomous control. If you build one, make sure to post it to Hackaday.io!

Strobe Remote

Reverse Engineering A Wireless Studio Lighting Remote

If you want to take a photograph with a professional look, proper lighting is going to be critical. [Richard] has been using a commercial lighting solution in his studio. His Lencarta UltraPro 300 studio strobes provide adequate lighting and also have the ability to have various settings adjusted remotely. A single remote can control different lights setting each to its own parameters. [Richard] likes to automate as much as possible in his studio, so he thought that maybe he would be able to reverse engineer the remote control so he can more easily control his lighting.

[Richard] started by opening up the remote and taking a look at the radio circuitry. He discovered the circuit uses a nRF24L01+ chip. He had previously picked up a couple of these on eBay, so his first thought was to just promiscuously snoop on the communications over the air. Unfortunately the chips can only listen in on up to six addresses at a time, and with a 40-bit address, this approach may have taken a while.

Not one to give up easily, [Richard] chose a new method of attack. First, he knew that the radio chip communicates to a master microcontroller via SPI. Second, he knew that the radio chip had no built-in memory. Therefore, the microcontroller must save the address in its own memory and then send it to the radio chip via the SPI bus. [Richard] figured if he could snoop on the SPI bus, he could find the address of the remote. With that information, he would be able to build another radio circuit to listen in over the air.

Using an Open Logic Sniffer, [Richard] was able to capture some of the SPI communications. Then, using the datasheet as a reference, he was able to isolate the communications that stored information int the radio chip’s address register. This same technique was used to decipher the radio channel. There was a bit more trial and error involved, as [Richard] later discovered that there were a few other important registers. He also discovered that the remote changed the address when actually transmitting data, so he had to update his receiver code to reflect this.

The receiver was built using another nRF24L01+ chip and an Arduino. Once the address and other registers were configured properly, [Richard’s] custom radio was able to pick up the radio commands being sent from the lighting remote. All [Richard] had to do at this point was press each button and record the communications data which resulted. The Arduino code for the receiver is available on the project page.

[Richard] took it an extra step and wrote his own library to talk to the flashes. He has made his library available on github for anyone who is interested.