Hackaday Prize 2023: Bolt Bot Micro Servo Droids

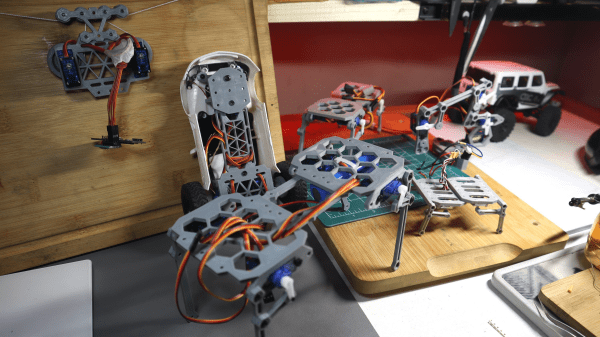
This Hackaday prize entry from [saul] is the beginning of a reconfigurable kit of 3D printed parts and servo motors for robotics learning. With just access to a printer, a few cheap-as-chips servo motors, an Arduino, and some nuts and bolts, you could be hacking together robot walkers within a few hours of starting!

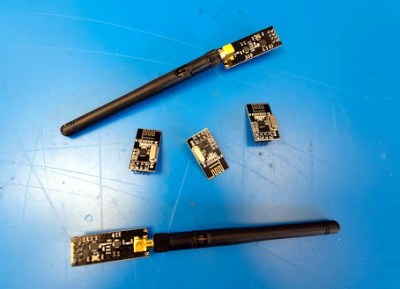
Bolt Bots is very simple to understand, with all the mechanics and wiring out there in the breeze, but strictly for indoor use we reckon. If you want to add remote control to your application, then drop in one of the ubiquitous nRF24L01 boards and build yourself a copy of the remote control [saul] handily provides in this other project.
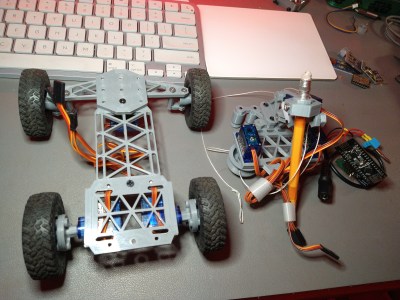
There really isn’t a great deal we can say about this, as it’s essentially a build kit with quite a few configuration options, and you just have to build with it and see what’s possible. We expect the number of parts to proliferate over time giving even more options. So far [saul] demonstrates a few flavors of ‘walkers’, a rudimentary ‘robot arm’, and even a hanging drawbot.

The bolt hardware can be found in this GitHub repo, and the remote control code in this second one.

Servo-based designs are sometimes sneered at due to their dubious accuracy and repeatability, but with a little of effort, this can be vastly improved upon. Also, multi-legged walkers need multiple servos and controllers to drive ’em. Or do they?

Continue reading “Hackaday Prize 2023: Bolt Bot Micro Servo Droids”

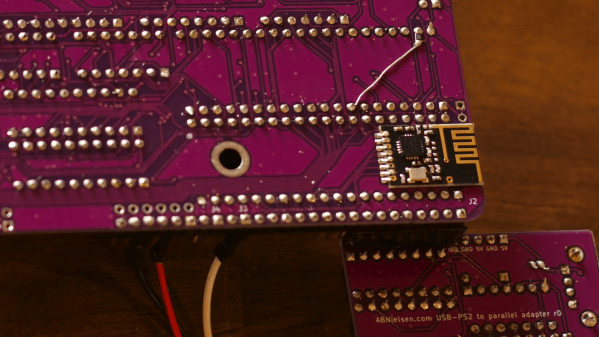
An NRF24L01 module soldered onto a 6502 single-board computer

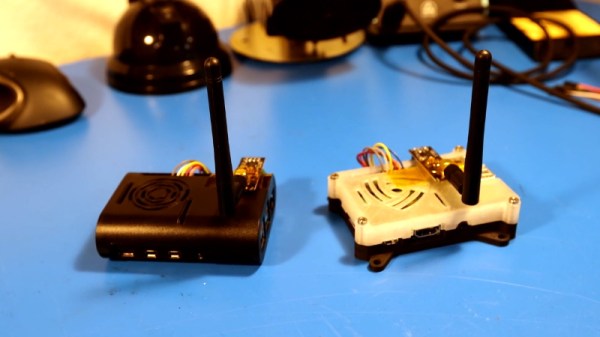
Wireless Bootloader Saves You From Swapping ROM Chips

Flashing your code into an Arduino, an ESP32 or any other modern microcontroller platform is pretty straightforward: connect the device through USB, fire up the appropriate software platform, and press “program”. But those who followed embedded programming classes in the ’80s and ’90s will remember a more complicated procedure that consists of swapping EPROM chips between a programmer, a target board and a UV eraser. Veterans of that era might even remember how you could overwrite a previous program with NOPs and place new code behind it, to save yourself a trip to the “blank chips” bin.

If you’re a retrocomputer enthusiast and would like to have the easy programming of modern tools, but the authenticity of a self-contained ROM-loading computer, you might want to check out [Anders Nielsen]’s latest design of a wireless boot loader for a 6502 single board computer. The target platform for this project is a beautiful custom-made 6502-based retrocomputer that [Anders] documented in detail on his Hackaday.io page.

The basic idea here is to have a wireless receiver on the target system that receives data from a transmitter connected to a modern PC. When you click “program”, the object code is sent to the 6502 machine, stored in RAM and executed. The wireless link is implemented with a pair of nRF24L01 2.4 GHz modules that communicate through SPI. Since [Anders]’s Mac Mini doesn’t come with GPIO ports he hooked up the transmitter to a Raspberry Pi which he controlled through a network link.

On the 6502 side he wrote a bootloader in assembly language, which bit-bangs the SPI protocol to communicate with the wireless module. A simple user interface is included to allow the user to control the loading and running of programs. All code and hardware documentation is available on Github for use by anyone with a similar 6502 system.

Those nRF24L01s are versatile little things: we’ve seen them being used to transfer anything from MIDI data to TCP/IP links, as well as code for other microcontroller platforms.

Continue reading “Wireless Bootloader Saves You From Swapping ROM Chips”

Sending MIDI Wirelessly With The NRF24L01

MIDI is a standard known by musicians and instruments all over the world. The basic twist on regular serial has helped studios around the world to work more efficiently. [Kevin] wanted to try sending MIDI data wirelessly, but rather than the typical Bluetooth solution, decided to use the humble nRF24L01 instead.

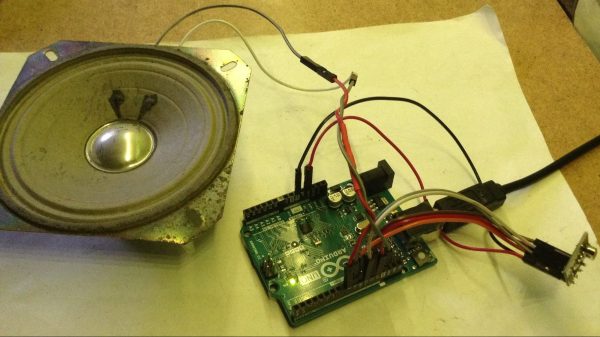
The circuitry used is simple: [Kevin] simply wired up two Arduino Unos with nRF24L01 radio modules, which communicate over SPI. Alternatively, an even quicker solution is to use a Keywish Arduino RF Nano, which packs a nRF24L01 on board. One Arduino can then be hooked up to a MIDI OUT port on an instrument, and it will send out MIDI signals wirelessly. The second Arduino can then be plugged into a MIDI IN port and repeat out what it receives over the air.

The real work was in the firmware, which takes MIDI data and packages it in a suitable form to send out over the nRF24L01. The system can operate in a one-to-one mode, emulating a single MIDI cable, or a multicast mode, where one sender transmits information to many receivers.

It’s a neat hack and one we could imagine would be useful in some fun performance situations. We’ve seen others do work on wireless MIDI interfaces for Eurorack hardware, too. Video after the break.

Continue reading “Sending MIDI Wirelessly With The NRF24L01”

Wireless Quad Voltmeter Brings It All Together

If you’re reading Hackaday, you almost certainly have a voltmeter. Matter of fact, we wouldn’t be surprised to hear you had two of them. But what if you needed to monitor four voltage levels at once? Even if you had four meters, getting them all connected and in a convenient enough place where you can see them all at once is no small feat. In that case, it sounds like the multi-channel wireless voltmeter put together by [Alun Morris] is for you.

Built as an exercise in minimalism, this project uses an array of components that most of us already have kicking around the parts bin. For each transmitter you’ll need an ATtiny microcontroller, a nRF24L01+ radio, a small rechargeable battery, and a handful of passive components. On the receiver side, there’s an OLED screen, another nRF radio module, and an Arduino Nano. You could put everything together on scraps of perfboard like [Alun] has, but if you need something a bit more robust for long-term use, this would be a great excuse to create some custom PCBs.

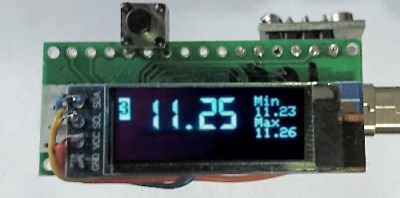
While the hardware itself is pretty simple, [Alun] clearly put a lot of work into the software side. The receiver’s 128 x 32 display is able to show the voltages from four transmitters at once, complete with individual indicators for battery and signal level. When you drill down to a single transmitter, the screen will also display the minimum and maximum values. With the added resolution of the full screen display, you even get a very slick faux LCD font to ogle.

Of course, there are some pretty hard limitations on such a simple system. Each transmitter can only handle positive DC voltages between 0 and 20, and depending on the quality of the components you use and environmental considerations like temperature, the accuracy may drift over time and require recalibration. Still, if you need a way to monitor multiple voltages and potentially even bring that data onto the Internet of Things, this is definitely a project to take a look at.

Continue reading “Wireless Quad Voltmeter Brings It All Together”

Nerfnet Tunnels TCP/IP Over NRF24L01 Radios

There’s an excellent chance you’ve already worked with the nRF24L01. These little modules are an easy and cheap way to shuffle data across a 2.4 GHz radio link at a respectable rate, making them great for remote control projects. But after seeing that others had experimenting with using these radios to transmit digital audio, [Andrew Rossignol] got to wondering if some software trickery could push the envelope even further.

The result isĀ nerfnet, a Linux program that allows you to tunnel TCP/IP over a pair of nRF24L01 modules. The link appears as a virtual interface, meaning everything happens transparently as far as other programs are concerned. Anything that uses TCP/IP to communicate on Linux can take advantage of this low-cost link, albeit at speeds that most of us haven’t had to deal with in decades.

Though it’s not quite as bad as you might think. Latency is around 50 ms, and after some tweaks, [Andrew] has been able to squeeze almost 300 Kbps out of the link. That’s more than enough for terminal work, and some light audio and video streaming isn’t out of the question.

In terms of range, he was able to maintain a fairly reliable connection at a distance of up to 60 meters (200 feet) outdoors. It might not sound like much, but again, you’ve got to take the cost of these radios into account. If you’re looking to SSH into a Raspberry Pi weather station you’ve got in the backyard, a pair of these could get the job done for just a couple of bucks.

The blog post [Andrew] has put together explains the software in fantastic detail if you’re interested in the nuts and bolts of it all. But if you just want to play around with the idea, you just need to connect some nRF24L01 modules to a pair of Raspberry Pis with short SPI wires to cut down any interference, and follow the instructions. Ideally the radios would have external antennas, but it’s not strictly required.

We’ve seen these modules pushed into service as impromptu Bluetooth Low Energy transmitters in the past, but nothing quite like this. While the latency and bandwidth offered by this technique might seem antiquated to modern eyes, it could be the perfect dedicated communication channel for your sensors, smart devices, or home automation projects.

Continue reading “Nerfnet Tunnels TCP/IP Over NRF24L01 Radios”

Offline Dinosaur-Jumping Becomes A Real Workout

It’s great to see people are out there trying to find fun ways to exercise amid the current crisis. Although jumping up and down isn’t great for the knees, it does give decent cardio. But if you don’t have a rope or a puddle, we admit that jumping can lose its bounce pretty fast.

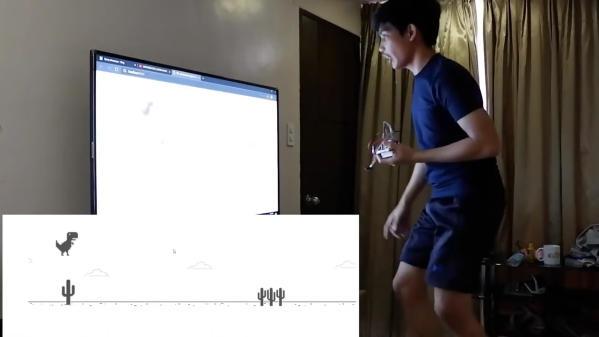
Quarantine has been a game-filled time for [fridaay]. Somewhere between a handful of FPS games, he decided to try to play Google’s offline dinosaur-based side scroller game by making the dinosaur spring over the saguaros whenever he physically jumps in the air. (Video, embedded below.)

Here’s how it works: [fridaay] holds a transmit circuit that consists of an Arduino UNO, an accelerometer module, and an nRF24L01 transceiver, all running on a 9 V battery. Whenever [fridaay] jumps, the accelerometer reads the change in Z and sends it to the receiving circuit, which is just another UNO and nRF. The receiving UNO is connected to a laptop and configured to press the space bar so the dinosaur canters over the cacti.

We’ve never been able to stay alive long enough in the game to see this happen, but apparently you need to crouch at some point in the game. [fridaay] has yet to implement a control for that, but we’re sure he’ll think of something. Jump past the break to see the video, and hit him up if you need the code.

If you have a lot of parts at your disposal, why not make a physical version?

Continue reading “Offline Dinosaur-Jumping Becomes A Real Workout”

RC Strandbeest Is A Head Above The Rest

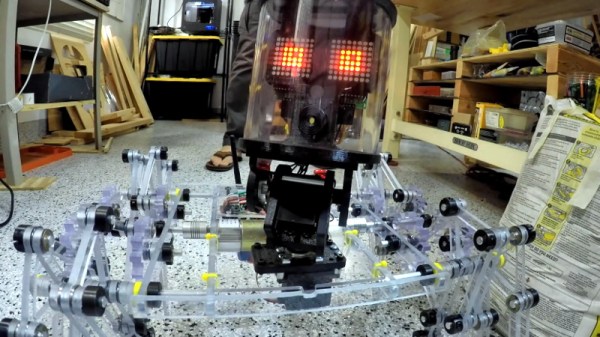
Prolific maker [Jeremy Cook] recently put the finishing touches (at least, for now) on his impressive ClearCrawler remote controlled Strandbeest, which includes among other things a surprisingly expressive “head” complete with LED matrix eyes. For anyone in the audience who was only mildly terrified of these multi-legged robotic beasties before, you may want to avert your eyes from the video after the break.

The clever locomotive design of [Theo Jansen] known as Strandbeest is a legged walker. What makes it special is that the legs themselves are not independent, but work together for a gliding action more akin to wheeled bots. [Jeremy’s] work with ClearCrawler has taken this to another level of precision and mechanization.

Before installation of the electronics, the ClearCrawler had to be tethered to a bench power supply, and could only move forward and backward. Once the locomotion was working as expected, [Jeremy] was ready to install some brains into the beast.

The robot is controlled by a dual motor driver and an Arduino Nano socketed in an I/O expansion board. Communication between the Nano onboard the walker and the hand-held remote control is provided by of a pair of nRF24L01 modules. The controller itself is a simple affair, comprised of a joystick shield plugged into an Arduino Uno.

The robot’s head is made up of a chunk of clear polycarbonate tube with a 3D printed internal frame to hold the dual 8×8 LED matrices that serve as its animated eyes. This arrangement is mounted on a servo pan and tilt mount, which is controlled by an analog stick on the controller. While the head doesn’t currently serve any practical function, it does give [Jeremy] a chance to emote a bit with his creation; a popular trick when he shows the ClearCrawler off.

A few years ago we covered this robot’s predecessor, the considerably larger ClearWalker. While that machine was surely a beauty to behold, this smaller and more agile iteration of the concept is quite a bit more practical.

Continue reading “RC Strandbeest Is A Head Above The Rest”