Water Drips Up In Kid-Friendly Engineering Experiment

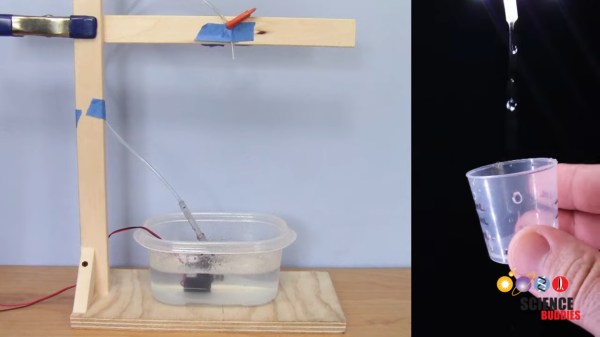
Did you know that water can drip UP instead of down? It’s true! Okay, okay- it’s a bit of an optical illusion, but one that’s mesmerizing no less, and it’s one that is especially awe-inspiring for kids. As [Science Buddies] explains in the video below the break, it’s also achievable for anyone with some basic supplies.

On first glance, the “water dripping upward” illusion looks like it must be extremely complicated with precisely timed drops, and perfectly triggered strobing lights and the like- right? Well, not so much. [Science Buddies] demonstrates a highly simplified experiment using only an aquarium pump, a basic frame, a smart phone with a strobing app, and naturally, water. The experiment is presented in a simple manner that would allow a young person to replicate it without too much adult intervention.

The video goes into such concepts as frequency, duty cycle (pulse width modulation), and other basic engineering principles. The experiment can be completed for just a few dollars for the pump and tubing, and the rest can be improvised. What a great way to get a young one started on their way to engineering!

If you’d like to see a more fleshed out version of a similar machine, check out this gravity defying dripper we featured a few years ago.
Continue reading “Water Drips Up In Kid-Friendly Engineering Experiment”

This Camera Captures Piezo Inkjet Micro-Drops For DIY Microfluidics

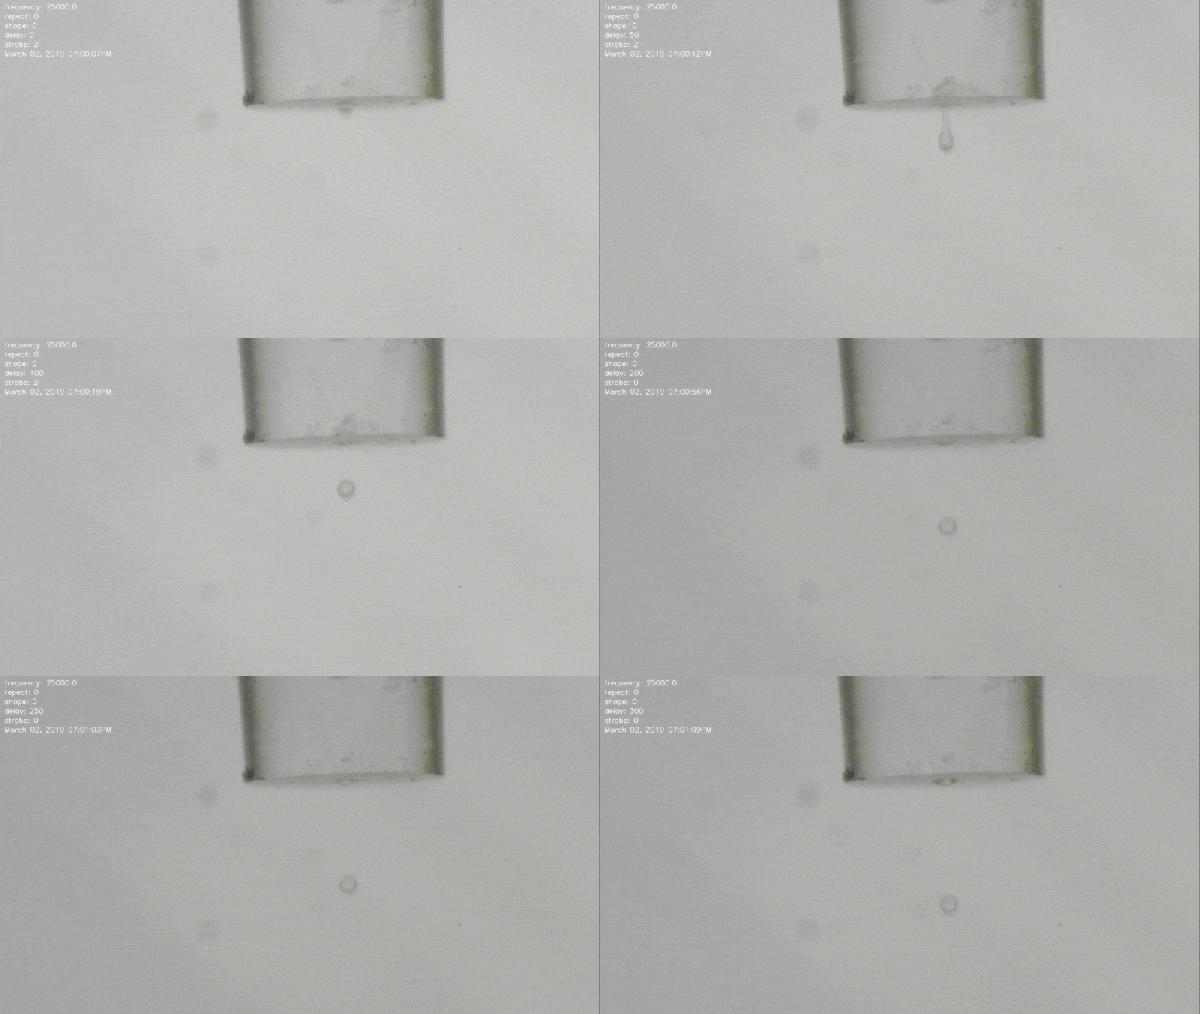
In microfluidics, there are “drop on demand” instruments to precisely deposit extremely small volumes (pico- or nano-liters) of fluid. These devices are prohibitively expensive, so [Kyle] set out to design a system using hobbyist-level parts for under $1000. As part of this, he has a fascinating use case for a specialized camera: capturing the formation and shape of a micro-drop as it is made.

There are so many different parts to this effort that it’s all worth a read, but the two big design elements come down to:

  1. Making the microdrop using a piezo element
  2. Ensuring the drop is made correctly, and visually troubleshooting
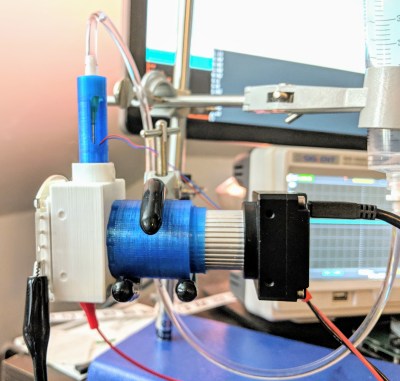
Working prototype. The piezo tube is inside the blue piece at the top. The camera is to the right, and the LED strobe is on the left.

It’s one thing to make an inkjet element in a printer work, but it’s quite another to make a piezoelectric element dispense arbitrary liquids in a controlled, repeatable, and predictable way. Because piezoelectric elements force liquid out with a mechanical motion, different liquids require different drive signals and that kind of experimentation requires a way to see what is going on, hence the need for a drop observation camera.

[Kyle] ended up taking the lens assembly from a cheap USB microscope and mating it to his Korukesu C1 USB Camera with a 3D printed assembly. Another 3D printed enclosure doubles as a lightbox, holding the piezo tube in the center with the LED strobe and camera on opposite sides. The whole assembly had a few false starts, but in the end [Kyle] seems pretty happy with his results. The device is briefly described at a high level here. There are some rough edges, but it’s a working system.

Inkjet technology has been around for a long time (you can see a thirty-plus year old inkjet printer in action here) but it’s worth mentioning that not all inkjet heads are alike. Most inkjet printer heads operate thermally, which means a flash of heat vaporizes some ink to expel a micro-drop. These heads aren’t very suitable for microfluidics because not only do they rely on vaporizing the liquid, but they also don’t work well with anything other than the ink they’re designed for. Piezoelectric print heads are less common, but are more suited to the kind of work [Kyle] is doing.

Strobe For Wood Turning Makes Inspection Easy

The lathe is a simple enough tool to understand, but requires much practice to truly master. During the turning process, it’s often necessary to inspect the workpiece. This generally necessitates stopping the lathe, waiting for everything to spin down, and then starting again. This can be a major time sink when added up across the full scope of a project. However, the magic of strobes can help.

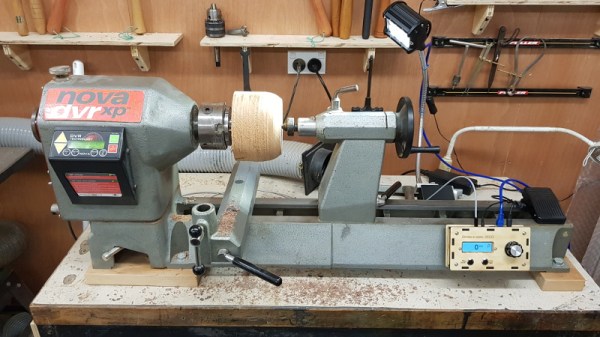
The basics of [Darcy]’s project will be familiar to any hacker who has worked with rotating machinery before. The rotational speed of the lathe is measured, in this case using a reed switch and a magnet. This signal is fed to a microcontroller, which controls the strobing of an LED lamp. By synchronizing the flashes to the speed of the lathe, it’s possible to view the workpiece as if it were standing still. By adjusting the offset of the flashes to the position of the lathe, it’s also possible to rotate this view to see the entire workpiece – all while the lathe remains spinning.

Further photos and videos are available in the Reddit thread. [Darcy] reports that despite his best efforts, he couldn’t quite find a business case for producing the hardware commercially, but the idea was too useful to leave languishing in a notebook. We’d love to hear your ideas on how this could improve turning projects, so be sure to let us know in the comments. If you’re just getting started with turning, it might be worth cutting a test bar to make sure your rig is up to snuff.

LED Illusion Makes Colorful Water Drops Defy Gravity

The 60s and 70s were a great time for kitschy lighting accessories. Lava lamps, strobes, color organs, black light posters — we had it all. One particularly groovy device was an artificial rain display, where a small pump dripped mineral oil over vertical monofilament lines surrounding a small statue, with the whole thing lighted from above in dramatic fashion. If it sounds appalling, it was, and only got worse as the oil got gummy by accumulating dust and debris.

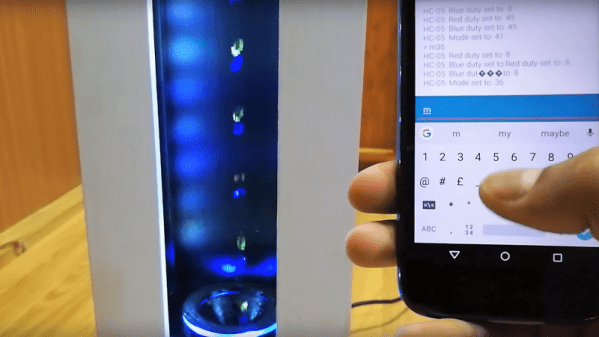
While this levitating water drops display looks somewhat similar, it has nothing to do with that greasy lamp of yore. [isaac879]’s “RGB time fountain” is actually a lot more sophisticated and pretty entrancing to watch. The time fountain idea is simple — drip water from a pump nozzle to a lower receptacle along a path that can be illuminated with flashing LEDs. Synchronizing the flashes to the PWM controlling pump speed can freeze the drops in place, or even make them appear to drip up. [isaac879] took the time fountain idea a step further by experimenting with RGB illumination, and he found that all sorts of neat effects are possible. The video below shows all the coolness, like alternating drops of different colors that look like falling — or rising — paint drops, and drops that merge together to form a new color. And behold, the mysterious antigravity cup that drips up and yet gets filled!

Allowances must be made for videos of projects that use strobes, of course. The effect of this time fountain and similar ones we’ve featured before is hard to capture, but this one still looks great to us.

Continue reading “LED Illusion Makes Colorful Water Drops Defy Gravity”

Stop Motion With The Time Glove

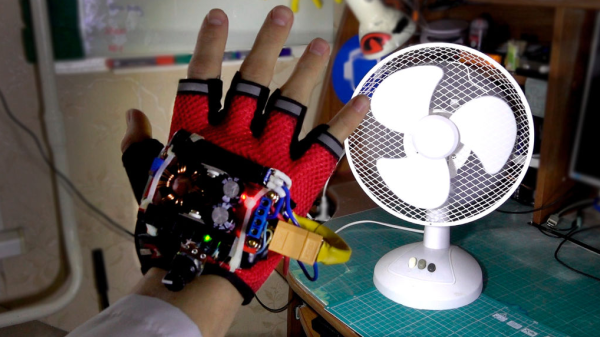
What do you get when you put an ultra-bright LED in the palm of a glove, and strobe it controlled by an accelerometer? A Time Control Glove! In creator [MadGyver]’s own words, it’s “just a stroboscope with frequency adjustment” but the effect is where all the fun is.

The Time Control Glove uses the stroboscopic effect, which many of us have seen used in timeless water drop fountains where the strobe rate makes drops appear to change speed, freeze in place, and even change direction. [MadGyver] made the entire assembly portable by putting it into a glove. An on-board accelerometer toggles the strobe in response to a shake, and the frequency is changed by twisting the glove left or right. The immediate visual feedback to the physical motions is great. The whole effect is really striking on the video, which is embedded below.

Continue reading “Stop Motion With The Time Glove”

Gravity Defying Drips Of A Bike Pump Controlled Fountain

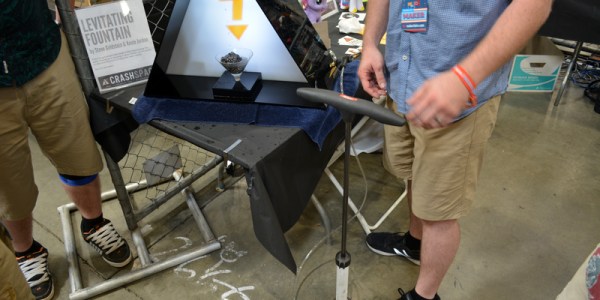
People love to see a trick that fools their senses. This truism was in play at the Crash Space booth this weekend as [Steve Goldstein] and [Kevin Jordan] showed off a drip fountain controlled by a bike pump.

These optical illusion drip fountains use strobing light to seemingly freeze dripping water in mid-air. We’ve seen this before several times (the work of Hackaday alum [Mathieu Stephan] comes to mind) but never with a user input quite as delightful as a bike pump. It’s connected to an air pressure sensor that is monitored by the Arduino that strobes the lights. As someone works the pump, the falling droplets appear to slow, stop, and then begin flowing against gravity.

Continue reading “Gravity Defying Drips Of A Bike Pump Controlled Fountain”

Strobe Remote

Reverse Engineering A Wireless Studio Lighting Remote

If you want to take a photograph with a professional look, proper lighting is going to be critical. [Richard] has been using a commercial lighting solution in his studio. His Lencarta UltraPro 300 studio strobes provide adequate lighting and also have the ability to have various settings adjusted remotely. A single remote can control different lights setting each to its own parameters. [Richard] likes to automate as much as possible in his studio, so he thought that maybe he would be able to reverse engineer the remote control so he can more easily control his lighting.

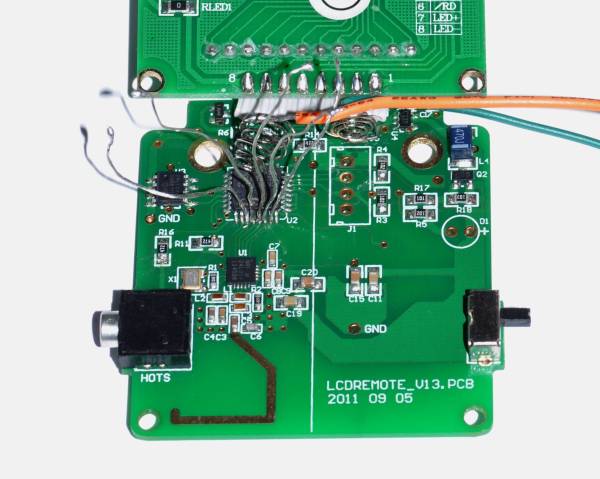
[Richard] started by opening up the remote and taking a look at the radio circuitry. He discovered the circuit uses a nRF24L01+ chip. He had previously picked up a couple of these on eBay, so his first thought was to just promiscuously snoop on the communications over the air. Unfortunately the chips can only listen in on up to six addresses at a time, and with a 40-bit address, this approach may have taken a while.

Not one to give up easily, [Richard] chose a new method of attack. First, he knew that the radio chip communicates to a master microcontroller via SPI. Second, he knew that the radio chip had no built-in memory. Therefore, the microcontroller must save the address in its own memory and then send it to the radio chip via the SPI bus. [Richard] figured if he could snoop on the SPI bus, he could find the address of the remote. With that information, he would be able to build another radio circuit to listen in over the air.

Using an Open Logic Sniffer, [Richard] was able to capture some of the SPI communications. Then, using the datasheet as a reference, he was able to isolate the communications that stored information int the radio chip’s address register. This same technique was used to decipher the radio channel. There was a bit more trial and error involved, as [Richard] later discovered that there were a few other important registers. He also discovered that the remote changed the address when actually transmitting data, so he had to update his receiver code to reflect this.

The receiver was built using another nRF24L01+ chip and an Arduino. Once the address and other registers were configured properly, [Richard’s] custom radio was able to pick up the radio commands being sent from the lighting remote. All [Richard] had to do at this point was press each button and record the communications data which resulted. The Arduino code for the receiver is available on the project page.

[Richard] took it an extra step and wrote his own library to talk to the flashes. He has made his library available on github for anyone who is interested.