[Peter] obviously enjoys getting to work in his wood shop. He also likes turning things into other things. With his latest project, he combines his two hobbies by turning plastic milk jugs into a plastic joiner’s mallet.
[Peter] started out by collecting and “processing” the milk jugs. Milk jugs are commonly made with HDPE. HDPE is a petroleum-based plastic with a high strength-to-density ratio. It’s easy to recycle, which makes it perfect for this type of project. We’ve even seen this stuff recycled into 3D printer filament in the past. The “processing” routine actually just consists of cutting apart the jugs with a razor blade. [Peter] mentions in the past that he’s used a blender to do this with much success, but he’s unfortunately been banned from using the blender.
Next, all of the plastic pieces are piled up on a metal try to placed into a small toaster oven. They are melted into one relatively flat, solid chunk. This process is performed three times. The final step was to pile all three chunks on top of each other and melt them into one massive chunk of plastic.
While waiting for the plastic to melt together, [Peter] got to work on the handle. He put his woodworking skills to good use by carving out a nice wooden handle from a piece of cherry wood. The handle was carefully shaped and sanded with a variety of tools. It is finished with some linseed oil for a nice professional look.
When the plastic was mostly melted together, [Peter] had to get to work quickly while the plastic was still soft. He pried the plastic off of the metal tray and stuffed it into a rectangular mold he made from some fiber board. He used a heat gun to soften the plastic as needed while he crammed it all into the mold. With the mold suitably stuffed, he closed it up and clamped it all shut.
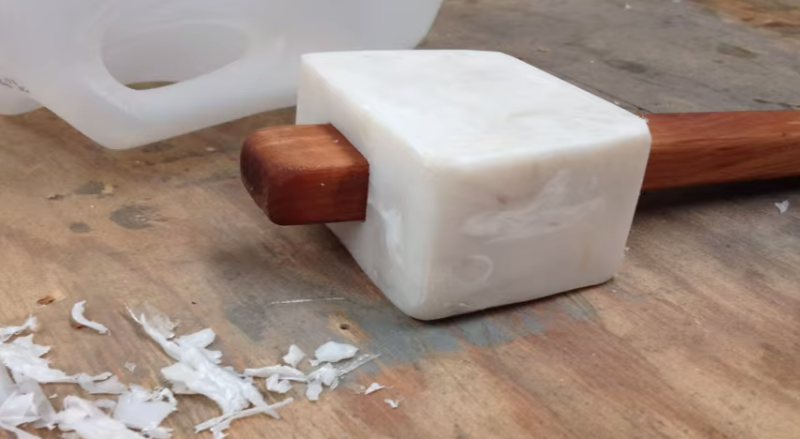
Once the plastic cooled, [Peter] had to cut it into the correct shape and size. He took the solid chunk of plastic to his band saw to cut all the appropriate angles. He then used both a drill press and a chisel to cut the rectangular mounting hole for the handle. The plastic piece was then shaped into its final form using a belt sander. All that [Peter] had left to do was slide it up and only the handle. The shape of the handle and mounting hole prevent the plastic piece from flying off of the top of the handle. Check out the video below to see the whole process.


Over here milk is usually sold in Tetra Pak.
There’s no way to recycle these carton-plastic-aluminum compounds at home.
Over here, Tetra Pak used to employ schoolchildren at tradeshows to demonstrate hydropulping with a kitchen blender to show how easy it is to separate the PE, AL, and paper fibers from these TBA packages. However, I don’t know if any commercial hydropulping recycling plants were ever built to actually recycle the packages.
It would probably take a LOT of packs to get enough PE to make a mallet like this, though.
Most of the time the recyclig effort of products are left in the concept stage, because it’s cheaper to just burn them.
We had the shift from washable PET bottles into single use pet/nylon bottles some years ago, and while they promised the bottles would be recyclable, the actual amount of recycled material possible in the input stream to make the new bottles is actually less than 10%, and the rest is downcycled or simply burned.
The new bottles use a two-layer construction to prevent CO2 or oxygen from passing through the thin plastic shell, and separating the two materials is economically infeasible so only a small portion can be cycled back into fresh bottles without affecting the material properties.
The previous thick-shell PET bottles could be washed and re-used up to 40 times each. The modern thin shell ones skip the expense of collecting and washing, so they’re cheaper despite the fact that they’re 90% disposable and use up 4 times as much material.
I just LOVE using old material for new purposes!
But I was wondering: arent there any fumes when heating this type of plastics?
His earlier youtube about it shows the process well.
https://www.youtube.com/watch?v=kUR6_bQLU-E
As long as you stay under max temp HDPE is stable and will not fume.
Its great you recycle but is worth all the energy spend on this?, how much electricity was spent melting this plastic?
Those white plastic cutting board are usually HDPE, so if you don’t need your raw material any thicker than one of those you could save a whole lot of effort.
Otherwise, pretty cool. Atomic Shrimp on !yt did a similar vid.
Very well done. I love seeing people reuse/recycle in house these materials. Commercial recycling is a joke.. They want you to pay THEM for YOU to provide them raw material that they then sell, that you then have to buy back in the form of a new product.. Doing the same process at home is a great alternative.
>They want you to pay THEM for YOU to provide them raw material that they then sell, that you then have to buy back in the form of a new product..
I have some worn out tires. Pls. send address and if you’re near enough I’ll drive by and dump them on your lawn after midnight.
Build your own mosquito breeding ground! It’s easy!
Mmmm mosquito’s – the protein of the future.
I, for one, welcome our new mosquito-flavored overlords.
Recycling isn’t often worth the effort. If it was, the companies would be paying you to get at the materials.
The fact that you have to pay, or the municipality has to pay the sortig and recycling out of taxes, just means they can get the stuff cheaper elsewhere, so you shouldn’t bother.
Yes, that makes perfect sense, just pile all your waste in the alley and let god take care of it.
Another source of plastic is dissolving styrofoam in acetone, resulting in a putty and then just mold it into whatever shape you want and letting the solvent evaporate. I’ve done this with several projects and the result is very dense and very hard.
This sounds interesting. Do you have any links to examples (pictures of results, instructions?)
http://www.instructables.com/id/How-to-%22make%22-plastic/
http://youtu.be/gbBfykbHlbc
Thank you!
Acetone melting has the issue of shrinkage, because the volume of the plastic goop increases and decreases with the acetone. If you stick it in a mold, it forms bubbles and cavities inside the object.
You can use acetone to glue styrofoam and ABS together by melting the surfaces together.
Then again, if you don’t mind the bubbles and cavities, ABS dissolved in acetone and then dunked in plain water makes for some very interesting results.
Acetone dissolves in water, so kneading acetone-plastic goop in water removes acetone and replaces it with H2O, creating a sort of rubbery droopy dough that can be shaped and squeezed into molds. It sticks to itself, but nothing else. You can shape it by hand, and it bounces like rubber before it starts to harden. When it does, it forms a leathery surface texture due to shrinkage.
It takes several days to a week to cure a 1 inch thick object at room temperature, and I haven’t tried what happens to it in the oven, but if you heat it up under a 40 Watt halogen spotlight it foams up and hardens quickly, which indicates it could fill up molds from the inside.
From the HaD archives: making a trashcan from home-recycled plastics. http://hackaday.com/2014/02/06/plastic-recycling-at-home-promises-a-revolution-in-local-plastic-production/
We used to recycle milk jugs all the time: Boat bailers!
http://ia.media-imdb.com/images/M/MV5BMTcyMDAzMDU0NV5BMl5BanBnXkFtZTcwMjI0OTM1MQ@@._V1_SX640_SY720_.jpg
Didn’t think the image would be so big…
Anyway, i’m going to test this out by pressing into a mold. My plan is to heat the hdpe in a metal pipe with a heat gun then extrude it into a plaster mold. i’ll post results. no timeline yet…
why not just put the entire mold in an oven? and sprinkle ground up plastic inside, as it melts, add more.
Cool, it looks like one of Thor’s baby toys!
Watch for cracks. One swing and off it comes. It’s not thoroughly mixed.
Awesome content, but @Rick, please proof-read it before posting, the occasional random word really interrupts the flow of reading a good article.
Great inspiration. I tried myself to heat up milk jug flakes directly into a mold and compact it down with every step: https://youtu.be/Hk4_F1VOSwI
Temperature is important!