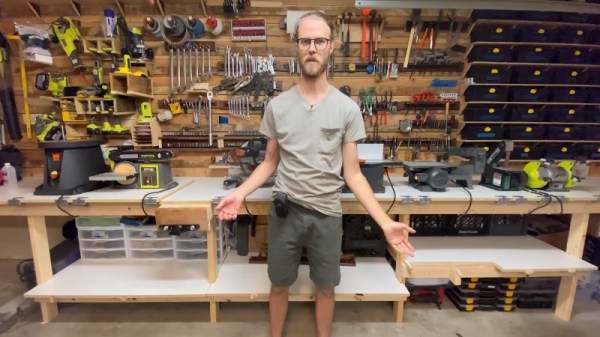
In a recent video, [SomeSkillStudio] created a tidy tool storage system for their slim garage workbench. We have seen the “five knuckle” 270 degree hinges used here before and knew they’d enable some cool hacks. Here you’ll see how he puts this unique type of hardware to work building a densely packed work surface. For anyone who’s set up shop in a garage that’s somehow also supposed to still regularly host vehicles, you’ll know how important it is to have a place to put everything away and make it easy to do so.
The video has several great tips on making sure everything fits together, something key for anyone reproducing this with their own tool collection. If you have even less space, we have some great past workshop builds from portable, to tiny, to elaborate. Even if you’ve already established a place to work, we have tips on organizing your shop, giving each tool a home in a shadow board or across an infinite grid. Clearly, making a work space is one of our favorite kinds of projects.
Sometimes a kid wakes up on Christmas morning and runs downstairs, only hoping to see one thing: a shiny new wind tunnel. This past December, that’s exactly what [SparksAndCode]’s son found under beside the tree, complete with a bag of scarves, ping-pong balls, and other fun things to launch through it (in the name of physics, of course).
The real story here starts about a week before Christmas, when [SparksAndCode]’s son was enthralled by a similar device at a science museum. At his wife’s suggestion, [SparksAndCode] got to work designing a and building a wind tunnel with hardware-store parts, his deadline looming ahead. The basic structure of the tunnel is three rods which support plywood collars. The walls are formed by plastic sheets rolled inside the collars to make a tube. Underneath, a Harbor Freight fan supplies a nice, steady stream of air for endless entertainment.
After finding a few bugs during his son’s initial beta testing on Christmas morning, [SparksAndCode] brought the wind tunnel back into the shop for a few tweaks and upgrades, including a mesh cover on the air intake to stop things from getting sucked into the fan. The final result was a very functional (and fun!) column of air. Looking for even more function (but not necessarily less fun)? We’ve got you covered too with this home-built research wind tunnel from a few years back.
Raise you’re hand if you’ve ever soldered directly to a battery even though you know better. We’ve all been there. Sometimes we get away with it when we have a small pack and don’t care about longevity. But when [Robert Dunn] needed to build a battery pack out of about 120 Lithium Ion cells, he knew that he had to do it The Right Way and use a battery spot welder. Of course, buying one is too simple for a hacker like [Robert]. And so it was that he decided to Build a Spot Welder from an old Microwave Oven and way too much mahogany, which you can view below the break.
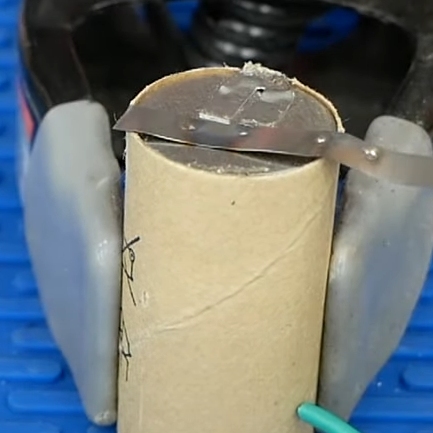
Spot Welding leaves two familiar divots in the attached tab, which can be soldered or welded as need.
For the unfamiliar, a battery spot welder is the magical device that attaches tabs to rechargeable batteries. You’ll notice that all battery packs with cylindrical cells have a tab with two small dimples. These dimples are where high amperage electricity quickly heats the battery terminal and the tab until they’re red hot, welding them together. The operation is done and over in less than a second, well before any heat damage can be done. The tab can then be soldered to or spot welded to another cell.
One of the most critical parts of spot welding batteries is timing. While [Robert Dunn] admits that a 555 timer or even just a manual switch and relay could have done the job, he opted for an Arduino Uno with a 4 character 7 segment LED display that shows the welding time in milliseconds. A 3d printed trigger and welder handle wrap up the hardware nicely.
The build is topped off by a custom mahogany enclosure that is quite a bit overdone. But if one has the wood, the time, the tools and skills (and a YouTube channel perhaps?) there’s no reason not to put in the extra effort! [Robert]’s resulting build is almost too nice, but it’ll certainly get the job done.
Of course, spot welders are almost standard fare here at Hackaday, and we’ve covered The Good, The Bad, and The Solar. Do you have a battery welder project that deserves a spot in Hackaday’s rotation? By all means, send it over to the Tip Line!
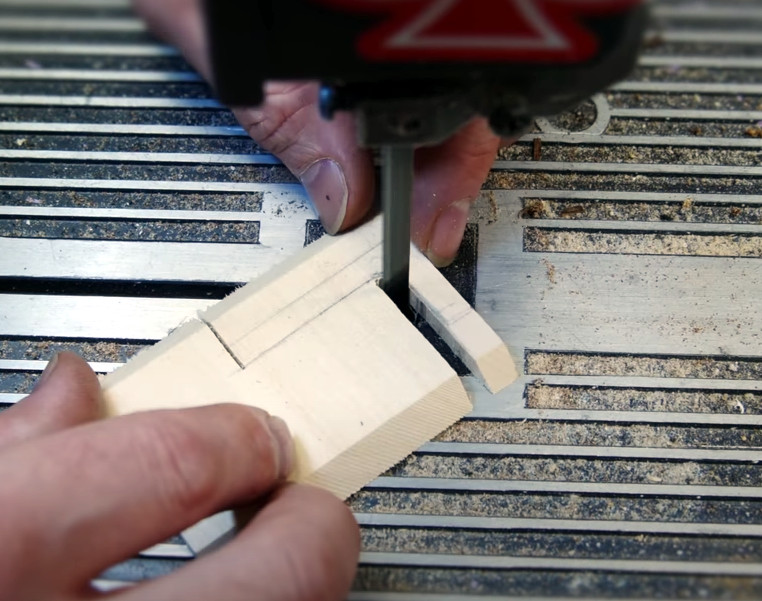
The first video assumes you’re a lumber neophyte, and goes over topics such as the different species of wood you’re likely to find at the hobby shop, proper sanding technique, and the differences between cutting with and against the grain. Some of the different cutting tools you can use are also covered, ranging from the humble hobby knife to the band saw. As always, [Eric] sprinkles the video with tips and tricks gained from his considerable professional experience, such as using some glue and a bit of sawdust to fill in any gaps left behind by an uneven joint.
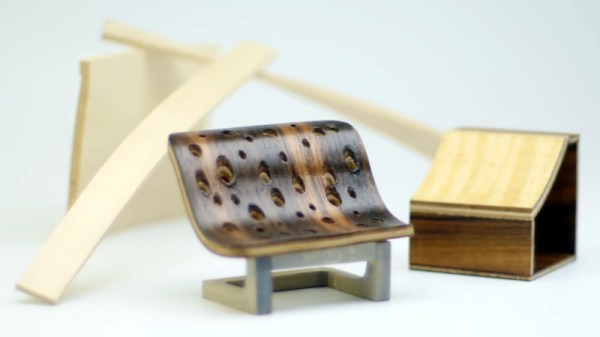
In the second video, things start getting more advanced. [Eric] demonstrates how you can create custom laminates, and how wood can be permanently bent into arbitrary shapes with sufficient steam and clamping pressure. By combining these new techniques with the basic concepts covered in the first video, surprisingly complex shapes can be formed with minimal effort.
[Eric] previously put together a similar series of videos on working with acrylic, a material that’s arguably far more familiar to the Hackaday readership. But whatever material you use, the takeaway message from this series is clear: get the right tools, learn the techniques, and professional results are well within your reach.
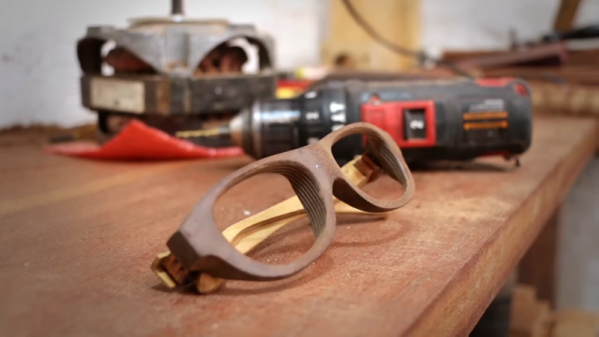
Most glasses and sunglasses on the market make use of metal or plastic frames. It’s relatively easy to create all manner of interesting frame geometries, tolerances can be easily controlled for fitting optical elements, and they’re robust materials that can withstand daily use. Wood falls short on all of these measures, but that doesn’t mean you can’t use it to make a beautiful pair of glasses.
ZYLO is a company making wooden eyewear, and this video from [Paide] shows the build process in detail. Modern tools are used to make things as efficient as possible. Parts are lasercut and engraved to form the main part of the frames as well as the temples (the arms that sit over the ears to hold them on your face). A special jig is used to impart a curve on the laminated wood parts before further assembly is undertaken. Metal pre-fabricated hinges and screws are used to bolt everything together like most other modern sunglasses, but there’s significant hand finishing involved, including delicate inlays and highlighting logo features.
In contrast, Manuel Arroyave works very differently in the creation of his Cedoro glasses. Sheets are first laminated together, before the shape is roughed out by a special horizontal axis milling setup. Even small details like the hinges are delicately hand-crafted out of wood and fitted with tiny wooden dowels.
It goes to show that there’s always more than one way to get a job done. We’re tempted to break out the laser cutter and get started on some custom shades ourselves. Perhaps though, you’re too tired to put your sunglasses on by yourself? Nevermind, there’s a solution for that, too. Video after the break.
Dowels are a useful woodworking technology making it easy to connect several pieces of timber, particularly with the aid of adhesive. However, depending on where you live, it can be difficult to come by a wide variety of stock. This is particularly important if you’re concerned about appearances – cheap pine dowels could spoil the look of a delicately finished hardwood piece, for example.
[Pask] notes that there are several methods to use the dowel plate. Hammering the wood stock through the holes works best for hardwoods, while fitting the square stock into the chuck of a power drill and forcing it through while spinning gives a better finish on softer woods. There are also useful tips on how best to produce dowels, with notes on strength and grain orientation.
It’s a useful tool to have in your workshop, and means you can turn just about any wood into dowels for your woodworking projects. If you’re fresh to the world of wood, worry not – we’ve got the primer to get you started. Video after the break.
These days most have come to think that if you want to make a complex 3D object with all curved surfaces then a 3D printer is the only way to go. Many have even forgotten that once such things could be hand carved. [JEPLANS], on the other hand, is a master at making these objects using only a scroll saw as he’s done with his latest, a miniature camel cut from a single block of maple.
His process has a lot of similarities to 3D printing. He starts with a computer drawn design, in this case for the camel’s front and side. After cutting it out, he peels off the unwanted pieces and the camel emerges like magic from the block. But he didn’t like the amount of manual work he’d need in order to improve it further so he modifies the design by adding a top view, iterating just as you would with 3D printing. But after cutting that out, he finds he’d damaged one of the legs. And so he cuts out a new one but only after making one more design change, this time adjusting the camel’s head position. And with that result he’s satisfied. Check out his painstaking and somehow familiar process in the video below.