In case you’re not aware, you can hop on your favorite online Chinese electronics retailer and buy a hundred Watt LED module for less than $10 USD. That’s an enormous amount of retina-burning fun, but how do you turn it into a flashlight? DIY Perks shows you how.
The main issue when dealing with these large LED modules is heat. Even though there’s many times more efficient than incandescent bulbs per Watt, that’s still an incredible amount of heat that needs to be removed. There’s a piece of equipment you might have sitting around that does just that: the lowly CPU cooler.
If the CPU heatsink and fan are big enough, the LED module can be attached right to the bottom. With a DC to DC boost converter modified so the entire flashlight can be powered from a LiPo cell, this unit is completely portable, ready to take camping, or even for some very interesting videography.


Heatshrink and through hole soldering. Concepts not present in this video.
Or sewing.
and snapping off that TO220… i’m not okay with this.
A lot of these articles on Hackaday that i have seem/watched already
Well sit back and let HaD do your browsing for you. You’ll save loads of effort.
Um… is that a *subliminal* product placement at the 18:25 point?
yes, u needto get bbq sauce…GO now!
“From a LiPo Cell”
Should be LiPo Battery if you want a runtime longer then 10 minutes or so..
What a fine example of how *not* to solder electronics.
Also, the guy is clearly British, says “Aluminium”, but calls this a “flashlight”. It’s a torch, mate!
srsly? Does he really solder 5cm wires between the FET/Diode and the PCB of the SMPS?
I mean.. somewhere (properly in china) an electronic engineer had spend a lot of time to optimise the length of these critical connection!
Lol, yes, wildly inappropriate.
Notice on the bottom of the PCB at 3:44 the ‘extra’ track length added. They are intentionally adding leakage inductance. Might be a resonant or quasi resonant converter.
End result, might not be resonant any more so the loss will sky-rocket. It’ll get hotter… And it’ll be very EMC baaaaad.
In the context of SMPS, the serpentine routing intentionally cancels some of the inductances, so they might be adding a very low value of resistance. Usually that’s for current sensing in current mode designs, but those are some really long tracks.
But then again, I have seen noobs mistaken the use of serpentine for high speed designs here on HaD because they have seen and copied it not understand the WHY and WHICH part.
‘Says’ Aluminium? Maybe that’s because it IS Aluminium!
http://www.rsc.org/periodic-table/element/13/aluminium
http://www.grammarphobia.com/blog/2008/06/aluminum-vs-aluminium.html
“In 1808 Sir Humphry Davy, the British chemist who discovered the metal, named it “alumium.” With just one “i” and an “ium” ending, it straddled the two competing versions we have today.
Four years later, however, Davy changed his mind and gave the metal the name “aluminum” (yup, the one-“i” American version). In his book Elements of Chemical Philosophy, published in 1812, Davy wrote, “As yet Aluminum has not been obtained in a perfectly free state. “
But later that same year other scientists decided “aluminum” didn’t sound sufficiently Latin, so they began calling it “aluminium.” Here’s a quote from the Quarterly Review: “Aluminium, for so we shall take the liberty of writing the word, in preference to aluminum, which has a less classical sound.” “
U.S.A! U.S.iA! iU.S.A! ¡EE-UU!
Hey, the inventor said it was the four-syllable word with only one I — I feel vindicated. It’s as if we each have permutations, dialects if you will, of the same non-Platonic language.
I’m sure some folks in Belfast have scars on their bodies for not saying things in a very British way. We will honor them by leaving the U off honor and pronouncing ‘herbs’ as if it were from French (oh wait, it is… malheursement).
Meanwhile, i watched this vekakte video at least a month ago. It felt so ridiculously elaborate for a flashlight, but it lacks the focal tools of a filming light (such as a Fresnel lens). Then again it’s built, so it’s more than I’ve done about the same matter.
By the way, that’s pronounced “fruh-NELL”. You see them on old lighthouses.
You really can’t say that American and British English are different dialects, they are at most accents.
There are almost certainly more people in England with scars for not saying things in an (as you say) British way, there was a sustained attempt to quash regional accents during the twentieth century.
American’s have entree as their main course, not as a dish to enter the meal. Any allusion that they have any grasp of language is moot.
If the words are different, that’s a dialect. If the way you say the words is different, that’s an accent.
It’s not the same metal: http://fakescience.tumblr.com/post/67385030474/is-it-aluminum-or-aluminium
In Britain we call it a torch, could be worse, he could be American. and its aluminium not aloominum.
IDEA NOT IDEEEE-AARRR
Let’s bring some colour to this page and list some of our favourite differences.
Let’s bring some color to this page and list some of our favorite differences.
A torch is fire on the end of a stick. Flashlight is an apt name for something that will wxplode with a flash of light…
Watching eevblog I see Dave, who is Australian pronounce it Aluminium also, but I don’t recall if he says flashlight or torch. Maybe he’s from Australia?
I’m Australian. We say “torch” too. I think it’s common in Commonwealth English.
DIY Perks -> [DIY Perks]
lol. Well the British accent gave it away for me. He’s definitely NOT Australian.
I got one of those 100W LEDs, a heatsink and driver the other week. I don’t know if it’s because I already own a few fairly high powered flashlights, but I was not that impressed by the output. I was also a bit bummed out that the adjustable driver didn’t really go all that low before dropping out. All in all, mostly a waste of money in my case.
Hmm the “spot” light is really not a spot light (It’s flood like hell :D )
I would recommend instead to use Cree XHP70 on Sinkpad (direct copper STAR) and of course to use regulator with current adjustment, not voltage…
I really wish these guys playing with batteries and LED’s would do something with optics.
I want to see that 100W led have a 20 degree beam spread lens assembly in front of it.
If your flashlight can’t set things on fire, it’s wimpy.
I have done some experiments with optics, by using the same kind of lens as in the video and a Fresnel lens I managed to get a little over 80000 lux a meter from the fresnel.
http://slashhome.se/p/gallery/?g2_itemId=10380#g2
Look up the candlepower forum – they work with lights and optics, these flashlight hobbyists.
Uh… IR LED? LEDs tend to be monochomatic. Many w visible spectra may be poor as a ‘torch,’ (match.)
Wow, just wow. Wiggle the ICs back and forth until they break off and solder on extension wires. Use solder for the mechanical strength even though there is a through hole at the pad you’re sticking the wire to. It’s cool, the guy built something he wanted, but to put out a video with so many electronics 101 level defects is just sort of sad. To teach people to do things wrong is a shame.
So, did you make you a perfect video..? Oh wait..
Stan may not have made the perfect video, but he has some nice articles on his website.
I probably could have worded my comment a bit better. My concern is that when playing with battery packs capable of high currents (particularly in the case of a short) construction should be done with a bit more care. It’s a cool project, just for some reason folks tend to overlook the need for care with battery packs. If I used the same methods as in the video for a project using 110VAC, even at low current, folks would properly raise an eyebrow at a minimum.
@Dave – What a useless comment. Stan points out several faulty techniques. You can disagree with his opinion but it’s still a valid comment. You can critique someone elses work without actually doing the work yourself. Teachers do it every day. It’s like the bullshit open source fanboys spew when they get criticized and say “If you don’t like it, write (code) it yourself”. If people don’t want to be reviewed by other people – then don’t publish the work/project/code on a public forum
This.
Thanks, [vonskippy]!
had to get a couple. now to see who i can blind
There are some minor mistakes and I’d agree about the heatshrink / soldering comments but…..
It’s clearly aimed at people who don’t have a BEng already – it’s a youtube instructional video.
Bearing that in mind – he uses cheap and easily found materials and modules, combines a bit of module hacking, electronic and mechanical elements and produces something useful. The video is well presented, looks professional and he explains what he’s doing at every stage.
It’s exactly the kind of project that would get someone into more advanced work – from that perspective I think it is a very good piece of work, certainly deserving of better than the usual “aren’t I clever spotting a trivial problem” comments that plague this site.
+1
the title says 100w, when you are meaning 1000w.
Thanks, fixed.
100W was correct. Now the title is wrong. He uses a 100W led. You cannot build a 1000W led flashlight using a 100W led.
The optical output is only equivalent to that of a 1000W incandescent light bulb.
Don’t just copy. Think!
Besides, I don’t think powering a led with a battery is very exciting or interesting to anyone following this site.
Fixed it back to what I originally wrote.
:/
Julian did it almost in 2013
http://www.youtube.com/watch?v=CxnP-6EZ3ZQ
http://www.youtube.com/watch?v=CIBIqaeiE2M
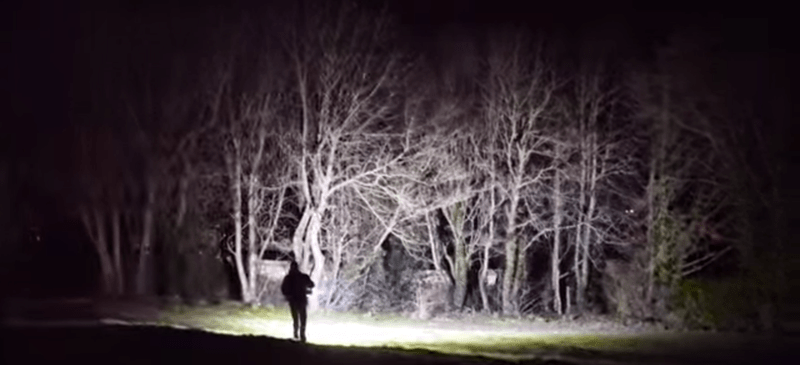
Hey, is that Big Foot’s glowing eyes between the trees on the right?
Good catch! He will be featured in a future episode, as he is working on a touch screen for furry hands.
I ordered the parts last week so I could build one. I’d love for someone to make a more competent video instead of just complaining about this one. I have the soldering skills to make this a nice reliable project but I don’t have the knowledge to select better components.
Will buy it when I see it in the Hackaday store.
Have to say it is a very well made DIY instructional video.
Some hints here. Soldering for beginners is usually done with a pencil iron which never works for big wire connections. Some times you need a big gun. Not one of those “tool shop” brands. Weller or Wen, 100-140 watts two heat levels.
Tape starts with T and that goes with trouble. It’s temporary, especially on a hot surface.
Learning shortcuts like pocketknife wire stripping and bending parts till they break off is real poor work. These tricks cause later failure more than most.
“pocketknife wire stripping”
Frickin Heretics! Everyone should know The Bugs Bunny Technique. Nibble on the wire with your incisors till you cut through the plastic then place the scored plastic wire between the gap in the front teeth and pull slowly.
Protip would be don’t do more then 1 1/4 or 3 cm at a time otherwise you’ll be asking for the tooth fairy to visit.
Making a 2 RJ45 endpoints is okay-ish in a emergency. Also not recommended to make it habit per day.
Copper is ok, Alum is meh. Braided Steel will hurt.
I knew a mechanic that stopped smoking because he heard it would ruin his teeth. He took up sunflower seeds. Ironically he had a gap on both front incisors from the seeds themselves after 2 years.
I notice theres no current limiting resistor in this build(I’ve got half the parts to build this, and the rest are on the way), I was wondering if it needs a big resistor ballast for the LED or anything in the circuit side of things to improve this build? I know alot of hack a day readers are really knowledgeable about electronic design
There’s a guy in the comments that recommends using one of these for current regulation. I bought one and it’s a lot bigger then the one he uses in the video.
http://tinyurl.com/o77mcmg
This is a nice instruction video, come on guys don’t complain so much! :)
Here is another build (running only at 20W according to author) but does not need the fan: http://www.thingiverse.com/thing:841948.
And since vision is “logarithmic” a factor of 5x power is not that big of a deal as it looks prima facie.