Welcome back to part II in this ensemble of techniques with laser-cut Delrin. Thanks for many of the great insights along the way in the comments. In this guide, I’d like to go over some of the more immediate kinks that come to mind when getting started with this material.
Sourcing Delrin Sheets
When it comes to shopping, there are a variety of suppliers to choose from, but there are a few key words and thoughts to keep in mind.
Names
First, Delrin, is the “brand name” that refers to the Acetal homopolymer. Variants may also be labeled, acetal or acetal homopolymer. Delrin’s natural color is a soft white, but dyes can take it into a range of other colors. Black and white are, by far, the most common, though.
Tolerances
In the previous guide, all of the examples were cut from a small range of sheet thicknesses (0.0625[in], 0.09375[in], and .125[in]) sourced from OnlineMetals. As the thickness of the sheet increases, the tolerances on the thickness rating will also become more loose. You might buy a .125[in] plate and find it to be .124[in] in some places and .126[in] in others. If you purchase a .250[in] sheet, however, you’ll find that it may vary as much as .126[in] oversize though!
Buy it Flat
Despite McMaster-Carr being my go-to solution for one-off prototypes where rapid build iterations trump BOM cost, I don’t recommend purchasing Delrin from them as their sheets don’t have a flatness rating and often gets shipped bent in (oddly sized) boxes. (Seriously, has anyone else gotten a few oddly-sized parts in a gigantic McMaster-box before?)
Internal Stresses
Extruded Delrin has internal stresses built up inside of the sheet. There are a variety of reasons why this could be the case, but my biggest hunch is that the extrusion process at the factory results in different parts of the sheets solidifying at different times as the sheet cools, possibly causing some parts of the sheet to tighten from the cooling before other gooier sections have yet to finish cooling. What this means for you is that as your part gets lased out of the sheet, you’re, in a sense, relieving that stress. As a result, the part that you cut–especially for thin sheets–may come out of the laser cutter slightly warped.

Assuming that the sheet put into the laser cutter was flat in the first place, then you can guarantee that features like holes and pockets will be the correct relative distance to each other when the part is spread out flat. To flatten out parts in their final application, I’ve come up with two solutions.
Standoff-Stacking
 Because the relative location of the holes is precise, you can bolt plates together with standoff to flatten them out.
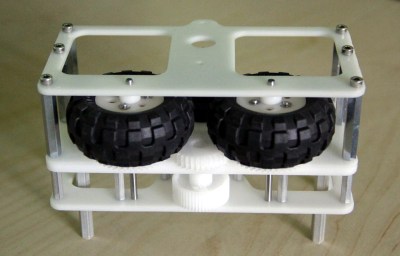
This is the method that I used in the GameCube-bot-2’s chassis. With multiple standoffs though the width and length of each piece the chassis as a whole pulls all sheets flat.
“Pin-Assignment”
Alternatively, you can also embed holes for spring pins and sandwich two plates together such that the pins hold both plates flat relative to each other and cancel their warping. Spring pins embedded in Delrin can also serve a dual purpose in that you can “double-up” your Delrin plates for thicker geometry. Below, I doubled-up on some eighth-inch plates to better accommodate a flanged bearing.
The Dreaded Taper
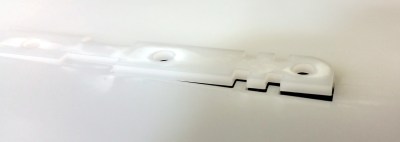
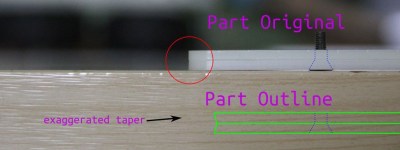
Alas, for CO2 lasers in the 40-to-60-watt class, we’re pretty-much stuck with this feature appearing on the edges of all our parts. By “taper,” I’m referring to the beveled edges that appear on Delrin (and some other) laser-cut parts. This beveled edge is a characteristic of the way the laser cut lases through material.

If we imagine the beam focusing into a small dot in the same way we focus the sun’s light through a magnifying glass to burn paper, it’s not too difficult to imagine the “coned” shape that the collimated light takes on as it exits the lens. beyond the point of focus, this cone fans out into another cone. This “double-cone” moves through our part cutting material. Depending on where we focus the lens prior to cutting will determine the shape of the lens–unless we cut our part in multiple passes with different focal points per pass. In the spirit of repeatability, I’ll opt for an alternative workaround.
Getting around this issue entirely is nearly impossible, so it’s usually easier to design around it. Press-fit parts that rest completely inside the lased pocket, such as bearings, are usually experiencing a tighter squeeze on one end, rather than the other. Hence, they’re likely to pop out. To get around this issue, you can either opt for their flanged counterparts or sandwich two Delrin plates together with opposing beveled edges to better hold the part inside.
No Glue!
Delrin is well-know for being chemically-inert–so much so that it’s nearly impossible to find a glue that bonds Delrin to another surface! While there’s certainly an opportunity to try melting it together in this case, I’ll say, for now, that gluing Delrin is out-of-the-window of possibilities for reliable techniques–especially in models that need to function in some way besides looking nice.
(Re)Sizing Holes with Tight Tolerances
Sometimes, holes need to be just the right size to accommodate the tight tolerances of metal-to-Delrin press-fits. When that’s the case, we can capitalize on the laser cutter’s “stronger parts” and touch up the rest manually. In this case, the laser cutter excels at achieving tight tolerances between relative dimensions, such as the spacing between holes. On the flip-side, the laser cutter doesn’t excel at nailing the exact dimension of those holes with tight tolerances. Consequently, we can undersize our holes, lase them out, and ultimately bring the holes to their final dimension with the properly sized drill bit or reamer. It’s a small bit of extra work, but it’s a guarantee that certain holes can meet tighter tolerance constraints.
Store it Flat
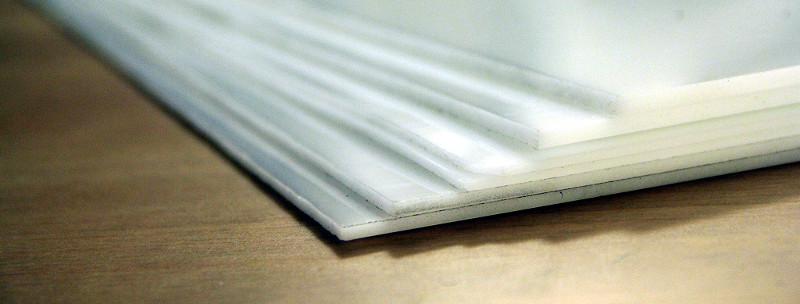
Delrin tends to warp under its own weight. If stored on end, it will develop a bend over time that makes it very difficult to cut evenly in a laser cutter since the beam is focused at a fixed distance from the lens. To keep problems with gravity out of your Delrin side-projects, I’d recommend storing sheets flat.
Only the Beginning
Thanks for tuning in for this two-part Delrin special. Don’t forget that while these techniques might lay out a foundation, there’s certainly many more undocumented tricks worth trying with this material–and that’s where you come in! If you make any discoveries on your own, be sure to keep us posted in the comments. As a community, we can keep refining our knowledge-base as we keep rolling out the projects.


I don’t know much about laser cutters in general or the CO2 ones you speak of. However, is there no way to refocus the beam and “cut” the part a second time to possibly level our the bevel?
The only way I can think of is that you would have to angle the beam, such that one side of the light cone is flat and the focus point is past the bottom of the material. This probably isn’t done in many cases though, and would require you to know which side is the ‘good’ edge and which is the scrap edge.
There are water jet cutters with a 2 axis tilting nozzle to push all the taper to the waste side of cuts. Why not do it with a laser? The tilt could be done with a modification to the magnetic lens suspension system used in optical disc players.
You can use a lens with a longer focal length to make a sharper cone. It’ll still be a cone but with a less-angled kerf.
Also, a longer focal length will make a bigger spot size, meaning that the cut valley will be wider. Not a problem, but the kerf has to be accounted for in the cut.
Acrylic has a “focus” property where melted acrylic acts as a lens for unmelted work below it. (According to a paper I read.) Depending on the speed of your cut, you can sometimes see the cutting action swept behind the laser spot as it moves – when the laser stops, the cutting action catches up.
This is why cutting a thick piece will sometimes show the features “spiral” – down the shank of a gear, for instance. The laser is cutting the next tooth while the melt is behind it on the previous tooth. You can get around this with carefully selected cutting power and speed.
This comes up when making pieces that fit together, such as jigsaw puzzles
I suspect Delrin doesn’t have this feature, so the cutting operation would be completely dropcut, and always have the angle.
The best way to deal with this is to account for it in the design. Most of the time edges don’t have to mate with anything so it’s not a problem. If two pieces have to fit together, cut one from the top and the other from the bottom so that the kerf angles match up.
Do you mean making a 50% cut and then flipping the part to finish the cut?
I think he’s saying to cut part (A), flip the stock over, cut part (B) so that the mating edges won’t have a valley between them.
ie: edge of (A) —> / / \ / <—(B)
Wow… comment system killed my ASCII art diagram…
(A) —} / / {—(B)
vs
(A) —} \ / {—(B)
On thicker pieces, one way to reduce the bevel angle is to do a second pass with a different focal point, thereby evening out the cut.
Unfortunately this often takes trial and error, even on materials you have used before.
For perfect edges I have left extra material and used bench belt-sanders, and then polishing wheel.. It works well for acrylic, at least, but is time consuming.
Could you mod the cutter so that the focal length oscillated between two points at a high rate to get the same effect as multipassing?
Hm.. Possibly – though the speed would have to be pretty high – perhaps something like a pair of solid state electrical shutters, focusing lenses, and beam splitters with different path lengths…
I dont think the improvement with the ‘change the focal point’ technique is good enough to justify these efforts, the bevel is pretty much one of the cons to laser cutting – and it can be pretty bad on thicker materials (around 10mm thick).
or just use some sandpaper it’s really easy to compensate for sandpapering so it’s flat where it’s needed.
To refocus the beam you would need to move the head up and down which there is no provision for in most mechanisms and certainly no way to do it programmatically. You can manually move the bed up and down for each re-cut but this is where the repeatability thing comes in as even if the piece is held down the part you have just cut is now free of the sheet and can move as you lower the bed … Total PITA
Or implement an electro-refractive component in the optical path.
Informative article. I looked at a few prices (http://www.onlinemetals.com/merchant.cfm?pid=21228&step=4&showunits=inches&id=970&top_cat=181) and Delrin still seems pretty expensive. Is there anything between this excellent material and acrylic from a price standpoint that can still give us a bit of toughness?
Plywood?
I’m experimenting with PVC. I’ll let you know. I’m using a CNC mill, not a laser though.
Can’t use PVC in most laser cutters. The chlorine content turns into hydrogen chloride gas in the cutting process, and that ruins optics, corrodes mechanical parts, etc etc. Epilog and FSL won’t even service lasers that show signs of chlorine attack.
PET (polyester) is a decent midpoint between acrylic and delrin in terms of strength, but it doesn’t cut anywhere near as nicely. Thin sheets only.
I’m using PETG and it works very well and makes a good Polycarb subsitute, not got a lot of it though unfortunately.
Delrin makes a better job for stuff that doesn’t need to be see through though.
As Macw as already stated PVC gives off poisonous fumes and Poly carbonate just shrivels up and sets on fire (think it’s poisonous as well )
Try cheap cutting boards, athough it’s a gamble whether you’ll get acetal plastic, high-density polyethylene, or plain polyethylene. HDPE shares similar characteristics with Delrin, although I believe it’s more prone to melting when laser cut.
HDPE is a huge mess to cut in anything thicker than about 1mm. It melts rather than vaporizing, and it tends to hold enough heat that the parts fuse back together after the laser has passed by. The only success I’ve had cutting it is using many, many low-power passes with plenty of time for the material to cool in between.
Acetal plastic is much cheaper, as stated in the article…
http://www.amazon.com/Acetal-Copolymer-Opaque-Standard-Tolerance/dp/B00CPRAC9U
Delrin IS Acetal…
It’d be really good to mention in here that laser-cutting POM produces formaldehyde. Once, in our shop, someone started to cut some Delrin pieces and it turned out that the ventilation system had a small leak…suffice it to say, everyone had to evacuate with burning eyes and noses. Don’t attempt this project without VERY good ventilation.
Could you use a heat gun or hair dryer on cut pieces to make them flatten out again?
Can you sand, file, or chemically smooth the beveled edges?
Most pieces will be small enough to give a light bake in the oven on a tray. Don’t let the misses catch you.
As for the beveled edge, a belt sander with table can take care of any but you’ll need to be careful to not wash out any features or dimensions.
I actually use HDPE cutting boards, and cut with normal woodworking tools. They are locally available, cheap ($15 for 2’x3′)
& come in various colors & thickness. Gluing is a challenge, but I seem to remember the same for delrin. I used a 2 part krazy glue type stuff, it held till it got wet. You could certainly make that thing in the picture. Someone with a lasercutter should give it a try….
Some of those cutting boards are Nylon as well.. Which makes sense with the effect liquid had on epoxy for you.
When I built my first CNC machine some 10 years ago, my parents suggested cutting boards for building some of the parts, instead of the PVC sheet I was struggling to find – the nylon cutting board worked very well and I got it for like $10!
It’s probably worth mentioning that if you have to work around the taper problem, you can waterjet Delrin fairly well, quickly and highly accurately.
I’m by no means an expert in plastics, but it seems you could solve most of the bending issues by using a heated bed that softens the material prior to cutting, keeping it relatively flexible while it cuts. Then, post-cutting, you cool the bed uniformly and slowly and your pieces come out just right. That’s essentially what 3D printer heated beds are for, anyway.
Of course, if the material delaminates or changes heavily when melted that wouldn’t be a good idea. Like I said, I’m not familiar with it.
I’ve heard from my local laser cutting folks and from a number of online sources that fire is a serious problem with Delrin. Can you address how to deal with that issue?
Cut Delrin all the time with my Epilog Legend EXT 75 watt laser. No fire or fume concerns. Usually by from McMaster or a local Tap Plastics.
I don’t understand the comment “On the flip-side, the laser cutter doesn’t excel at nailing the exact dimension of those holes with tight tolerances.” I can laser a hole to within 0.001″ with minimal effort. It only takes understanding a few things: focal length accuracy, laser kerf width, and the “thickness to angular offset” ratio (the angled edges that vary by material thickness). It does take testing and evaluation with various settings and materials to obtain that understanding, but once you have it, the data is golden.
As for gluing Delrin, you can raster a fine hatch pattern somewhat deep to create a surface like 120 grit sandpaper, clean it, and then use adhesives designed for imperfect surfaces to gain a “usable” bond. Still haven’t found a “permanent” bond solution other than lasering holes and using rivets.
Delrin -Burns really well and makes toxic gases. A fire at work has us looking it to doing away with it in a very expensive manner because it will have to be replaced with something that doesn’t ignite so readily and release toxic fumes…
Delrin can be glued. 3M makes an adhesive that does a superb job: Scotch-Weld Structural Plastic Adhesive DP8005. It can join many low surface-energy plastics. See https://www.3m.com/3M/en_US/company-us/all-3m-products/~/3M-Scotch-Weld-Structural-Plastic-Adhesive-DP8005/?N=5002385+3293241357&rt=rud