Defocused Laser Welding Fabric Proves There’s Many Ways To Slice It

Laser cutters are certainly a Hackerspace staple for cutting fabrics in some circles. But for the few fabrics derived from non-woven plastics, why not try fusing them together? That’s exactly what [Dries] did, and with some calibration, the result is a speedy means of seaming together two fabrics–no needles necessary!

The materials used here are non-woven goods often used in disposable PPE like face masks, disposable aprons, and shoe coverings. The common tool used to fuse non-woven fabrics at the seams is an ultrasonic welder. This is not as common in the hackerspace tool room, but laser cutters may be a suitable stand-in.

Getting the machine into a production mode of simply cranking out clothes took some work. Through numerous sample runs, [Dries] found that defocusing the laser to a spot size of 1.5mm at low power settings makes for a perfect threadless seam. The resulting test pockets are quite capable of taking a bit of hand abuse before tearing. Best of all, the fused fabrics can simply be cut out with another pass of the laser cutter. For fixtures, [Dries] started with small tests by stretching the two fabrics tightly over each other but suggests fixtures that can be pressed for larger patterns.

It’s great to see laser-cutters doubled-up as both the “glue” and “scissors” in a textile project. Once we get a handle on lasering our own set of scrubs, why not add some inflatables into the mix?

Getting Kitted To Teach Your First Hardware Workshop

I was always a sucker for art classes in my early days. There was something special about getting personal instruction while having those raw materials in your hands at the same time. Maybe it was the patient voice of the teacher or the taste of the crayons that finally got to my head. Either way, I started thinking: “I want to do this; I want to teach this stuff.”

Last year at Hackaday Superconference I got my chance. Hardware workshops with real hardware were so rare; I just had to bring one to the table! What follows is my tale of joys and woes bringing together a crew to take their first few steps into the world of cable-driven animatronics. If you’re thinking about getting your feet wet with teaching your own hardware workshop, read on. I’ve packed this story with as much of my own learnings as I could to set you on a path to success.

The good news is that Supercon returns every year. I you want to take part in some epic workshops like this one, grab a ticket for this year’s conference now. If you want to host a hardware workshop, the Call for Proposals is still open! Okay, let’s dive in.

Continue reading “Getting Kitted To Teach Your First Hardware Workshop”

The Wonderful Scent Of Etching Pi On Pie For Pi Day

My “owl-hours” these last few months have been buried in the garage, chopping down aluminum extrusions for a homebrew laser cutter. Nevertheless, it’s time-well-spent. With the skeleton of the gantry now in place, what better way to give it a test-run other than engraving a few sweets?

(Goggles on, folks!)

Yesterday marked this year’s Pi Day, a time to commemorate our commitment to nerdom. I’m no baker; so when a couple friends put me to work on the assembly line of Pi-day pie-making, I couldn’t resist giving one a special touch.

This beloved journey towards building a laser cutter isn’t quite done, but it’s well on its way! Without fumigation, my only exceptions for cutting materials at this stage are paper, and food that smells great after burning it.

Without further ado, I’m honored to serve up a few digits of Pi-on-Pie.

To make the pattern, I generated a DXF vector file with Solidworks, and produced GCode with dxf2gcode. Admittedly, I wholeheartedly believe that this job better lends itself to GCMC, the open source GCode Metacompiler; but, sadly, time was against me. My only true regret: no raspberries in this pipeline.

From Wii-Motes to 3D sintered objects, we’ve seen some bizarre and fantastic objects enter and exit the hood of many laser cutters. If you’ve got a tale behind your build, we’d love to hear about some of your adventures. Join us on the IO and tell us your story as it happens!

(Ok, goggles off.)

Continue reading “The Wonderful Scent Of Etching Pi On Pie For Pi Day”

Aligning Invisible Lasers On-the-cheap

Lining up the beam from your homebrew (or retrofitted) laser cutter doesn’t come without its challenges. For instance, how do I use my remaining eye to align an invisible beam that has enough power to burn through some objects in its path? Some of us will go through the extra hassle and expense of mixing in a visible guide that traces the path of the CO2 laser. For the penny-pinchers out there, though, [Stephen] has us covered with an inexpensive technique that will cut you down by only a few strips of masking tape.

Stephan’s technique is simple, but elegant. He covers each mirror with tape, fires the laser, and leaves a burn mark, working his way from the last mirror that the laser hits to the first. With a burn mark on each mirror, and one through a guide made from a sheet of plywood, [Stephen] has a pretty good idea where the native direction of the beam is headed. He then swaps a red dot laser in to line up with the burn marks, and then aligns the mirrors using visible, and safe, light. Phew! Now that’s a lot easier than iteratively firing the beam and replacing the tape on the mirror each time we want to tweak the mirror alignment.

With all that burnt masking tape, the process can get a bit smelly. Nevertheless, we’ve filed this one away for later when we start getting that itching, burning sensation that kicks us into building our own homebrew laser cutter.

Continue reading “Aligning Invisible Lasers On-the-cheap”

Drawbacks Of Laser Cut Delrin–and How To Slip Around Them

Welcome back to part II in this ensemble of techniques with laser-cut Delrin. Thanks for many of the great insights along the way in the comments. In this guide, I’d like to go over some of the more immediate kinks that come to mind when getting started with this material.

Sourcing Delrin Sheets

When it comes to shopping, there are a variety of suppliers to choose from, but there are a few key words and thoughts to keep in mind.

Names

First, Delrin, is the “brand name” that refers to the Acetal homopolymer. Variants may also be labeled, acetal or acetal homopolymer. Delrin’s natural color is a soft white, but dyes can take it into a range of other colors. Black and white are, by far, the most common, though.

Tolerances

In the previous guide, all of the examples were cut from a small range of sheet thicknesses (0.0625[in], 0.09375[in], and .125[in]) sourced from OnlineMetals. As the thickness of the sheet increases, the tolerances on the thickness rating will also become more loose. You might buy a .125[in] plate and find it to be .124[in] in some places and .126[in] in others. If you purchase a .250[in] sheet, however, you’ll find that it may vary as much as .126[in] oversize though!
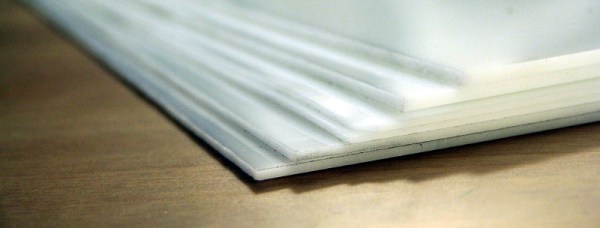
Buy it Flat

Despite McMaster-Carr being my go-to solution for one-off prototypes where rapid build iterations trump BOM cost, I don’t recommend purchasing Delrin from them as their sheets don’t have a flatness rating and often gets shipped bent in (oddly sized) boxes. (Seriously, has anyone else gotten a few oddly-sized parts in a gigantic McMaster-box before?)

Internal Stresses

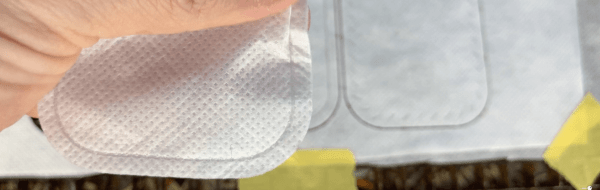
Extruded Delrin has internal stresses built up inside of the sheet. There are a variety of reasons why this could be the case, but my biggest hunch is that the extrusion process at the factory results in different parts of the sheets solidifying at different times as the sheet cools, possibly causing some parts of the sheet to tighten from the cooling before other gooier sections have yet to finish cooling. What this means for you is that as your part gets lased out of the sheet, you’re, in a sense, relieving that stress. As a result, the part that you cut–especially for thin sheets–may come out of the laser cutter slightly warped.

Continue reading “Drawbacks Of Laser Cut Delrin–and How To Slip Around Them”