Step one to most electric longboard builds is typically the acquisition of a foot operated longboard, with step two being the purchase of a ready-made motor bracket to electro-convert the strenuous vehicle. Not so [Matt Carl’s] scratch-built electric longboard, which starts out with four 1/8″sheets of baltic birch.
After copying his paper template to the wood, [Matt] applies wood glue to the sheets and squeezes them tightly together in a custom, concave press mould, where they are left to dry under heavy weight plates. After drying, the curved laminate is cut out with a jigsaw, sanded and painted.


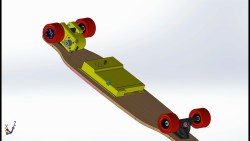
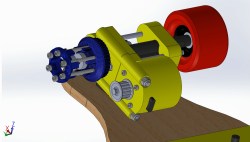
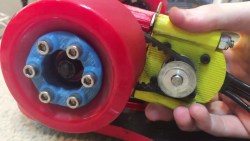
For adequate propulsion, [Matt] designed a custom 3D printable mount to attach a beefy brushless motor to one of the trucks. His open source design also includes a pulley that attaches to one of the wheels, an enclosure for the electronics and a number of brackets to mount it all to the underside of the board. Besides wood and plastic, the bill of materials also includes a brushless motor, drive belt and motor pulley, two large LiPo packs, an ESC, RC transmitter and receiver, and an onboard charger.
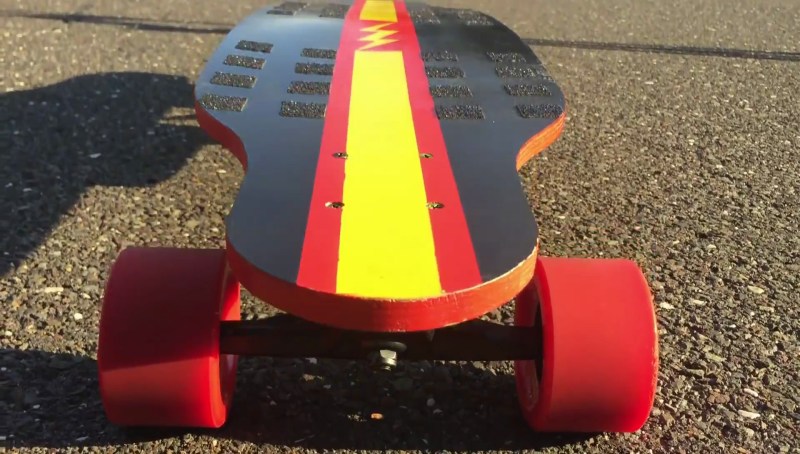
The assembled result of [Matt’s] woodworking, CAD and 3D printing efforts is a slick and very capable electric longboard with a top speed of 20 mph and a range of 10 miles. Not bad for a mere $400 budget! Worried about the longevity of the 3D printed parts? Carbon-fiber-reinforced 3D printing filament has you covered. Check out the video below, where [Matt] walks you through the 3D-printed part of his build!


This is a great build, Looks slick and is really simple. I would be tempted to double the battery capacity as you could easily fit more on there. I want all the range!!!
There are quite a few component in there that get quite warm over a 10 mile run @ 20mph. Would be interested in a follow-up after a few miles on how the 3d printed parts are wearing.
Print them in ABS, it’ll handle hotter things than you expect. I’ve been charging recovered lipos from laptop batteries in printed 18650 holders, and some of the cells got too hot to hold – but the holders didn’t care.
Those cells got thrown out, of course.
Its generally a nice build. I like it. I just hope he never has to change any of the bolted in components. Way, way, way too much thread locker used.
3D printed parts may be nice for a prototype and a few runs around the block. The problem i’ve seen with my own parts is that they don’t age that well, especially when they are under load for a long period of time and exposed to the sun or other sources of heat/uv light. After some months or more the plastics started to show signs of delamination, migrated away from the load, got brittle… might be OK for some, but running on a board with 20mph, see your motor break away and get stuck under the wheels and send you flying does not sound that nice to me.
Maybe some filaments are better (or good enough) for this application, i just would be very careful and maybe run some tests with the filaments and double check everything on your board before you take it out for a ride and after you get back home.
Really awesome and tricky man!!!!!!!!!!!!! I thought that DIY longboards are troublesome to learn, but while seeing your blog posting and video, I feel happy and simple to build my own longboard. For past two months, I feel irritated in searching for the blog like yours. Now I got it…………. Thanks, Moritz Walter.
Thanks for sharing Moritz, I will got to try it some days. I’m considering sourcing from some DIY manufacturers for my newly designed longboards. Yea, me too, into self made longboards. Though, not an electric one.