Blinky LED projects: we just can’t get enough of them. But anyone who’s stared a WS2812 straight in the face knows that the secret sauce that takes a good LED project and makes it great is the diffuser. Without a diffuser, colors don’t blend and LEDs are just tiny, blinding points of light. The ideal diffuser scrambles the photons around and spreads them out between LED and your eye, so that you can’t tell exactly where they originated.
We’re going to try to pay the diffuser its due, and hopefully you’ll get some inspiration for your next project from scrolling through what we found. But this is an “Ask Hacakday”, so here’s the question up front: what awesome LED diffusion tricks are we missing, what’s your favorite, and why?
Diffusive Materials, Blending Colors
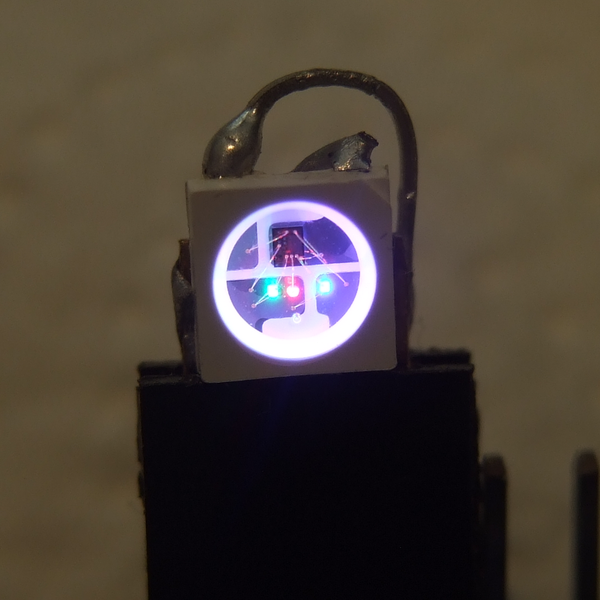 Look closely enough at an RGB LED and you’ll see three individual LED chips, not surprisingly in red, green, and blue. We all know this, and yet it’s still surprising how badly blended the colors can be, even from an LED unit like the WS2812, where the three diodes are ridiculously tiny and less than a millimeter apart. Somehow, even at desk-distance, you still get the feeling that you’re looking at a red LED and a blue LED instead of a blended magenta light source.
One approach is to use a diffusive material that has a rough enough surface that it scatters the light that passes through it. Diffusive materials include something “traditional” like frosted glass or acrylic, as seen in [Mike Szczys]’s 1 Pixel Pacman demo video or this classy linear RGB clock. Something like 50% transparent acrylic seems to be just about right. You can get a similar effect by sanding or tumbling a clear LED.
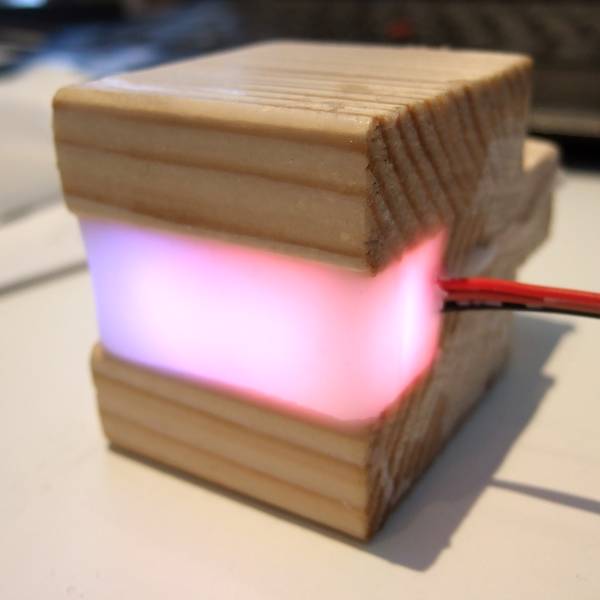 Then there are “oddball” diffusers. A drop of hot glue works pretty well, because it’s rarely crystal clear. Stranger still is polyester pillow stuffing. Lately, I’ve been experimenting with re-melting candles and entombing LEDs in paraffin wax — around 1 cm depth yields very uniform colors. I’ve also seen holes drilled in wooden cases, filled with epoxy, and sanded down.
You could always 3D print the case in a translucent material, so that the case is the diffuser. Or you can just hold up a sheet of paper or a cutout from a milk jug. These low-tech options work surprisingly well.
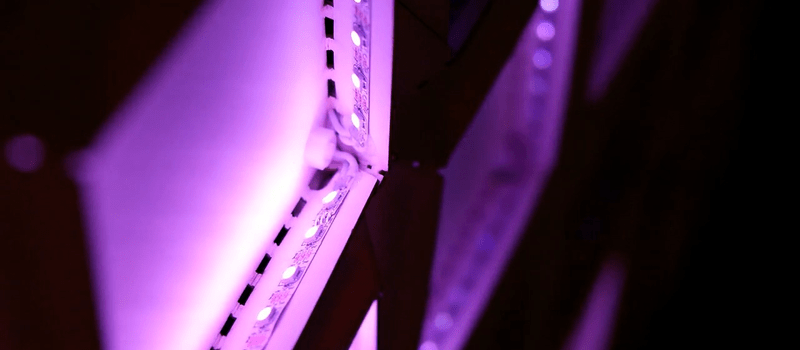
The main variables with diffusive materials is how transmissive the material is and how far away from the LED it’s located. Thicker, less transmissive materials tend to blur better but darken the LED more — sometimes a good thing. Locating the diffuser further away tends to mix colors better, but also blurs the points of light out, and can muddy up the image. Again, sometimes you want this effect, like in this wall panel, and sometimes you don’t, like in [Mike]’s Pacman. But the distance to the diffuser can be critical. Test it out well before designing the case.


Reflective Cavities, Shaping Light
 Reflective cavities serve the same purpose as translucent material, but can be lighter weight if more difficult to construct. You can either add a diffuser sheet to the front of the cavity or not, as you wish. Both can be really nice effects. For instance, “Ecstatic Epiphany” by [Micah Elizabeth Scott] uses folded borders that bounce the LEDs off of a light-colored surface, and spread it around a little bit, to achieve both color mixing and some shaping. It works fine without any front cover.
 “Colossus” uses white foam-core dividers to make many individual reflective cavities, covered with two layers of white bed sheet as a front-surface diffuser. Within each cell, the colors are discrete and well mixed, for the perfect big-pixel effect. You could also use straws, toilet-paper tubes, or even soda bottles.
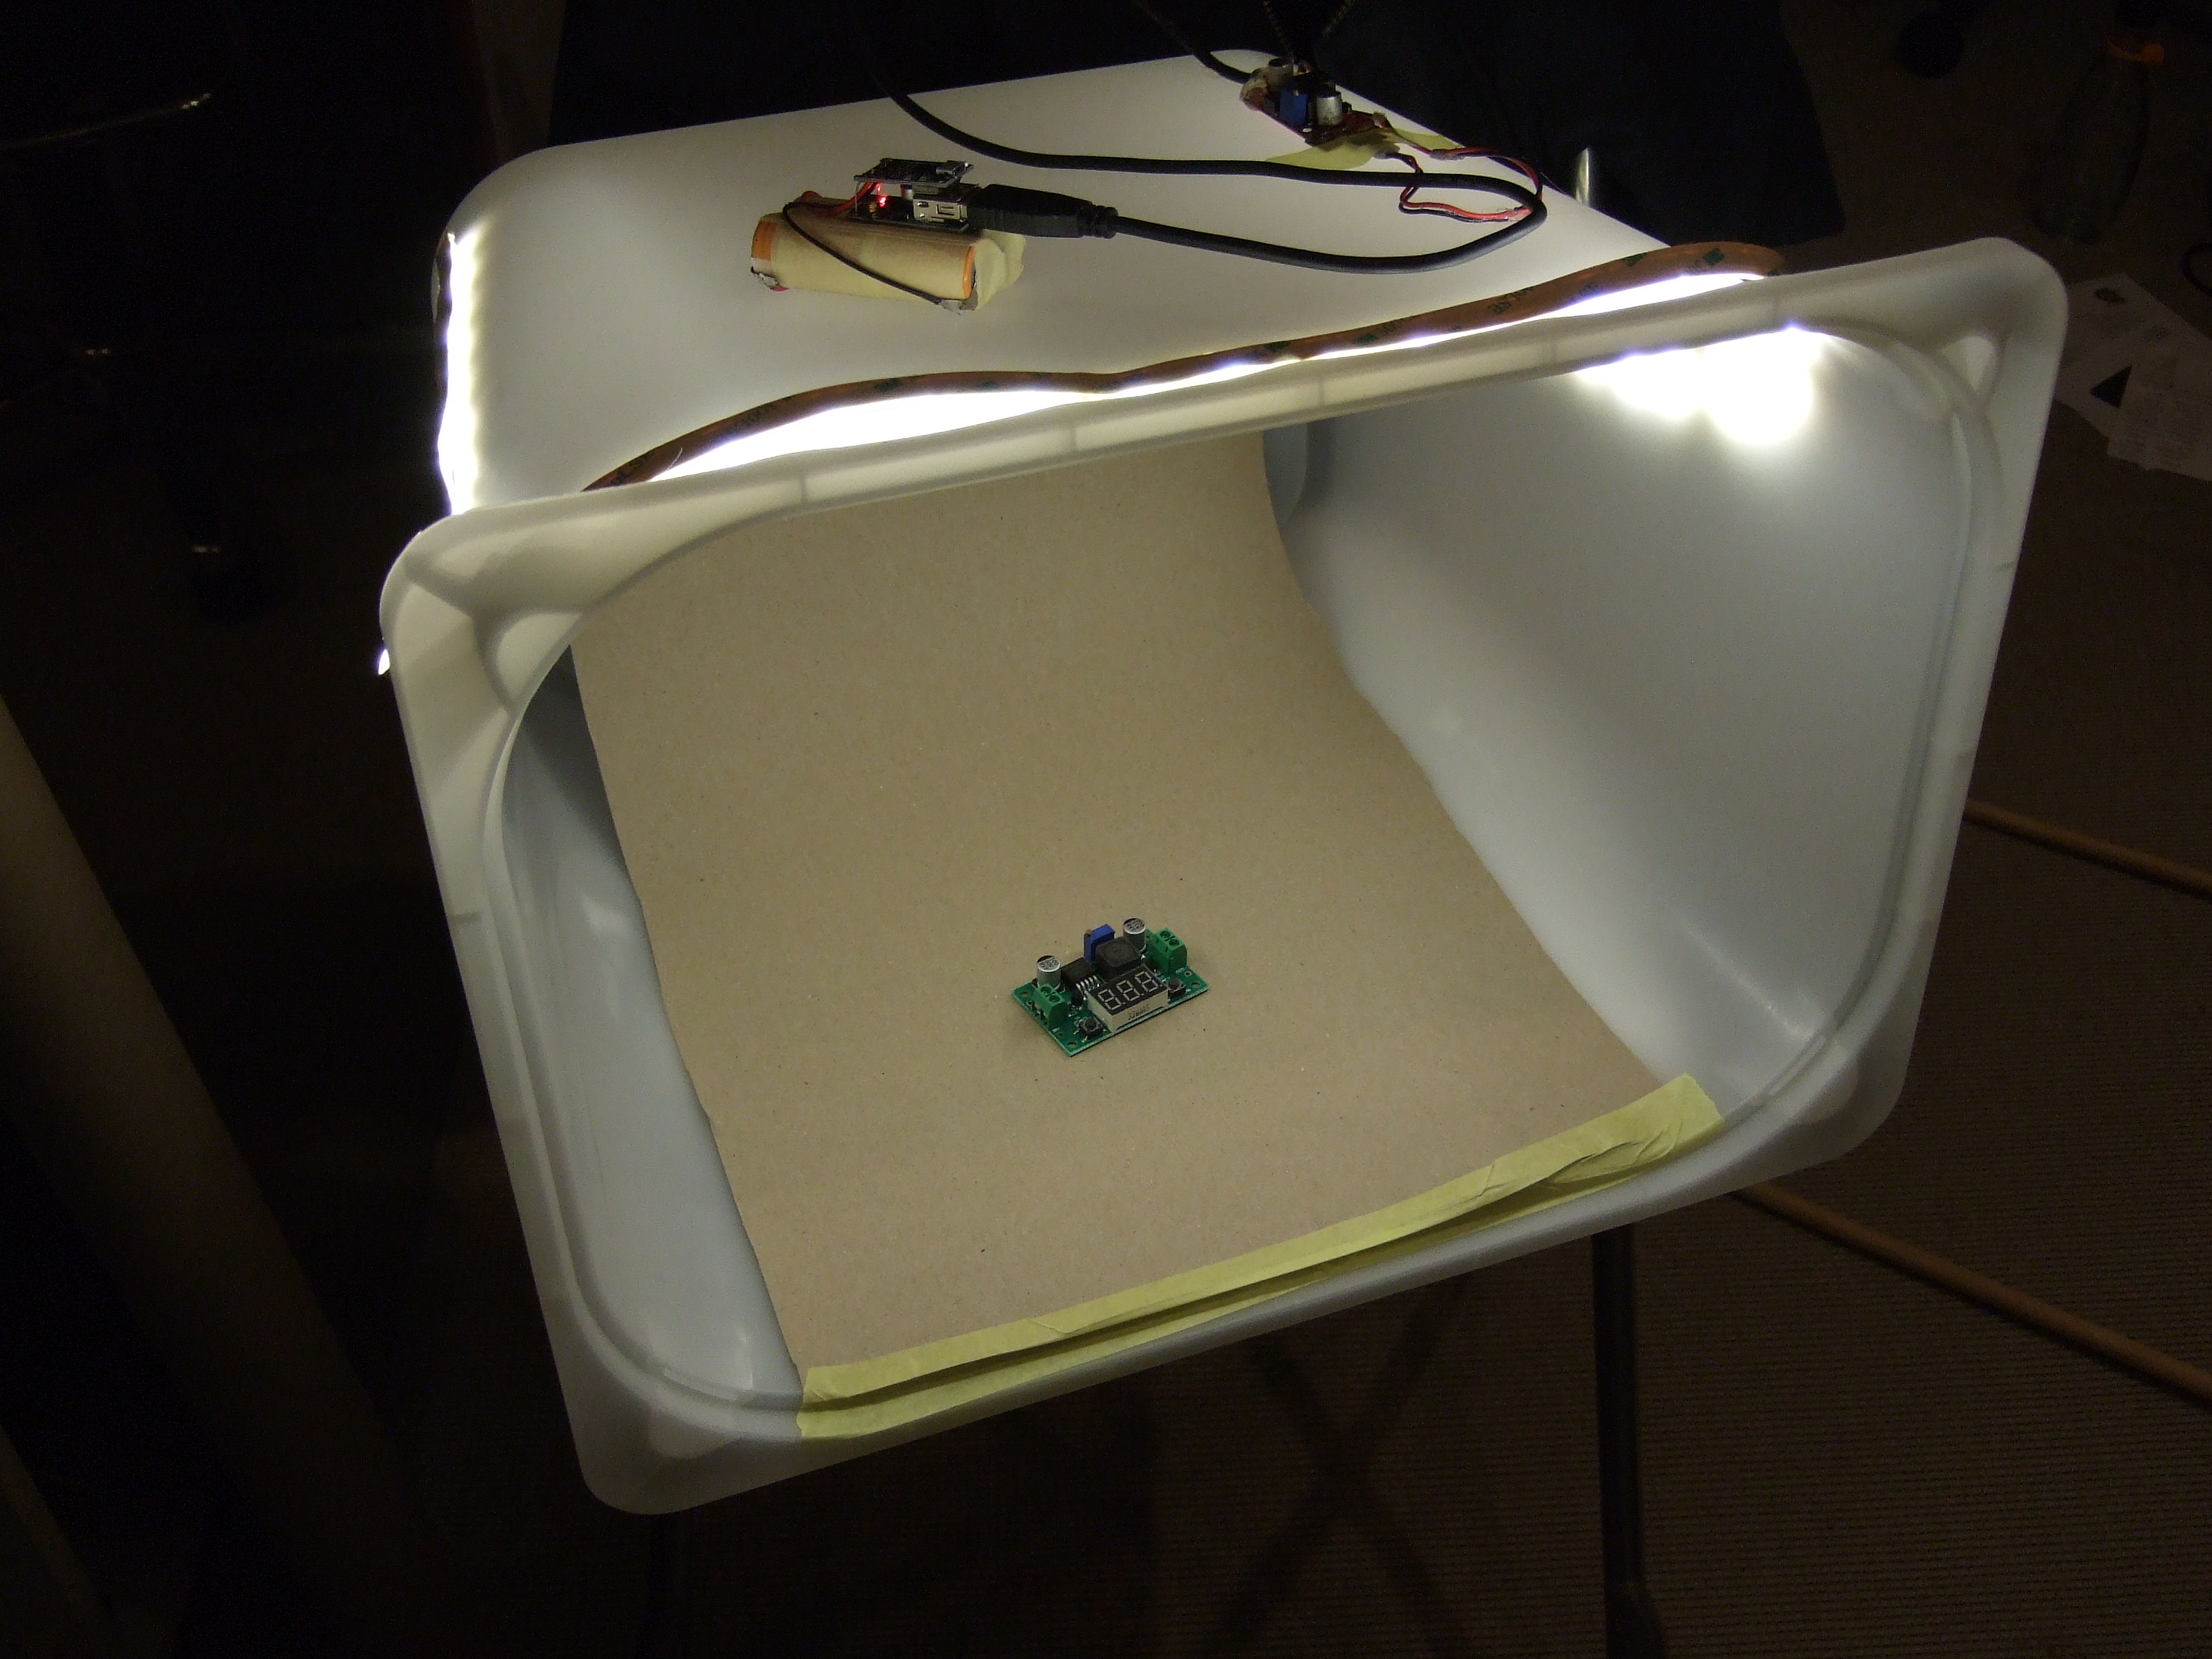 Photographer’s light boxes are also essentially diffuser cavities. We’ve shot many of our closeups in one that’s made of “vellum” art paper surrounding a wooden frame, but we recently upgraded to IKEA Trofast with optional LED lighting for nocturnal photo sessions. Most of the light coming through the translucent plastic ends up bouncing around inside, leaving very soft shadows and even illumination. It works better when driven by daylight. If you want to take this idea to the extreme, check out [Doog]’s model shooting rig. Note the clever use of underlit diffusive acrylic.
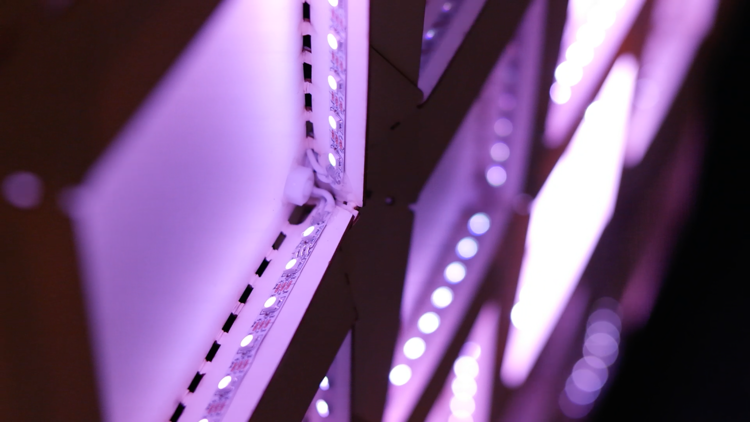
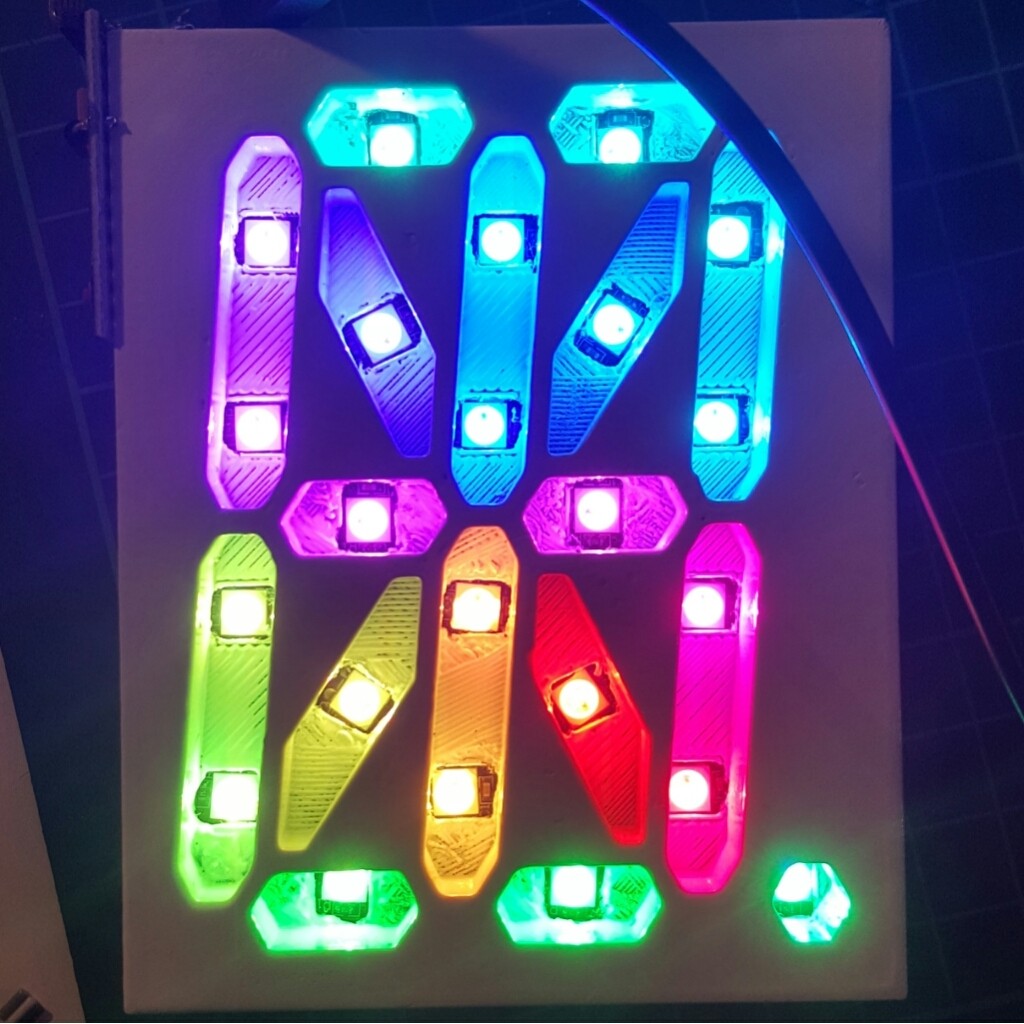 Nothing is stopping you from making interesting shapes out of the reflective cavities. Triangle-shaped reflective cells give [Micah Scott]’s “Triangle Attractor” and [Becky Stern]’s WiFi wall display their style. If triangles aren’t your thing, you can 3D-print the cavities in whatever shape you need, like these 16-segment displays.
Designing the diffusive cavity just right is an art more than a science. Generally speaking, the more reflective the walls, and the more volume they enclose, the better the color mixing is going to be. It’s definitely worth your time to experiment around with indirect illumination, where the light bounces first before leaving the box. Combining cavities with diffusive material front panels can yield some very subtle effects.


The Ask
Pshwew! That was a whirlwind tour of diffusing options, divided arbitrarily into categories of diffusive materials and cavities, with overlap. What did we miss? What’s your favorite LED diffusive effect?


Hi,
I am not sure if this is the right place to ask but maybe the experts can help me in this….. if i have Led strip and i want for example to make only led number 5 is on and the rest is off…is that doable and how ?