
Hackaday reader [Don] dropped by the tip line recently to let us know about the latest version of his color-changing LCD clock project. This is his second version of the hardware which makes some pretty big improvements over the original, including moving from the Pi B to the Pi Zero and an internal simplification of the wiring. He mentions the next revision of the project will focus on Google Home integration, which should be interesting to see.
As a father of two pre-school age children, he was looking for a way to help his kids understand the concept of time and scheduled activities. Colors and shapes come fairly easy to children of this age, but time and how it relates to the day is a bit more difficult for them especially as their comprehension of numbers is still developing. [Don] reasoned that even if they couldn’t read the numbers on the clock yet, if he had the display change colors to indicate different periods of the day (sleep, play, cleanup, etc), it would not only keep them on schedule, but reinforce the meaning of the numbers on the screen.
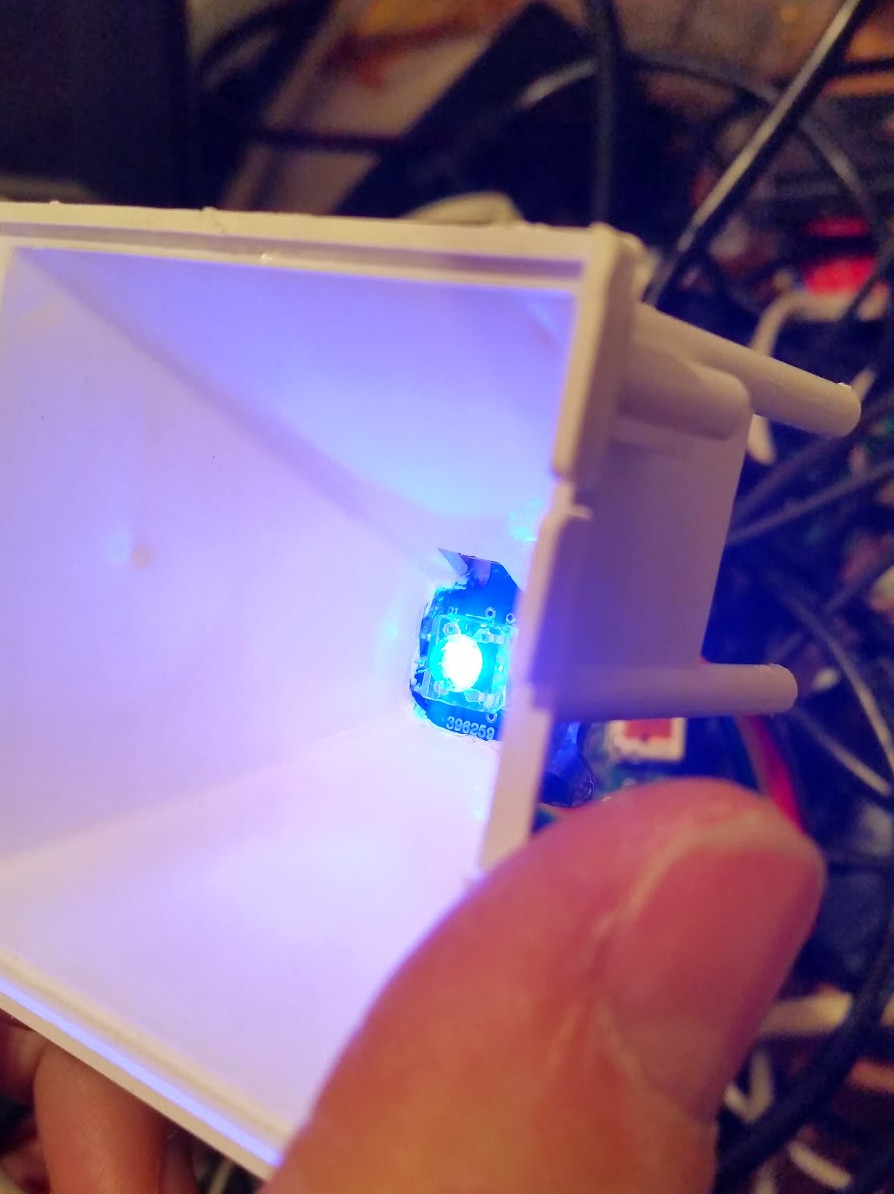
The project was made infinitely easier by a lucky find at a local retailer. For $10 he got a kid-friendly looking clock that utilized a simple projector to backlight the LCD display. This meant [Don] would just need to swap out the stock lighting module for a controllable RGB LED, and the hardware modifications would essentially be complete.
Even the Pi Zero fits perfectly inside the case of the clock, the only modification necessary was cutting a little hole in the back for the Pi’s micro USB port. His earlier version used an external Pi B connected to the clock via CAT5, so getting it all integrated into the one device is a huge improvement, especially when little kids are involved. Moving the Pi and its 5 V pins into the clock itself also allowed [Don] to drop the voltage regulator required previously.
With the basic hardware for a color changing LCD clock together, the rest of the project was just a matter of software. After some research, [Don] came across RPi-ShiftBrite by [Hive13] and made his own fork which added some features necessary for his project, namely the ability to quickly set the ShiftBrite to a specific color on the command line. To schedule the color changes, he used the very slick minicron: a web-based tool to create and monitor Linux cron jobs.
The Pi itself does not actually interface with the clock, and with no onboard RTC it’s necessary to keep it updated with NTP or else the times will become desynchronized. It can be necessary to sync the Pi’s clock to the Internet as often as every hour to make sure the colors shift at the appropriate times. The addition of a RTC module like the DS1307 could alleviate this issue and might be something to consider for a future revision.
All told, a fantastic project and something we’ll be sure to keep our eyes on as it progresses. We’ve seen our share of unique Raspberry Pi powered clocks, and even a few color changing ones, but this approach is easily the most straight-forward we’ve seen.


So this is a store bought clock, with an overly large brain to make it change colors? It seem that I often sound negative. The project is probably neat, but I would not consider it a hack. Doing the color changes with something much smaller or in some cleverly unique way would make it a hack.
It works. What did you get done in the meantime?
yup, it works and you miss the chance to learn something new…
What exactly counts as “cleverly unique” if not taking the thing apart and modding in new components?
I think the nice thing about this hack was that it was relatively easy/clean to do, and yet the final results look very professional. Especially with the Pi inside of it. This could pass as a commercial product, and at the end of the day what higher compliment is there when doing these kinds of hacks and mods?
Thanks for checking out the project.
I hear you regarding the simplicity, however it is quite a bit more complicated than meets the eye. There is a process that runs on the Pi that gives status updates about what color or mode the clock is currently in and the entire system is controlled via Google Assistant. Yes, the Pi is still overkill given that, but I bought the Pi Zero W for $5 which is less than it would cost to use an ESP-12E or similar. Furthermore, each of these clocks are going to be fitted with a thermometer that will help map the temperature in the house for my upcoming DIY thermostat project.
But the main point is that when I started following HaD, I was clueless about these sort of things so providing a very simple way to accomplish something neat for newcomers is a good way for us to grow our community. We all have simple and complicated projects and having them all here is kind of a way to put the cookies on a shelf where anyone can reach them.
The webcams on each side give it an Orwellian aire.
The hack here is the color changing feature and time management software integrated into the slick kid-friendly enclosure.
Thanks for checking it out! The cameras are part of my baby monitor that is no longer needed. I popped out the IR filters and made a small IR spotlight out of 9 super-bright LEDs. It flooded the crib with tons of IR light without waking up the kids.
What a blast to see an original ShiftBrite used here! First macetech product ever, back when there weren’t many options around for addressable pixels. That green one would be from around 2007 to 2009, before we changed the design.
Dude, it’s been years since we ran into each other…
I love the ShiftBrites. If you check out more on my blog, you’ll see that I made my first DIY Ambilight out of them :) They are still WAY brighter than any single NeoPixel. And I still have 8 or 10 on hand that I haven’t managed to fry yet.
This just made my day.
Made my day, too! Brighter somehow, and still 10-bit PWM plus current sink control instead of just 8 bits :)
The other day I checked on one of the Chinese sites if they sell Zeros, and they did, 17 euros.
Even the Chinese don’t have them for near the infamous fiver.
Still though, 17 is not that much I suppose.
I was lucky enough to actually get to purchase them for $5 each.