OctoPrint is arguably the ultimate tool for remote 3D printer control and monitoring. Whether you simply want a way to send G-Code to your printer without it being physically connected to your computer or you want to be able to monitor a print from your phone while at work, OctoPrint is what you’re looking for. The core software itself is fantastic, and the community that has sprung up around the development of OctoPrint plugins has done an incredible job expanding the basic functionality into some very impressive new territory.
But all that is on the software side; you still need to run OctoPrint on something. Technically speaking, OctoPrint could run on more or less anything you have lying around the workshop. It’s cross platform and doesn’t need anything more exotic than a free USB port to connect to the printer, and people have run it on everything from disused Windows desktops to cheap Android smartphones. But for many, the true “home” of OctoPrint is the Raspberry Pi.
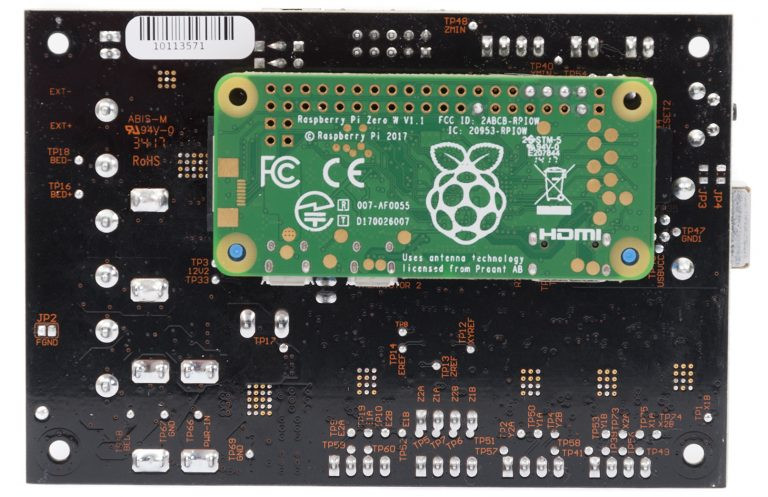
As I’ve covered previously, the Raspberry Pi does make an exceptional platform for OctoPrint. Given the small size and low energy requirements of the Pi, it’s easy to integrate into your printer. The new Prusa i3 MK3 even includes a header right on the control board where you can plug in a Raspberry Pi Zero.
But while the Raspberry Pi is more than capable of controlling a 3D printer in real-time, there has always been some debate about its suitability for slicing STL files. Even on a desktop computer, it can sometimes be a time consuming chore to take an STL file and process it down to the raw G-Code file that will command the printer’s movements.
In an effort to quantify the slicing performance on the Raspberry Pi, I thought it would be interesting to do a head-to-head slicing comparison between the Pi Zero, the ever popular Pi 3, and the newest Pi 3 B+.
Test Procedure
For this test, I used the latest nightly of OctoPi, a pre-built OctoPrint image for the Raspberry Pi; as support for the Raspberry Pi 3 B+ is not currently available in the stable version. OctoPi was installed on a Samsung 32GB Evo Plus Class 10 Micro SDHC card, which was switched between the different Pis so as not to introduce additional variables such as SD performance or software configuration.
For the Cura slicing profile, I set up a generic printer using a 0.4 mm nozzle, 0.2 mm layer height, and a print speed of 40 mm/s. Five 3D models were selected, of increasing geometric complexity. The STLs were sliced on each model Raspberry Pi, and OctoPrint’s built-in slicing timer was used to determine exactly how long the process took.
In other words, the only difference between each slice was the Raspberry Pi hardware itself. The times recorded in this experiment are based solely on the processing capability of each model Pi.
20 mm Cube
We’ll start off small, with a basic 20 mm cube. I generated this STL in OpenSCAD, and it’s about as simplistic a model as they come. Cubes like this are often used during early calibration of a 3D printer, so it seemed appropriate to use it as a starting point for our slicing comparison.


Even this early, we can see how far the Pi Zero is lagging behind its larger siblings. While the nearly 10 seconds it took the Zero to slice the cube is hardly a long time to wait, it’s a troubling sign of things to come given how simple a task this was.
#3DBenchy
Love it or hate it, “Benchy” has become the de facto test for 3D printers. While a seemingly simplistic model, it actually integrates a number of challenging-to-print design elements such as overhangs and low-slope surfaces. As such, this is a much more realistic representation of a “daily driver” for 3D printing.


The Pi 3 and 3 B+ remain very similar, but it’s increasingly obvious the Zero is fighting above its weight. That said, it still didn’t take a long time to slice #3DBenchy. While the Zero was nearly four times slower than the 3 B+ in this test, 72 seconds is hardly an eternity and is probably “good enough” for many users.
Aria the Dragon
“Aria the Dragon” is an exceptionally popular model on Thingiverse created by Louise Driggers. This is a fairly complex model, and takes us out of the utilitarian types of prints that may be more common for Hackaday readers and firmly into artistic territory.


The gap between the 3 and 3 B+ continues to widen, and things only get worse for the Zero. At nearly 3 minutes, the slicing time for Aria is starting to get annoying.
Fillenium Malcon
This model looks suspiciously like a particular hunk of junk from a certain Disney-owned film franchise, but creator Andrew Askedall promises that the similarities are purely coincidental. The Malcon is notable for being printable with no supports (assuming you’ve got a printer up to the task) and has nearly 650 “Makes” on Thingiverse.


Hope you packed a lunch. The 10+ minute slicing time for this model on the Pi Zero is past the point where most people would give up.
Moon Lamp
Leung Chan created this gorgeous “Moon Lamp”, which packs in so much surface detail that the STL itself weighs in at nearly 50 MB. When lit from inside, the print shows innumerable tiny craters that were modeled from real images of the moon. If this doesn’t convince your friends they need to get a 3D printer, nothing will.


Unfortunately, this marked the end of the road for the Pi Zero. After pegging CPU and RAM usage to maximum for a few minutes, OctoPrint popped up with an error message that slicing had failed. Upon closer examination it looks like the system runs out of space on the swap partition and Cura takes a dive. In theory if you gave the Zero a larger swap partition (OctoPi only allocates 100 MB by default) it might grind its way through, but I wouldn’t recommend it. The model is just too complex for the lowly Zero.
Offloading Slicing
Originally I was going to include the time it took my main computer to slice these models in comparison to the Raspberry Pi, but it quickly became clear that was pointless. Even the Moon Lamp only takes a few seconds on my desktop, and the more simplistic models slice so fast that it might as well be instantaneous. There’s simply no competition between a modern desktop or laptop processor and the comparatively dinky ARM chip used in the Raspberry Pi.
Which is why you should really just slice your models on the computer and send the resulting G-Code to OctoPrint over the network. That’s the intended workflow, and it really does make a lot more sense than forcing the Pi to labor over a task it’s clearly not cut out for. If the results of this test have shown anything, it’s that slicing on the Pi is a time consuming process no matter which model you buy.
Conclusion
To be clear, the usability of OctoPrint is very good no matter which Pi it’s running on. If you slice your STLs on your computer and OctoPrint only has to deal with the G-Code files, it doesn’t matter which Pi you get. The Zero is a bit sluggish when the OctoPrint UI first comes up, but beyond that there’s really no practical difference that I noticed.
But if you really want to use the Pi for slicing, forget the Zero. It just doesn’t have the muscle for slicing complex models. On the other hand, if you’re already using OctoPrint on your Raspberry Pi 3, I’d say stick with what you’ve got. The performance difference between it and the 3 B+ really isn’t worth the upgrade.


How sure are we on the compile options used for the CuraEngine on this test? The CuraEngine is full of 64bit integer math, and proper compile options for the target platform can make a huge difference. And I think I got better times when I ran the CuraEngine on ARM during CuraEngine development… potentially, a speedup can be achieved by changing most things to 32bit integer math.
Also, the cube test shows the “overhead” of the engine, a cube is so simple for the CuraEngine algorithms that it has pretty much nothing to do compared to a complex model.
Finally, slice time does not have to be a huge problem, with some changes, the CuraEngine could be “pipelined” meaning that it outputs the first layer of gcode much quicker, without processing everything. At that point you can start printing already while you wait for the rest of the gcode. I’m still a bit sad that I wasn’t allowed to develop that option in Ultimaker time.
(FYI, CuraEngine was originally my work. I kinda know how it works and does things because of that)
That probably explains the results since even the newest Pi 3+ image is still 32 bit.
Well, for example, on x86, if you compile the CuraEngine for 486 or for Pentium4, you get a 40% performance boost. Even in just 32bit. Because the P4 has a whole bunch of extra registers and 64bit registers.
NEON extensions most likely also help here, if the compiler can make proper use of those.
32bit address space does not mean no 64bit math. (common misunderstanding)
For a model with no supports, it is true that you could slice the first one or two layers and start printing while slicing the remainder (assuming overall size checks have passed). One concern with this is that the slicing could bog down on a complex layer (for whatever technical reason) to the point where the printer has to pause. If not built to do this gracefully, it could mar the print.
Additionally, if supports are required, you really need to analyze all the way up to the final layer before you can finish building the first layer.
Still the up/down pass for support is relatively quick compared to all the other processing. So, yes, you have to do that first. So, there is a bit of complexity, but overall, it is doable.
I don’t think slowing down is a risk, slicing as a whole is still a few factors faster then printing itself. Hours of printing takes minutes of slicing. You buffer ahead and the first layers you generally print slower to get good sticking prints.
Printering is new to me.
Also- even at 60sec, not a big deal since the print time is probably two orders of magnitude higher. Not sure why people slice on the Pi anyhow- slicing is so fiddly that I always have the need to change options, move the piece, add support, change temp, etc., which doesn’t work in the OctoPrint web interface.
I still wonder what’s the catch in slicing on the server-side? I still prefer to do the slicing on the desktop PC, and then just send the gcode to the octoprint server. Slic3r has had the “send to octoprint and print” button for a long time already.
Well, CuraEngine wasn’t designed to be “easy” on memory. It wouldn’t have any problems in completely running the 1GB ram full with complex models. That’s one of the risks of slicing at Octoprint.
There are a few advantages in a “many users on few printers” scenarios, where people don’t need to install a slicer, just CAD software.
I am using Octoprint already for a while but never for slicing. Fastest results are on PC and in my opinion, trusty slicing software is Simplify3D, even for price of cheapest printer from China.
The PiZero is already sluggish enough when only running OctoPrint and controling it via the web interface. I find it better to use slic3r on the PC side and configure it for directly interfacing with OctoPrint (enter OctoPrint API key etc.). Then you can prepare your models on the PC side much faster and send the G-code directly to OctoPrint with one click. You can set OctoPrint to automatically print an incoming file if you want. For me this gives the best of both worlds…
this is largely why i stopped using octoprint. the UI on the printer can run plain gcode well enough. and i’m never printing so remote i can’t just slide in an sd card.
I slice with KISSlicer more and more these days, so slicing on the PI isn’t an option. I’ve never had a problem with the interface performing slowly on my PiZero boxes, even with the Pi camera live streaming and recording time lapse.
Ilo love cura jand octoprint plugin to it ..
The biggest issue I had/have with the ZeroW wasn’t really slicing time, but boot time. It takes about 5 minutes before the web interface is up and running for me.
Slicing takes a while, sure, but I love having multiple printers each with their own Pi where I can simply drop the STL to the printer and not have to mess with changing slicer profiles etc…
I use a Pi3 now, although I did love having a printed case for the ZeroW with a camera mount and attached to the print bed so video was stable. The Pi3 is too big to attach to the print bed, and most of the USB cameras I have tried have the focus too far out to be clear when attached to the bed, even on extensions.
If you were using the Raspberry Pi camera then you can buy extra long ribbon cables for it. It’ll be more than enough for you to just mount the camera module by itself with the Raspberry Pi 3 somewhere else.
Considering the Pi Zero is basically a Pi 1 board I am not surprised it didn’t do well. Plus it’s a single core trying to do all that work compared to the 4 cores in the Pi 3
it did pretty well and better settings on it would put it right beside them, until the settings on them were changed. I’d rather buy an io card for a pc out of the skip though and have better horsepower on hand
“or you want to be able to monitor a print from your phone while at work”
Please don’t. I don’t want to read that any more makers lost their homes in house fires!
Since I slice everything in Simplify 3D I use a Pi Zero …. I had a Pi 3 with a 5″ touchscreen but I barely used the touchscreen and the Pi 3 is a real power hog and needs a fan if you have it in an enclosure. Plus since all my CAD software is on my PC it’s easier to just slice it there where I can preview it layer by layer for any glitches and errors and just send the G-code to the Pi W. one Pi W has a USB Hat and a webcam for monitoring and the other has a Pi camera module. BTW I turned the Pi 3 and 5″ screen into a handheld RetroPie game system so it didn’t go to waste and gave it to my nephew’s oldest boy for Christmas but he can’t get it away from Dad who grew up on SNES and Gameboys in the 90’s
The pi 4 may be a game changer. It is roughly 4 times faster than the 3b+ and it can have 4 gigs of ram which may make an additional difference. I am finishing building a prusa 3s and I have a pi 4 which is all set up with dual monitors and an ssd. I’ll be doing these prints to test this. When it runs octoprint of course.
So what were the results with pi4