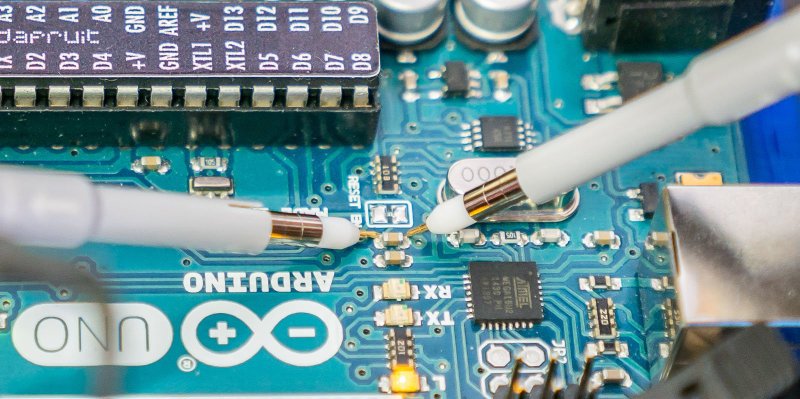
We won’t mention names, but we are always dismayed to see people twist knobs randomly on a scope until it shows a good picture. These days, there’s the dreaded auto button, too, which is nearly as bad. If you haven’t spent the time to learn how to properly use a scope [Bald Engineer] has a great introduction to making six measurements with an Arduino as a test device.
To follow along you’ll need an Arduino UNO and a two-channel (or better) scope. Actually, most of the measurements would probably work on any Arduino, but there are some that require the separate USB to serial chip like that found on the UNO and similar boards.
The six measurements are:
- The auto reset programming pulse
- Capture and decode serial data
- Noise on the power rail
- Observe probe loading effects
- PWM duty cycle
- The timing of pin manipulation code
Some of these measurements use a bit of Arduino code, while others just make use of the circuitry on the board no matter what software is running.
Not only does the post show you where to make the measurements and what the result should look like, there’s also a discussion of what the measurement means and some suggested things to try on your own.
If you go through this post, you might also enjoy learning more about probes. If you are feeling adventurous, you can even build your own current probe.


Just upgraded to Rigol DS1054z – looks like a great way to learn some of the new capabilities ( like serial decode ) – great article!
Same. I haven’t used a scope since EET in college like20 years ago! Getting past the basics and into more advanced measurments would be awesome.
Very cool. Makes me wonder if somebody hasn’t written an Arduino sketch that could be used as a general purpose oscilloscope trainer. It could produce via the digital and analog outputs facsimiles of various phenomena that you can practice configuring your scope against.
That does sound like a useful app and idea. Always good to have another scope reference source as well :)
The “Beam Finder” button was a great invention!
It allowed me to determine which way to turn the Vert and Horz knobs to re-center the trace after someone else messed them up!
Agreed! I also liked the neon indicators on the Tektronix 500 series scopes that showed you which direction the beam was off screen.
If you dread that auto button you might want to steer clear, this tutorial advises to press it between each measurement! ;)
My system is, if I turn a few knobs and don’t get what I want, then I press auto, and then start over twisting the knobs. Only half kidding!
For people that don’t want to learn a lot about their scope, if they get it set to AC coupling that will help a lot; now simple twisting of knobs is much more likely to give you immediately useful feedback. If you’re DC coupled you’ll need that auto button to avoid repetitive stress injuries from the amount of knob-twisting required just to get the useful data on the screen.
Great article for a beginner looking for a way to tame o-scope.
Do you guys know any other articles on how to use it? We have web full of “scope tutorials” but it all look the same. I saw at least a dozen and all explain what is scope, what is x and y, how to turn knobs etc…. but nothing on how to do measurements, how to interpret…