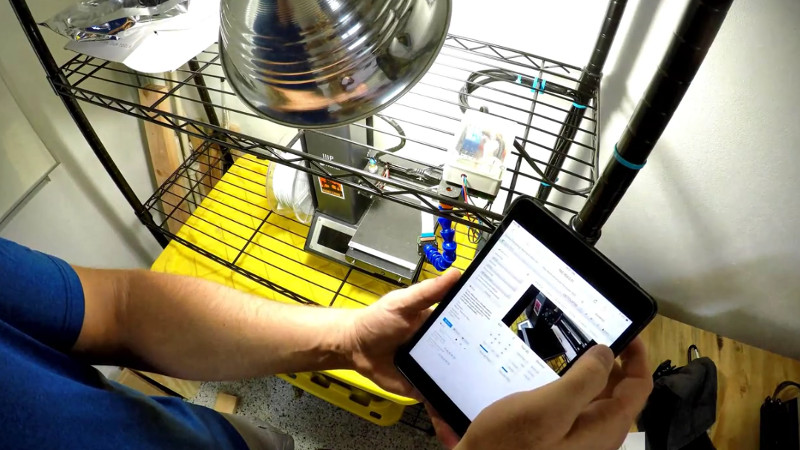
OctoPrint is a great way to monitor your printer, especially with the addition of a webcam. Using a tablet or mobile phone, you can keep an eye on what the printer is doing from anywhere in the house (or world, if you take the proper precautions), saving you from having to sit with the printer as if it’s an infant. But simply watching your printer do its thing is only a small slice of the functionality offered by OctoPrint’s vast plugin community.
 As [Jeremy S Cook] demonstrates, it’s fairly easy to add power control for the printer and auxiliary lighting to your OctoPrint setup. Being able to flick the lights on over the print bed is obviously a big help when monitoring it via webcam, and the ability to turn the printer off can provide some peace of mind after the print has completed. If you’re particularly brave it also means you could power on the printer and start a print completely remotely, but good luck if that first layer doesn’t go down perfectly.
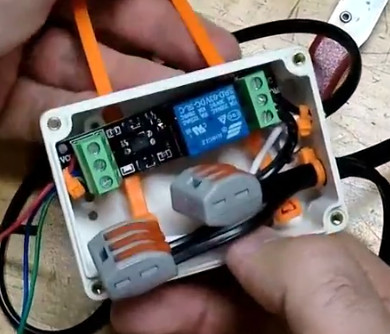
In terms of hardware, you only need some 3.3V relays for the Raspberry Pi running OctoPrint to trigger, and an enclosure to put the wiring in. [Jeremy] uses only one relay in this setup to power the printer and lights at once, but with some adjustment to the software, you could get independent control if that’s something you’re after.
On the software side [Jeremy] is using an OctoPrint plugin called “PSU Control”, which is actually intended for controlling an ATX PSU from the Pi’s GPIO pins, but the principle is close enough to throw a relay. Other plugins exist which allow for controlling a wider away of devices and GPIO pins if you want to make a fully remote controlled enclosure. Plus you can always whip up your own OctoPrint plugin if you don’t find anything that quite meets your switching needs.
[Jeremy] previously documented his unique mount to keep his Raspberry Pi and camera pointed at his printer, which is naturally important if you want to create some cool videos with Octolapse.


At time mark 1:30 it a banner stating “Should be Switching Neutral”
You are correct, you are NOT an electrician !!
Just like the circuit breaker in the breaker box, you switch the HOT side.
You want to cut off any live power line as close to the source as possible.
If you switch the Neutral side, the HOT line is still connected to what ever you have it wired to.
Please correct your video, for the safety of your viewers.
Wow, thanks – I will change that. That is actually what I meant to say, which will be confirmed if you look at the electrical drawing…
In fact I cut myself off voice-wise because I made an error, and meant to correct it via that banner, but I guess I got locked in on one train of thought!
Hot is Black wire though, right? So he called it the wrong thing and accidentally wired it correctly?
In that note yes. Story here is that I said that in the narration, realized that it was wrong, then “corrected” it with a note that somehow says the exact same thing. Guess my mind got locked in there.
I’ll post a corrected version when I’m able, but the wiring diagram shown before/after is correct.
There are quite a few dirt-cheap remote power switches you could buy that cost <$20 and handle all of the icky AC wiring. Then all you're doing is closing one contact and letting someone else handle the AC part.
That’s what I did a while ago already: I got a Sonoff S20, set it up to use MQTT with my Openhab2-server so I can toggle it on and off remotely, then hooked up an extension-cord to the Sonoff and my Octoprint-device and the printer to the extension-cord. In Octoprint, if I tell it to shutdown the system, it’ll send a command to the S20 to turn power off in 2 minutes, which gives plenty of time for the Octoprint-device to turn itself off cleanly.
It all works quite neatly, and the only thing running at all times is the S20 itself — not the printer and not the Octoprint-device.
I’m happy with how it turned out, but that’s certainly a good option as well. Someone also suggested using a smart Internet-connected switch.
Thanks for the writeup Tom!
I did this with my printer: http://pantonvich.blogspot.com/2018/01/upgrades-to-makerfarm-i3v-3d-printer.html
This is how i do it. I am using a sonoff switch flashed with tasmota firmware. Before the pi shuts down it issues a 30 sec delayed shutdown command to the sonoff device, that way the pie have time to shutdown before power is cut. https://youtu.be/0tB7b_evsGw
I added a relay in line for switching the printer on and off. I wrote a quick script that calls up “PSU Control” plugin, delays enough time to allow the printer to come on, then calls the command to connect to usb. I also have the opposite command for turning off (disconnect, wait, then power off.) I can call these scripts as actions from octoprint. I have also added some extra neopixels I have for lighting. Those I wrote a quick python script for changing it’s state. This is also controllable in octoprint. I will say it is nice to be able to turn on just red either late at night, or when printing green and monitoring over the camera (highlights some of the details)
“the ability to turn the printer off can provide some peace of mind after the print has completed”
Adding a nasty 20-cent eBay relay into the 120VAC hot line doesn’t really *add* any piece of mind to the system… maybe the opposite.
What’s the real current rating of this relay, breaking 120VAC into a live load? (and remember, it’s a switchmode power supply with a fair bit of inrush current.)
What’s the current rating of the screw terminals used on this PCB? What about the PCB tracks?
How likely is it that the $2 generic Shenzhen mystery meat relay module will be the part that catches fire, not the 3D printer itself?
Power supply is listed as 2A input, well within the 10A rating of the relay.
I suppose you’re right about being cautious, but the printer itself is certainly made in China as well. Also, I generally don’t leave the building when the printer is running, and it’s purposely built on a metal shelf next to a brick wall.
Easy Luke, right warning but wrong tone.
suggestion ? Fire detector and auto/remote triggered fire extinguisher. ^_-
Oh and the device should run on cellphone network In case fuse blowing up and loosing internet.
Ha, probably true.
Sometimes its important to see past the tone and figure out if the person has a legitimate point I’ve found.