A few months ago we brought word that [Electronoobs] was working on his own open source alternative to pocket-sized temperature controlled soldering irons like the TS100. Powered by the ATMega328p microcontroller and utilizing a 3D printed enclosure, his version could be built for as little as $15 USD depending on where you sourced your parts from. But by his own admission, the design was held back by the quality of the $5 replacement soldering iron tips he designed it around. As the saying goes, you get what you pay for.
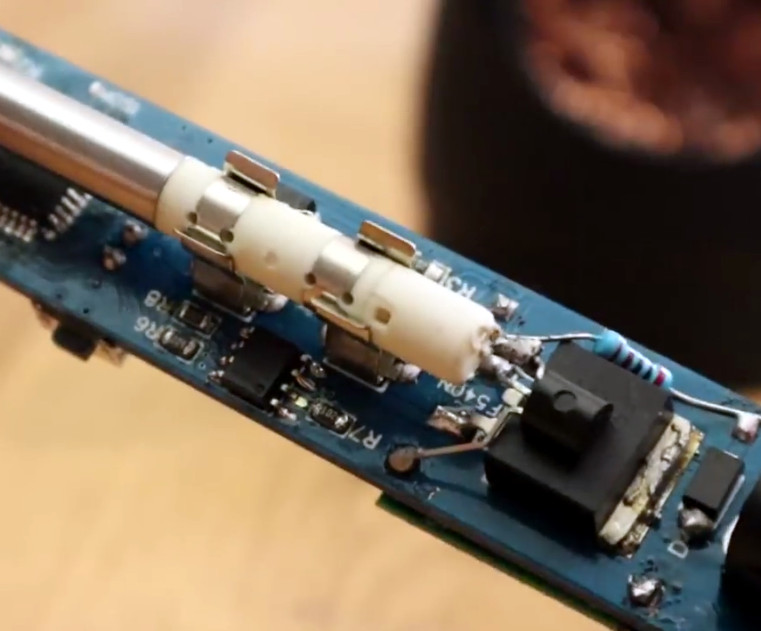 But [Electronoobs] is back with the second version of his DIY portable soldering iron, and this time it’s using the vastly superior HAKKO T12 style tip. As this tip has the thermocouple and heating element in series it involved a fairly extensive redesign of the entire project, but in the end it’s worth it. After all, a soldering iron is really only as good as its tip to begin with.
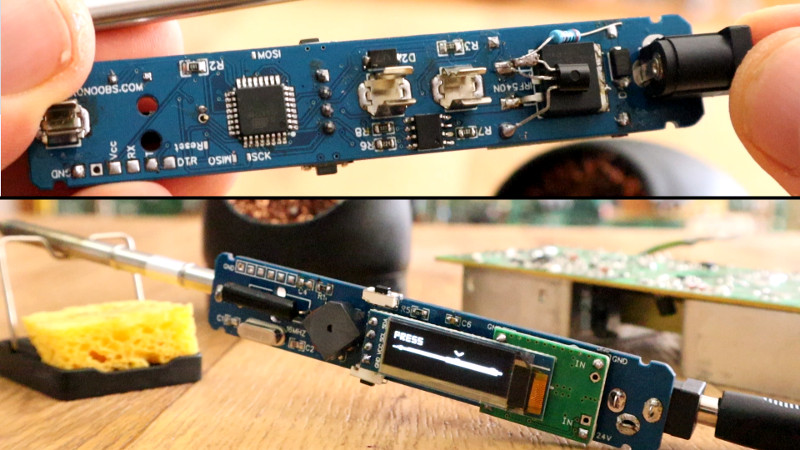
This version of the iron deletes the MAX6675 used in V1, and replaces it with a LM358 operational amplifier to read the thermocouple in the T12 tip. [Electronoobs] then used an external thermocouple to compare the LM358’s output to the actual temperature at the tip. With this data he created a function which will return tip temperature from the analog voltage.
While the physical and electrical elements of the tip changed substantially, a lot of the design is still the same from the first version. In addition to the ATMega328p microcontroller, version 2.0 of the iron still uses the same 128×32 I2C OLED display, MOSFET, and 5V buck converter from the original iron. That said, [Electronoobs] is already considering a third revision that will make the iron even smaller by replacing the MOSFET and buck converter. It might be best to consider this an intermediate step before the DIY iron takes on its final form, which we’re very interested in seeing.
The first version of the DIY Arduino soldering iron garnered quite a bit of attention, so it seems there’s a decent number of you out there who aren’t content with just plunking down the cash for the TS100.
[Thanks to BaldPower for the tip.]


Somehow I missed this the first time around. Good project. Thank you
Mm, it doesn’t look very mechanically strong, I could see the tip levering out of those clips quite easily with any modest side-load on the tip in the “wrong” dimension. An appropriate case design to provide more support would help I guess.
This is similar to the design the TS100 uses for retaining the tip, except there the contacts also have screws that mechanically couple them to the metal case. Maybe some sort of retaining clip could be added to help here?
The new buck converter Electronoobs proposes to use barely works at 24V.
I really wish I made a note of whose YouTube video it was that tested this replacement: On eBay search for “2A DC-DC Buck Step-down Adjustable Converter Module 5-24V to 1.8V 3.3V 5V 9V 12V”
You can solder bridge the right gap underneath the board for a 5V output. No need to faff around with the trimmer and glue although the option is there if you need a precise output.
The cheapest and most popular power supplies available are 19V laptop chargers anyway.
24V 5A Psu for $15, 3A versions are $10
I think the channel you’re referring to is Onstate LED Lighting.
https://www.youtube.com/channel/UCKs_u8kcQBQsERZhpZHU_7Q
Assuming Electronoobs is American (?), this a classic case of stealing Chinese IP… hang on… what?
He is from Spain
They will be alright they can go and overfish somalia and create pirates out of people and sell the fish to the west.
using an lm358 opamp with typical 2mV offset for measuring uV thermocouple voltages …