There was a time, not so long ago, when hype for desktop 3D printing as so high that it seemed you could print anything. Just imagine it, and your handy dandy magical 3D printer could manifest it into reality. But now that more people have had first hand experience with the technology, the bubble has burst. Reality has sobered us up a bit, and today we’ve got a much better idea of what can and cannot be printed on a traditional desktop 3D printer.
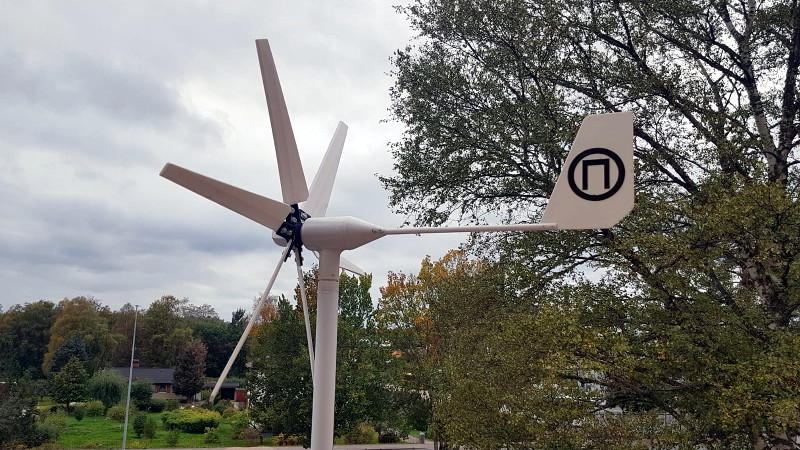
 But that doesn’t mean we aren’t surprised from time to time. As a perfect example, take a look at this almost entirely 3D printed wind turbine designed and built by [Nikola Petrov]. Outside of the electronics, the pole it’s mounted to, and some assorted bits and bobs, he produced all the parts on his own large-format TEVO Black Widow printer. He mentions there are a few things he would do differently if he was to build another one, but it’s hard to find much to complain about with such a gorgeous build.
To be sure, this one isn’t for the 3D printing novice. First of all, you’ll need a printer with a bed that’s at least 370 mm wide just to print the blades. [Nikola] also recommends printing the parts in ABS and coating them with acetone to smooth and harden the outside surfaces. We’d be surprised if you could print such large objects in ABS without a heated enclosure as well, so plan on adding that to your shopping list.
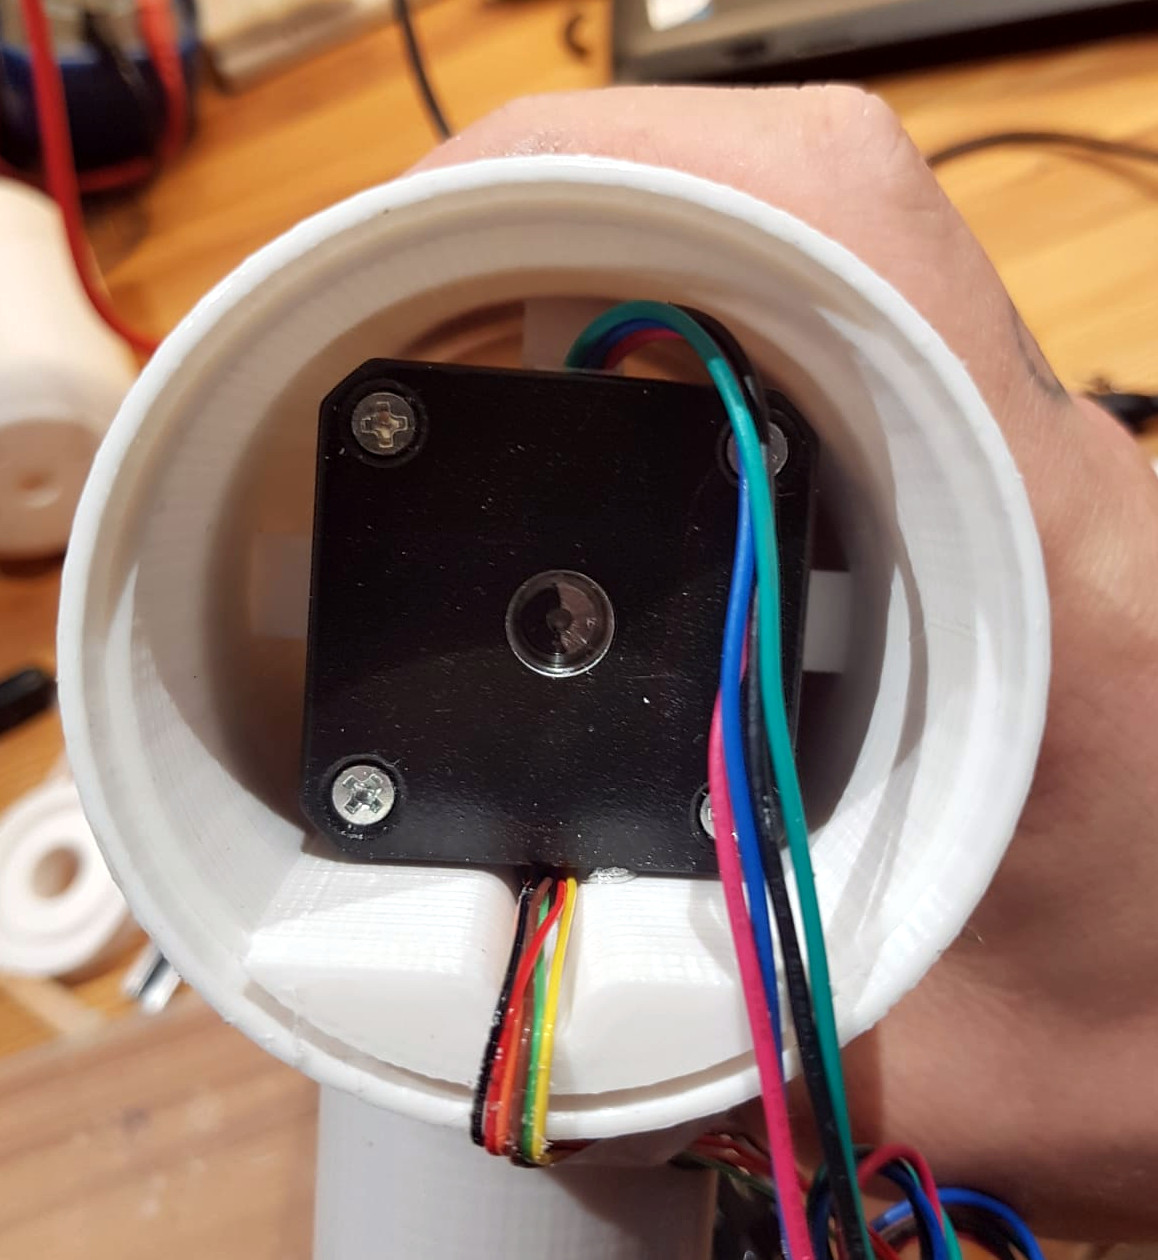
On the flip side though, the electronics are about as simple as they come. The blades are spinning a standard NEMA 17 stepper motor (through a 1:5 gearbox) to produce AC power. This is then fed into two W02M rectifiers and a beefy capacitor, which gives him DC with a minimum of fuss. In theory it should be capable of producing 1A at 12V, which is enough to light LEDs and charge phones. In this design there’s no battery charging circuit or anything like that, as [Nikola] says it’s up to the reader to figure out how to integrate the turbine into their system.
If you don’t think your 3D printing skills are up to the task, no worries. In the past we’ve seen wind turbines built out of ceiling fans, and occasionally, even less.


A breath of fresh air.
I’m blown away by this build.
This really spins 3D printing a new direction
You could say it is a Wind of Change…
Wait, there are things you can’t 3D print? I haven’t found any limitations there yet for things I want.
Apparently you don’t want diamonds, gold ingots, food…
Well, I do own a PancakeBot, so I’ve got the food angle covered.
Why would you choose to use a stepper motor as a generator?
My guess is for the three phase AC, the times the power for every revolution of the rotor. Also the bearings may be more substantial than the typical DC hobby motors often used.
No, with a stepper you will gets two phase ac, assuming a 4 wire stepper motor.
Availability, High voltage per RPM.
I thought ABS had some serious problems with UV degradation? Unless treated with something quite robust, this thing would only last a few years before it became brittle and started to fall apart…
you could build a rotary mill to cut wing foam cores. then apply carbon fiber and epoxy to those to make blades. and it should have a bom a bit lower than a large format 3d printer.
a cnc rotary mill could be build with a single stepper motor driving the rotory axis through a gearbox to drive a tensioned rod that supports the foam blank. a threaded rod parallel axis would probably suffice. and you could use the guts of a cd drive for the perpendicular axis for most smaller wings. the rotory axis is essentially infinite, the parallel axis can be arbitrarily long (how long is your rod?). and for wind turbine blades a few cm of travel is all you need on the perpendicular axis. if you wanted to do wings proper you would need a longer perpendicular axis.
Hopefully on version 2 he’ll optimize the blade design. The no camber, no twist, flat blades are pretty inefficient.
The (very likely) bad blade design was also the first thing I thought when I saw this project.
I was also wondering about the use of a stepper motor with gear.
It seems more logical to use a 2 or 3 blade rotor with direct coupling to the shaft.
Less blades @higher RPM can extract the same energy from the wind as many blades at lower RPM.
Combine that with a thin steel cable through the length of the blades (for example inner cable from bike brakes) to prevent centrifugal forces from tearing the blades apart at high rpm, or some fiberglass strips.
This will also keep the parts together if the blades break due to high stresses.
Without modifications this design will probably tear itself apart in the first storm.
There is not much mentioned about the electronics.
My first go would be some (skottky) rectifiers (+Elco) connected to the stepper motor, and then an SMPS design with MPPT to match the power input of the rotor with the power extracted from the capacitor.
NEMA17 also seems to small for a rotor with a diameter of 70 cm, but that’s ok if you do not care about maximum power output, but want some reasonable power at low winds.
UV resistance can be increased significantly with a few layers of the right paint.
This design will probably deliver some energy, but there is still a lot of room for improvement.
I wrote a paper about blade design back in highschool (wow that’s like 7 years ago) – however it is written in czech: https://blog.honzamrazek.cz/wp-content/uploads/2016/07/SO%C4%8C-N%C3%A1vrh-mal%C3%A9-v%C4%9Btrn%C3%A9-turb%C3%ADny-tisk.pdf
Hah! I was just going to ask if anyone had a good resource for (slow wind speed, small scale) turbine design like this. I wish I read Czech…
Anyone have any good resources in English? I’ve seen a bazillion people printing/building/cobbling together windmills, but no real documentation on how to do it right.
There is a pretty good book, but also in Czech: V. Rychetník, J. Pavelka, and J. Janoušek: Větrné motory a elektrárny. ČVÚT, 1997. I haven’t found any such a good resource in English so far (old Czech technical books are gold mines of knowledge in engineering!)
Wow, man, I’m impressed that you did such comprehensive work at highschool. It looks like a master’s thesis! Hats off.
Wow, I wanted to volunteer to translate it, but 61 pages? Not going to happen.
But quick look at it – it seems like high quality work for secondary school project! Congrats.
Hej! Nikola here, i optimized and uploaded new blade design, so check it out :) Also, thanks for the tip! :)
If it were me I would used some old brushless DC servo motors instead, the higher the pole count the better. Then you dont have to overcome the detent torque of a stepper motors and may not even need gearing which wastes even more energy. Dump that into a generic three phase rectifier and you have your DC.
A stepper motor is essentially a high pole count brushless DC motor.
Most stepper motors are 2-phase, but with NEMA 23 or bigger you can also buy 3-phase variants, which makes the perceived difference even smaller.
You’d want to choose a brushless DC motor with a low KV value (thousands of RPM per volt). This should then give you higher generation volts at lower input speeds.
I always thought that guiding fluids and gasses are what sets 3D printing apart. Because its all about the geometry, and that is what comes at no cost with 3D printing. Would the props not be built better vertically though, to minimize the warping issues? Just add a steel core, even if its just threaded bar, to prevent centrifugal enhanced delamination.
for airfoils i believe in printing the ribs, not the whole thing, and the covering them appropriately (monokote or tape or fiberglass, depending on your inclination)
Is possible to run raspberry pi for 24/h = 365 day per year?
this is a question, not one 10 minets
Yes,
Oh, do you mean powered by this windmill?
This answer made my day :)
Is there something wrong with using a car alternator ? Too much torque needed ? I’m thinking of building a much larger one, hence my question.
I was interested in the same idea but quickly came to the conclusion that it’s likely going to be impractical. There’s a pretty significant amount of torque needed to run them and a pretty high RPM needed to reach the threshold before it starts outputting a voltage. You’ll also need to provide it a voltage to get the charging circuit started as they’re usually using electromagnets, but this last point is more of a design consideration than a problem.
I guess a car alternator is out of the question ?
Nah – search the interwebs; big G returns nearly ~700k hits for “hawt” car alternator and ~190k for “vawt” car alternator. They’re common in diy builds.
Oops, didn’t notice the date on that one! *<:0)
Can I connect/couple Dc Output of this to Solar Panel output and drive it to the Solar DC Inverter for AC ?
What motor? I found like 15 different nema 17 motors