The Prusa i3 MK3 is, for lack of a better word, inescapable. Nearly every hacker or tech event that I’ve attended in 2018 has had dozens of them humming away, and you won’t get long looking up 3D printing on YouTube or discussion forums without somebody singing its praises. Demand for Prusa’s latest i3 printer is so high that there’s a literal waiting list to get one.
At the time of this writing, over a year after the printer was officially put up for sale, there’s still nearly a month lead time on the assembled version. Even longer if you want to wait on the upgraded powder coated bed, which has unfortunately turned out to be a considerable production bottleneck. But the team has finally caught up enough that the kit version of the printer (minus the powder coated bed) is currently in stock and shipping next day.
I thought this was a good a time as any to pull the trigger on the kit and see for myself what all the excitement is about. Now that I’ve had the Prusa i3 MK3 up and running for a couple of weeks, I can say with confidence that it’s not just hype. It isn’t a revolution in desktop 3D printing, but it’s absolutely an evolution, and almost certainly represents the shape of things to come for the next few years.
That said, it isn’t perfect. There’s still a few elements of the design that left me scratching my head a bit, and some parts of the assembly weren’t quite as smooth as the rest. I’ve put together some of those observations below. This isn’t meant to be a review of the Prusa i3 MK3 printer, there’s more than enough of those already, but hopefully these assorted notes may be of use to anyone thinking of jumping on the Prusa bandwagon now that production has started really ramping up.
Bed Selection
 Before going any farther, I want to address what is surely the biggest question for anyone looking to buy the Prusa i3 MK3: which bed surface to choose?
Prusa continues to struggle to produce enough of the powder coated PEI beds to keep up with demand, and as of this writing, there’s an additional three-week lead time on the beds themselves. In other words, the kits are ready to go right now, but if you want the upgraded bed, which comes at no additional cost, your kit may end up sitting in a pending status for up to three weeks while you wait in line to get the bed.
The main difference between the standard and upgraded beds is the surface texture of the printed parts. The standard bed leaves a bottom which is shiny and almost mirror smooth, while the powder coated bed gives the bottom of prints a matte textured surface. While the textured bed in theory should have even better adhesion thanks to an increase of surface area, it’s largely an aesthetic distinction.
So should you wait? Personally I didn’t, and received the standard bed which consists of a replaceable PEI sticker on a spring steel sheet. This is still a fantastic bed, with phenomenal adhesion and some of the easiest part removal I’ve ever experienced with a stock 3D printer bed: simply remove the spring steel sheet and flex it to pop the parts off. It’s also worth noting that, eventually, the powder coated beds will be added to the Prusa online store for separate purchase at $25 USD.
Kit Assembly
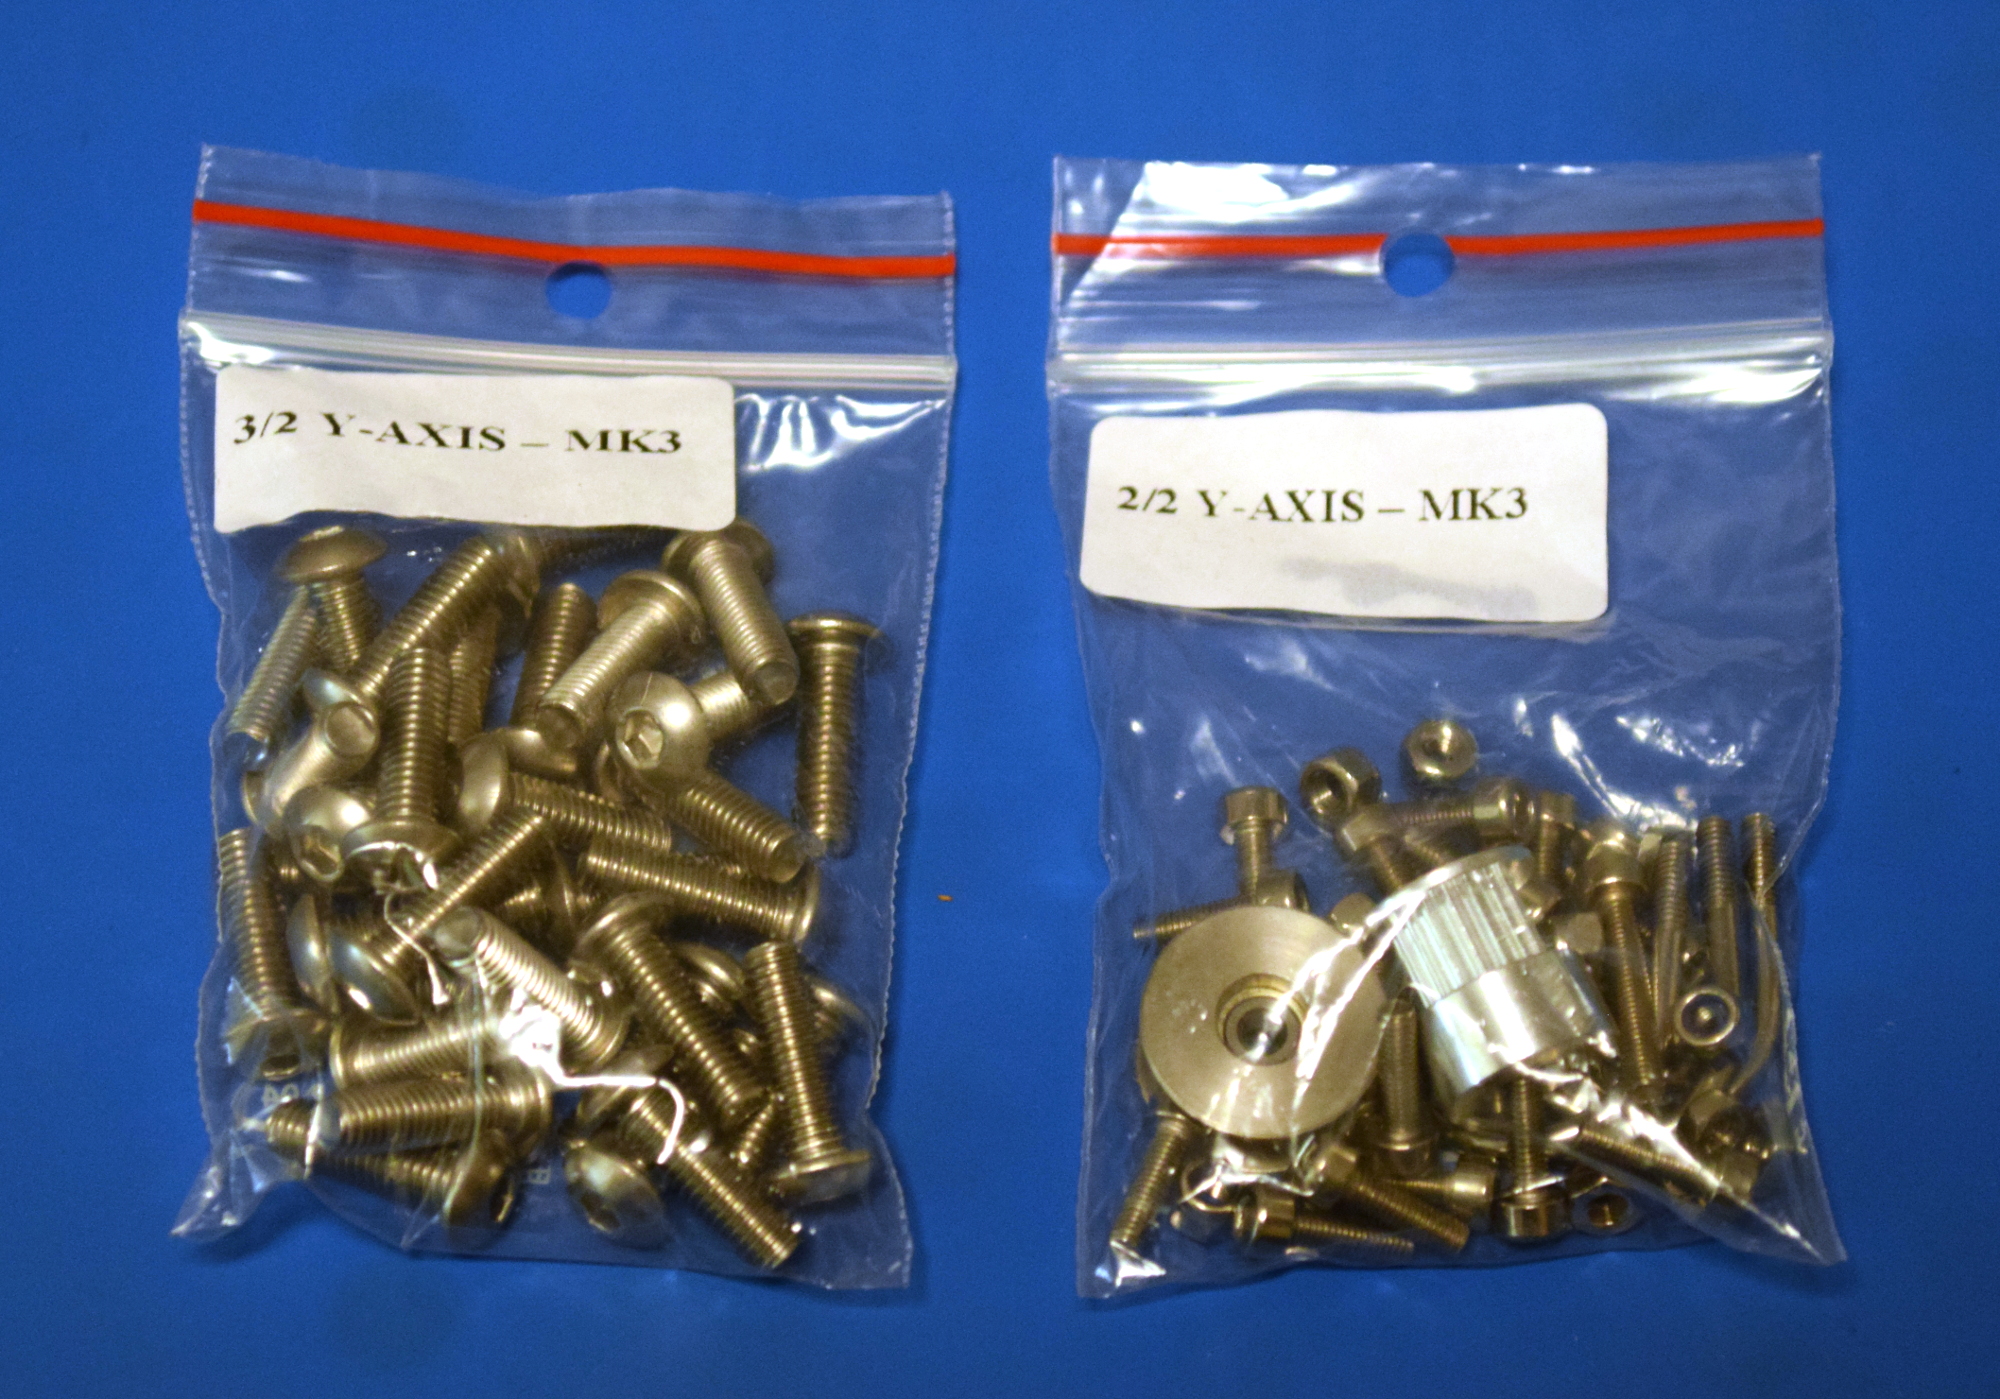 I’ve built my share of 3D printers over the years, and I can say confidently that this was the best kit I’ve ever assembled. If you’ve been put off from ordering the MK3 kit because of the perceived difficulty of assembling it, don’t be. The MK3 comes with a printed assembly manual (though checking the online version gives you the benefit of seeing comments from other owners) and the bags of parts are separated by assembly step. You don’t need to lay out all the pieces on a big table to find that one specific part; just grab the bag that corresponds with the current step of assembly, and you have everything you need.
It was also nice to see a well-stocked “Spares” bag that has at least one extra of nearly every piece of hardware in the kit. This is especially important as the kit makes use of somewhat uncommon fasteners, such as square nuts. That said, there are still a few tiny parts in the kit that don’t have any spares, such as the bearings inside the extruder, so a tray to securely hold the lose parts during assembly is a must.
Incidentally, the kit does technically include all of the tools you need to assemble it. But given the number of screws, and the fact you want them pretty well torqued down in most cases, I would suggest using a lightweight screw gun with a reliable clutch so you can quickly run in screws with consistent torque.
Rough Spots
While the kit and the documentation is fantastic overall, there were a few areas which slowed me down during the build. The main one was undoubtedly getting the frame squared up early on. You need to screw the aluminum extrusion to the vertical frame, and the manual explains that it’s critical to get this assembly as square as possible for optimal performance. But the manual fails to specify just how close it needs to be, nor does it give much in the way of guidance for adjusting it if you find the alignment to be off.
After consulting the comment section of the online manual, as well as various forums online, I eventually came to two conclusions: not only is it nearly impossible to get the frame perfectly square, it also doesn’t matter a whole lot. The printer will automatically compensate for a slight misalignment, and officially Prusa considers anything under a few millimeters of deviation to be normal.
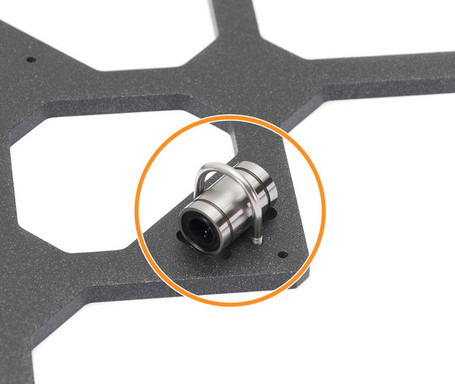
Another problem area is mounting the linear bearings on the bottom of the printer’s bed. Rather than a specific bearing holder, the MK3 uses a single U-bolt in the center of each bearing. These not only don’t hold the bearing down particularly well, but are far to easy to over (or under) torque. If you put them on too tight the bearing can deform, but too loose and they can rattle around. The best advice the manual can give is to hand-tighten the nuts and then turn them an additional 90 degrees with the supplied pliers. Frankly it feels rather sloppy, and it’s something I would hope to see addressed in the future. As it stands, it would arguably be better to just hold them on with zip ties.
Reliance on Printed Parts
The Prusa i3 MK3 makes use of an incredible number of printed parts. If it isn’t electronic, a fastener, or part of the frame itself, it’s probably printed. The reasoning for this is simple: not only does it allow Prusa to make incremental changes to the design without having to retool their entire production, but it allows the end-user to upgrade their own printer to keep up with upstream changes if they wish. In theory it’s a great idea, and works fine for probably 85% of the parts in the printer, but I feel it’s somewhat overused.
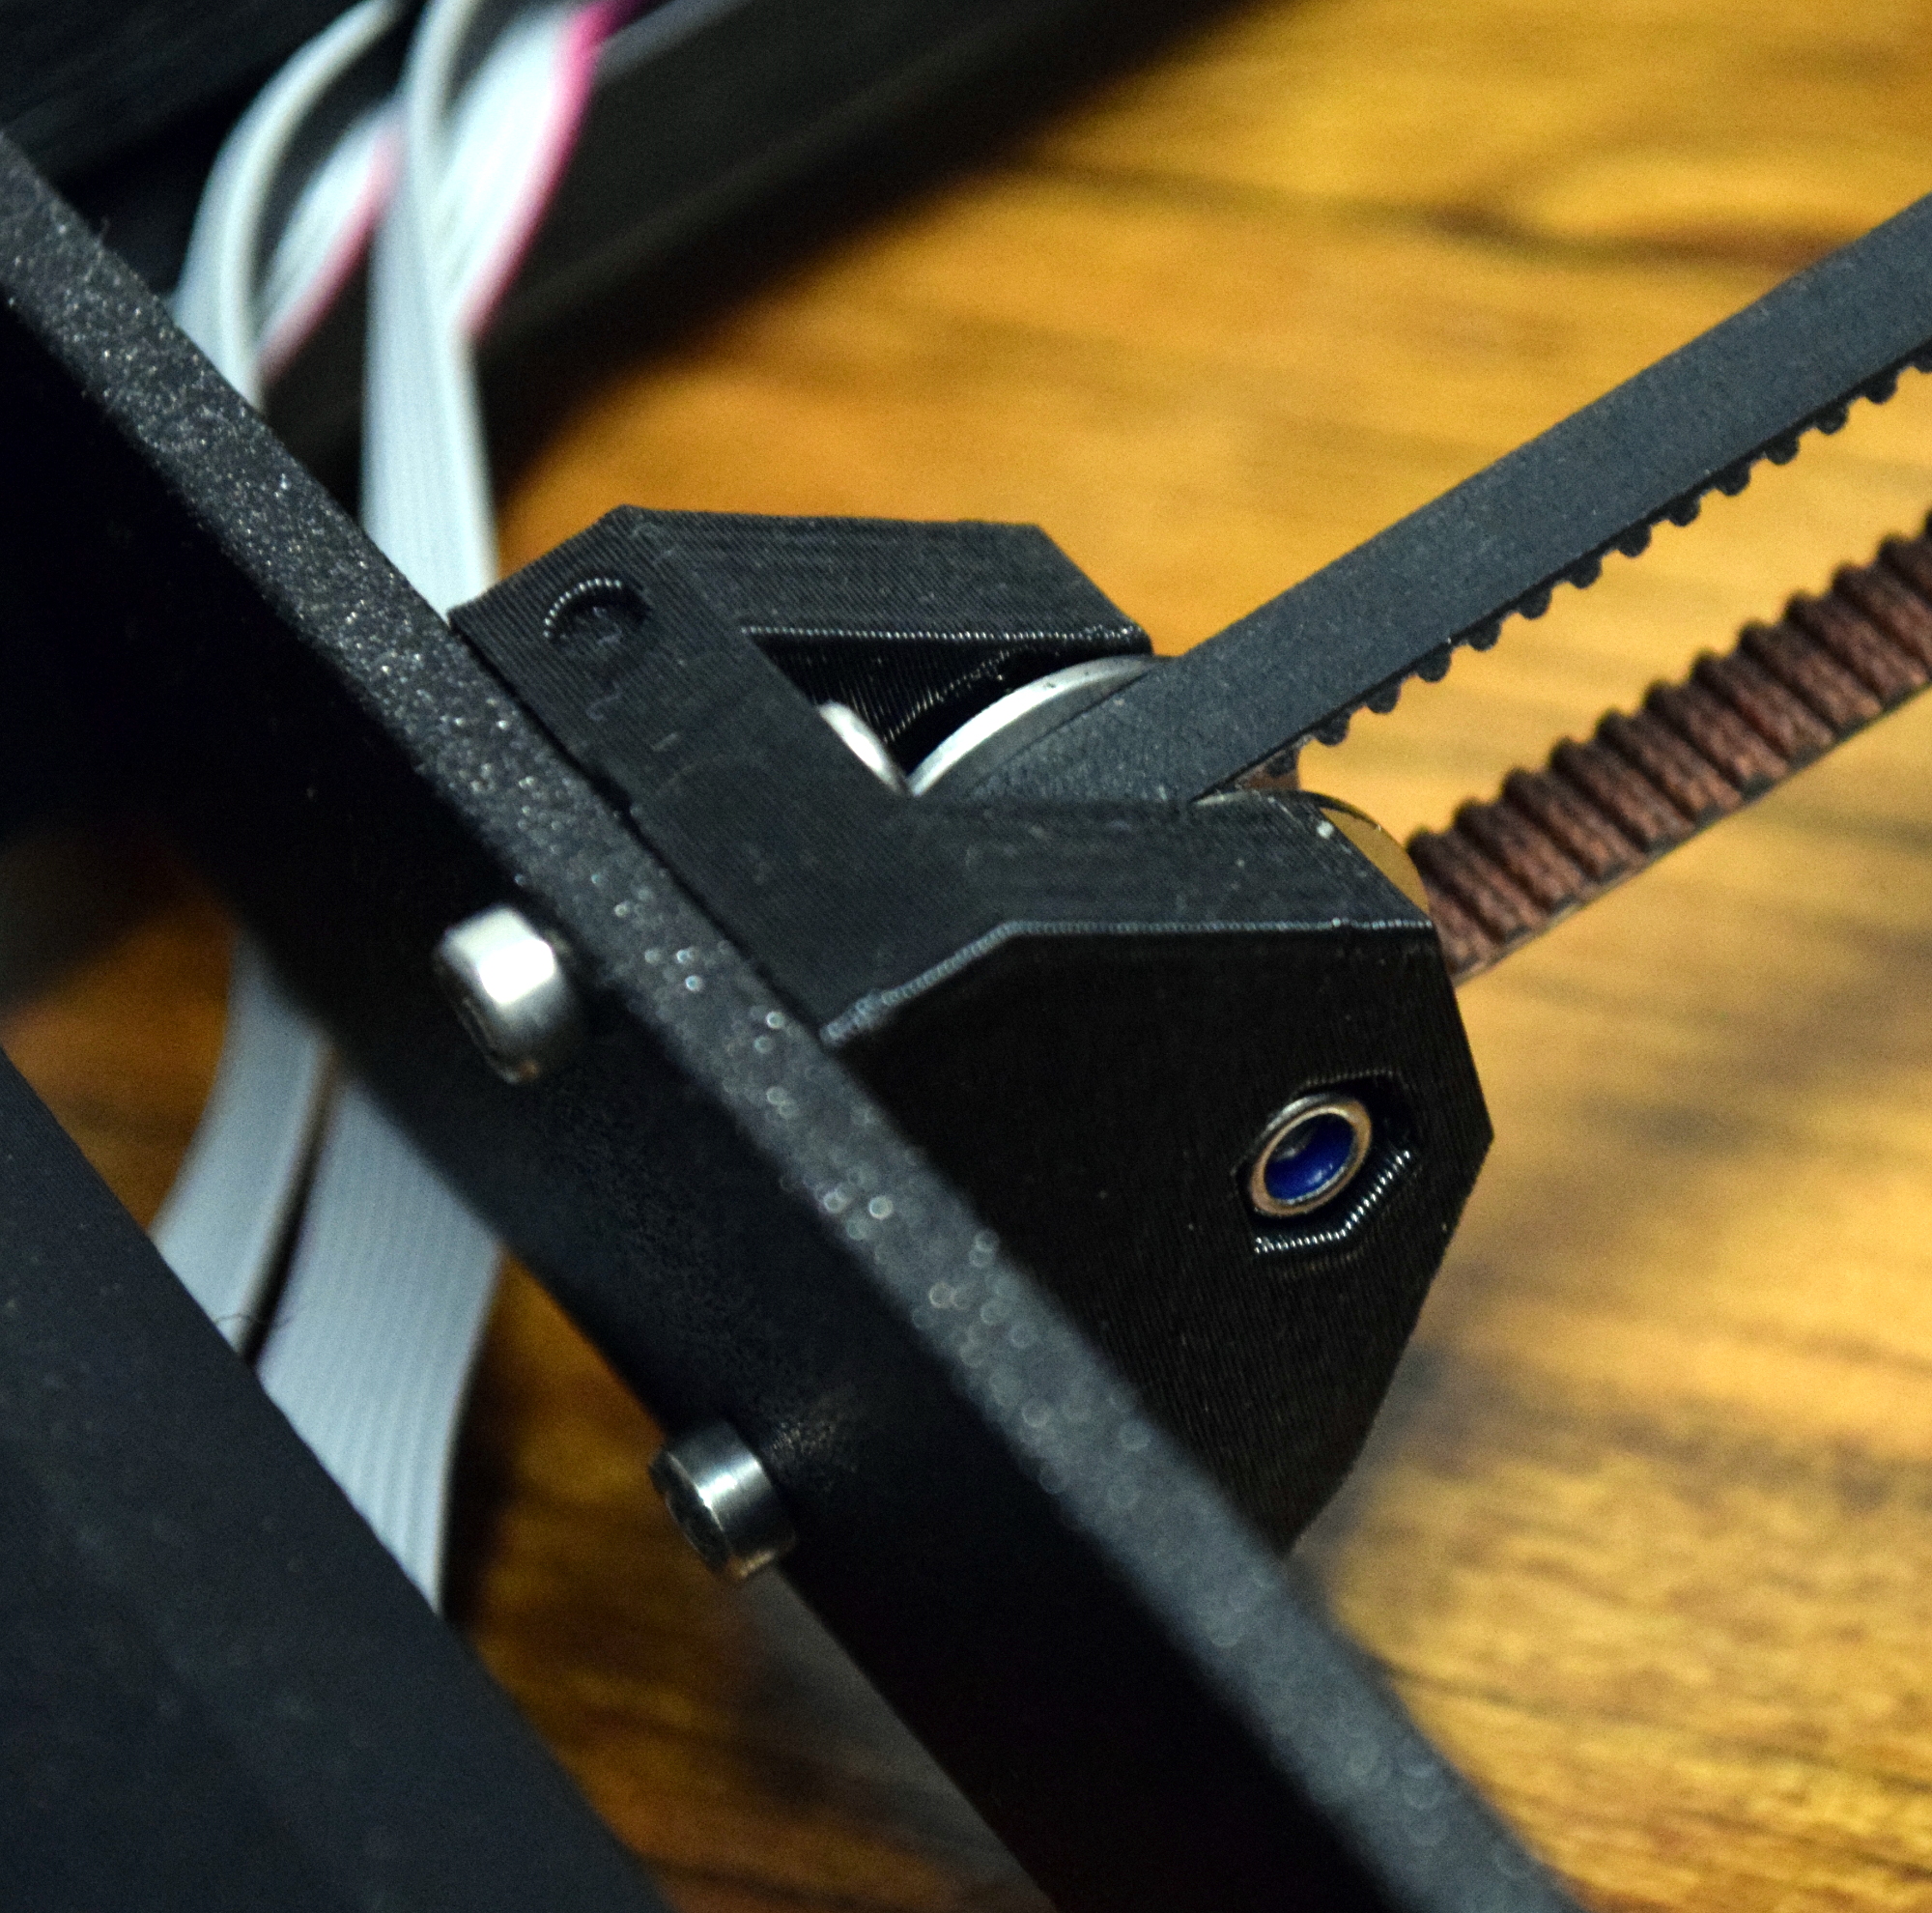 Case in point, the printer’s Y axis. Both the bracket for holding the stepper motor and the opposing pulley are simple blocks; with no provision for adjustment, or really any unique design elements at all. Both parts could be made faster and stronger by simply using bent aluminum brackets. With a drill press and a vise, a worker could produce a dozen of these parts in the time it takes to print one. For parts that seem unlikely to go through any significant design revisions, it seems strange to keep them as printed.
It isn’t just a matter of production bottlenecks, in some cases the printed parts may be a liability. Within the first fifteen hours of printing on my MK3, one of the printed parts came apart along the layer lines. To be fair this was something of an anomaly, and Prusa support was fantastic about sending me a replacement part for free. But for a printer that costs $1,000 USD (in its assembled form), it’s a little concerning that success or failure might ultimately depend on issues such as layer adhesion in its printed components.
A Leap Forward
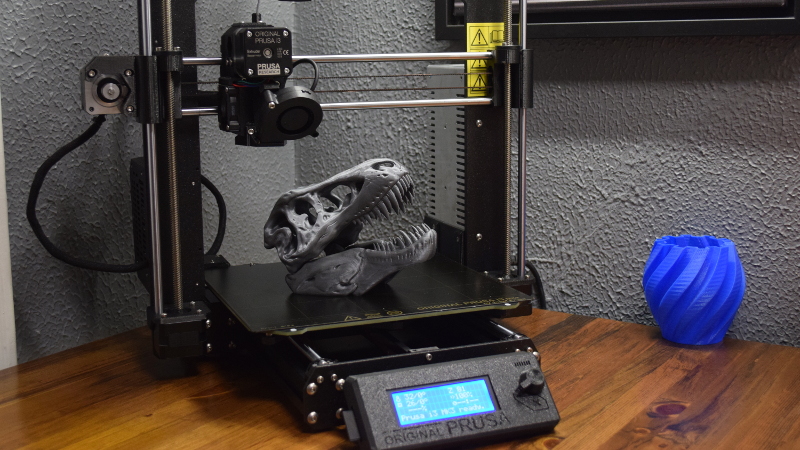
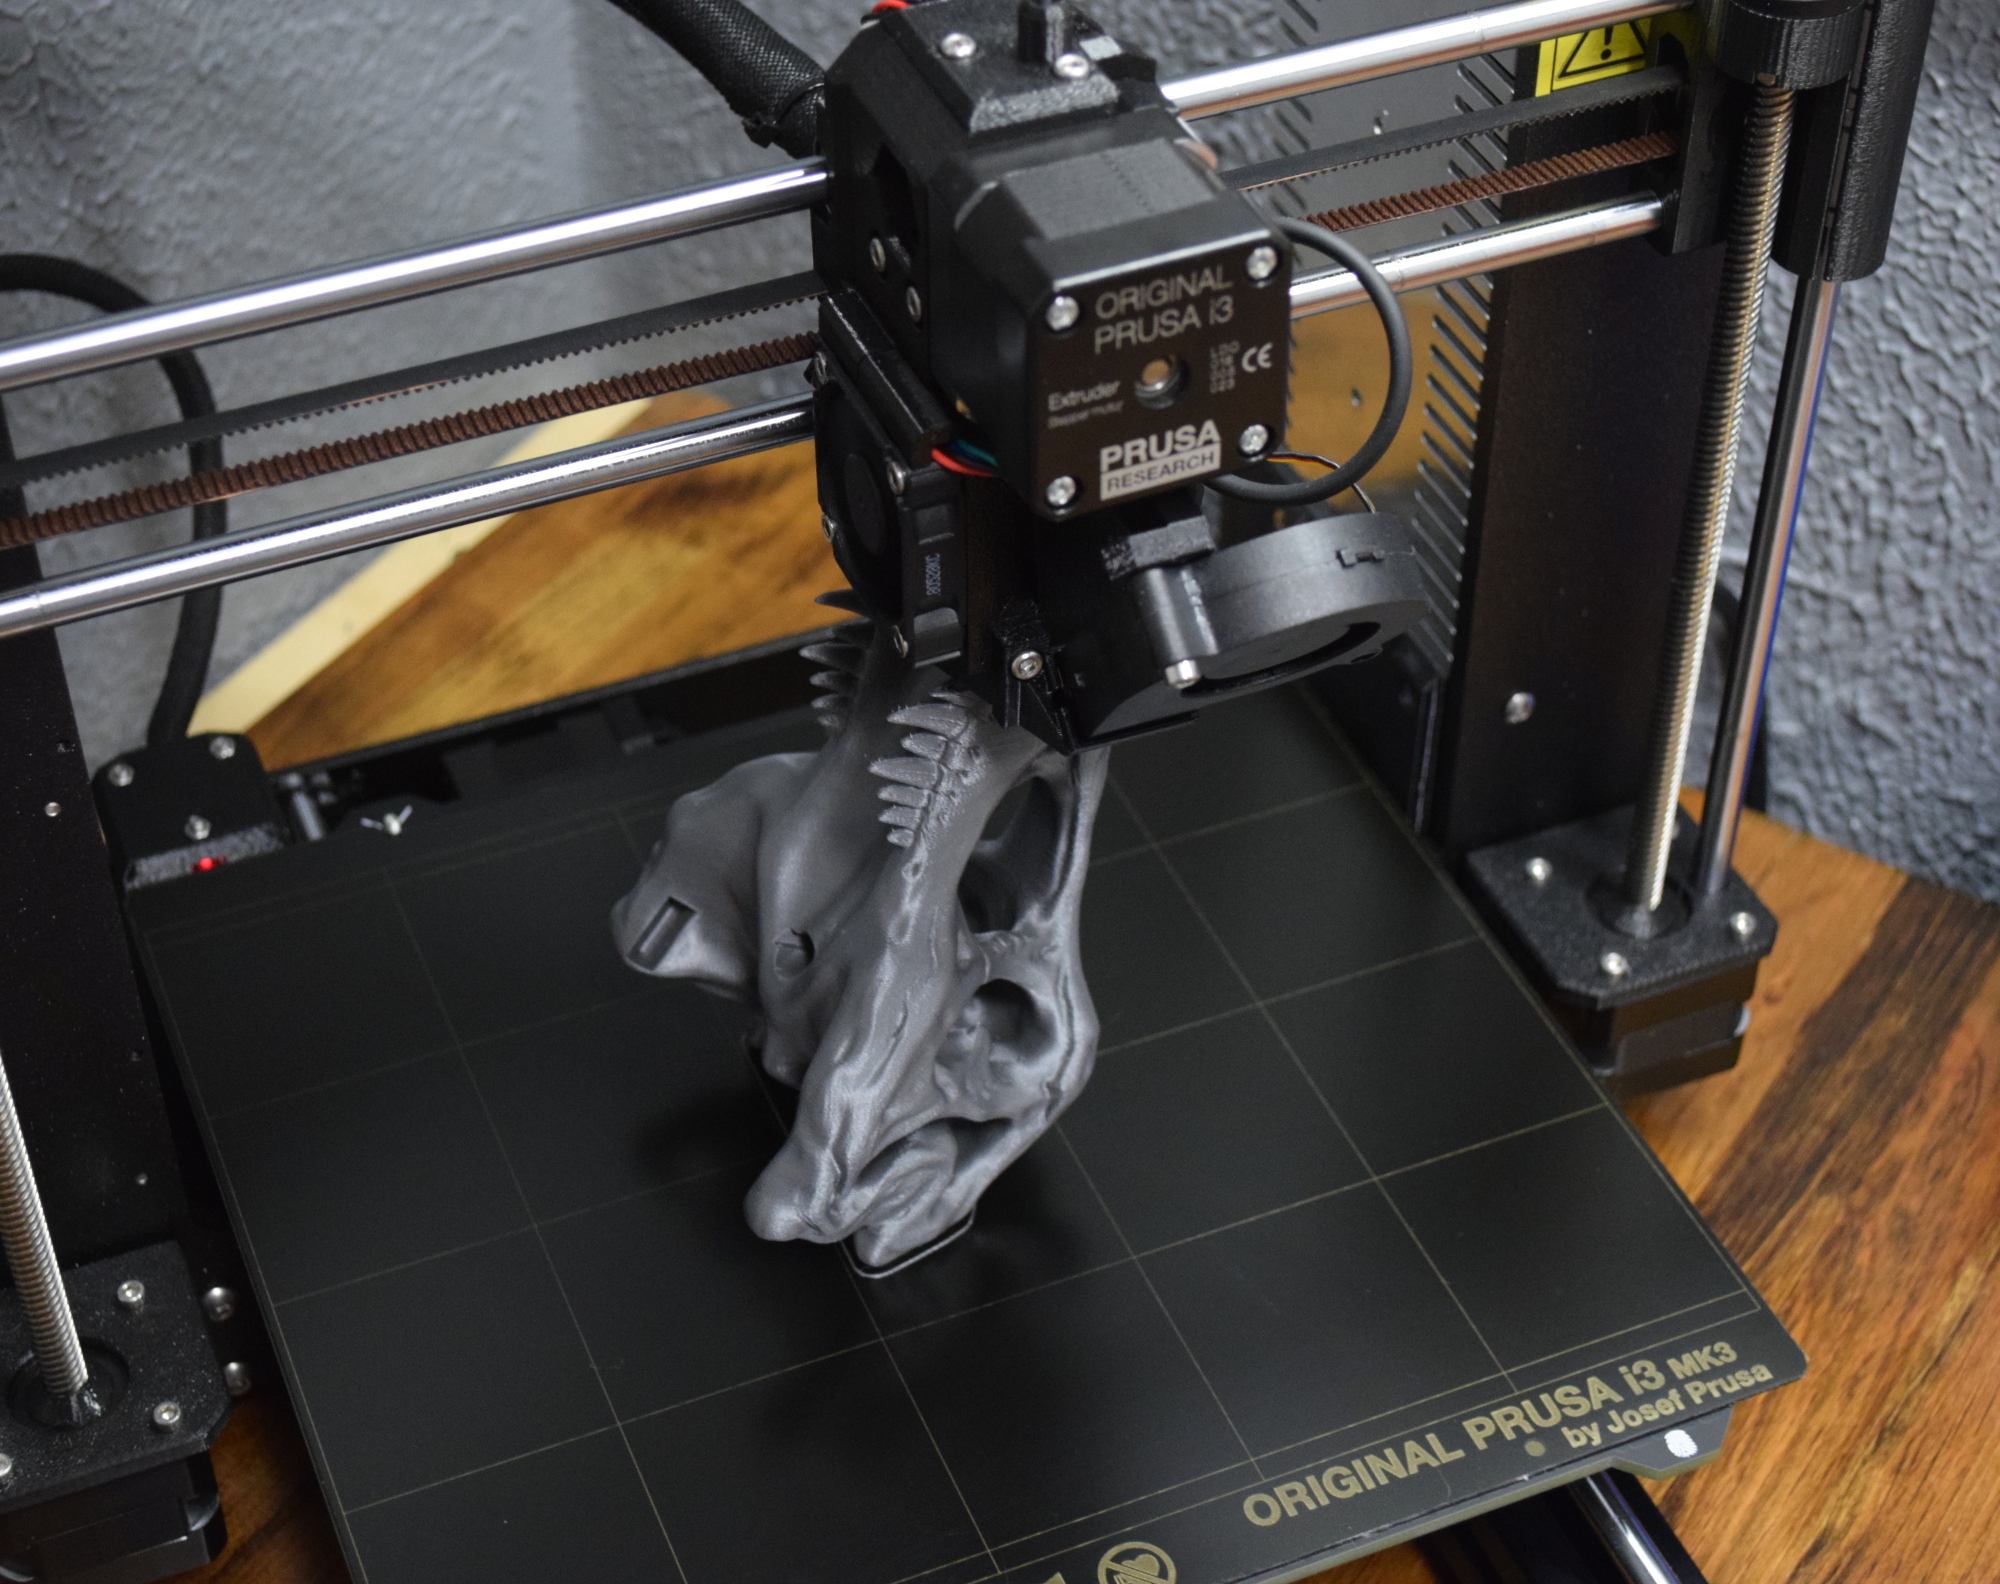
After putting a few hundred hours of prints through the Prusa i3 MK3, I almost feel foolish when I think of the amount of time I’ve spent fiddling with lesser printers to get results that still weren’t as good as what the MK3 consistently puts out. The very first print I did on the MK3 after assembling it, with absolutely no additional calibration or adjustment, was phenomenal. Other printers are only cheaper if your time has no value, or you enjoy the struggle.
From a usability standpoint it’s still not a perfect 3D printer, though perhaps such a thing isn’t possible. But the dizzying array of sensors and functions packed into the MK3 certainly puts it about as close as you can get. The ability to detect and recover from things like loss of power and filament jams are arguably worth the price of admission alone.
The Prusa i3 MK2 was already an excellent printer, but the new features added in the MK3 combined with the available multiple material upgrade really puts this machine on the cutting edge of desktop 3D printing. In the end, if you’re looking for a printing workhorse that you know can get the job done, this is the machine for you. Unfortunately, if you’re more interested in the tinkering and fiddling which has been a hallmark of 3D printing up to this point…those days might be numbered.


> The very first print I did on the MK3 after assembling it, with absolutely no additional calibration or adjustment, was phenomenal.
Phenomenal for uncalibrated printer, yes. That pulley looks ok, but there should be some reinforcement on that frame, otherwise it will bend and may break when belt is tightened.
What? The pulley holder is one of the (many) 3D printed parts the MK3 comes with, the user doesn’t print the parts themselves when they buy the kit.
Kind of interested in how you thought the printer could print it’s own core components during assembly…
I said FRAME needs reinforcement. That should be done at factory level. I never said user should print it.
My printer (anet a8 heh) needed reinforcement in the same place. It’s not like it’s required from the start, but that frame is plastic, it will creep after some time. I printed those reinforcements with stock frame but I could buy 5 printers like mine for one prusa. But my printer had similar print quality with first uncalibrated prints, then I changed nozzle for better one and it’s even better now (probably not as good as calibrated prusa and without all those bells and whistles).
I’m not sure if you’re referring to your a8 printer when you say, “that frame is plastic,” but the Prusa’s definitely isn’t – it’s powder-coated steel and extruded aluminum.
I didn’t know, that changes everything. Thanks!
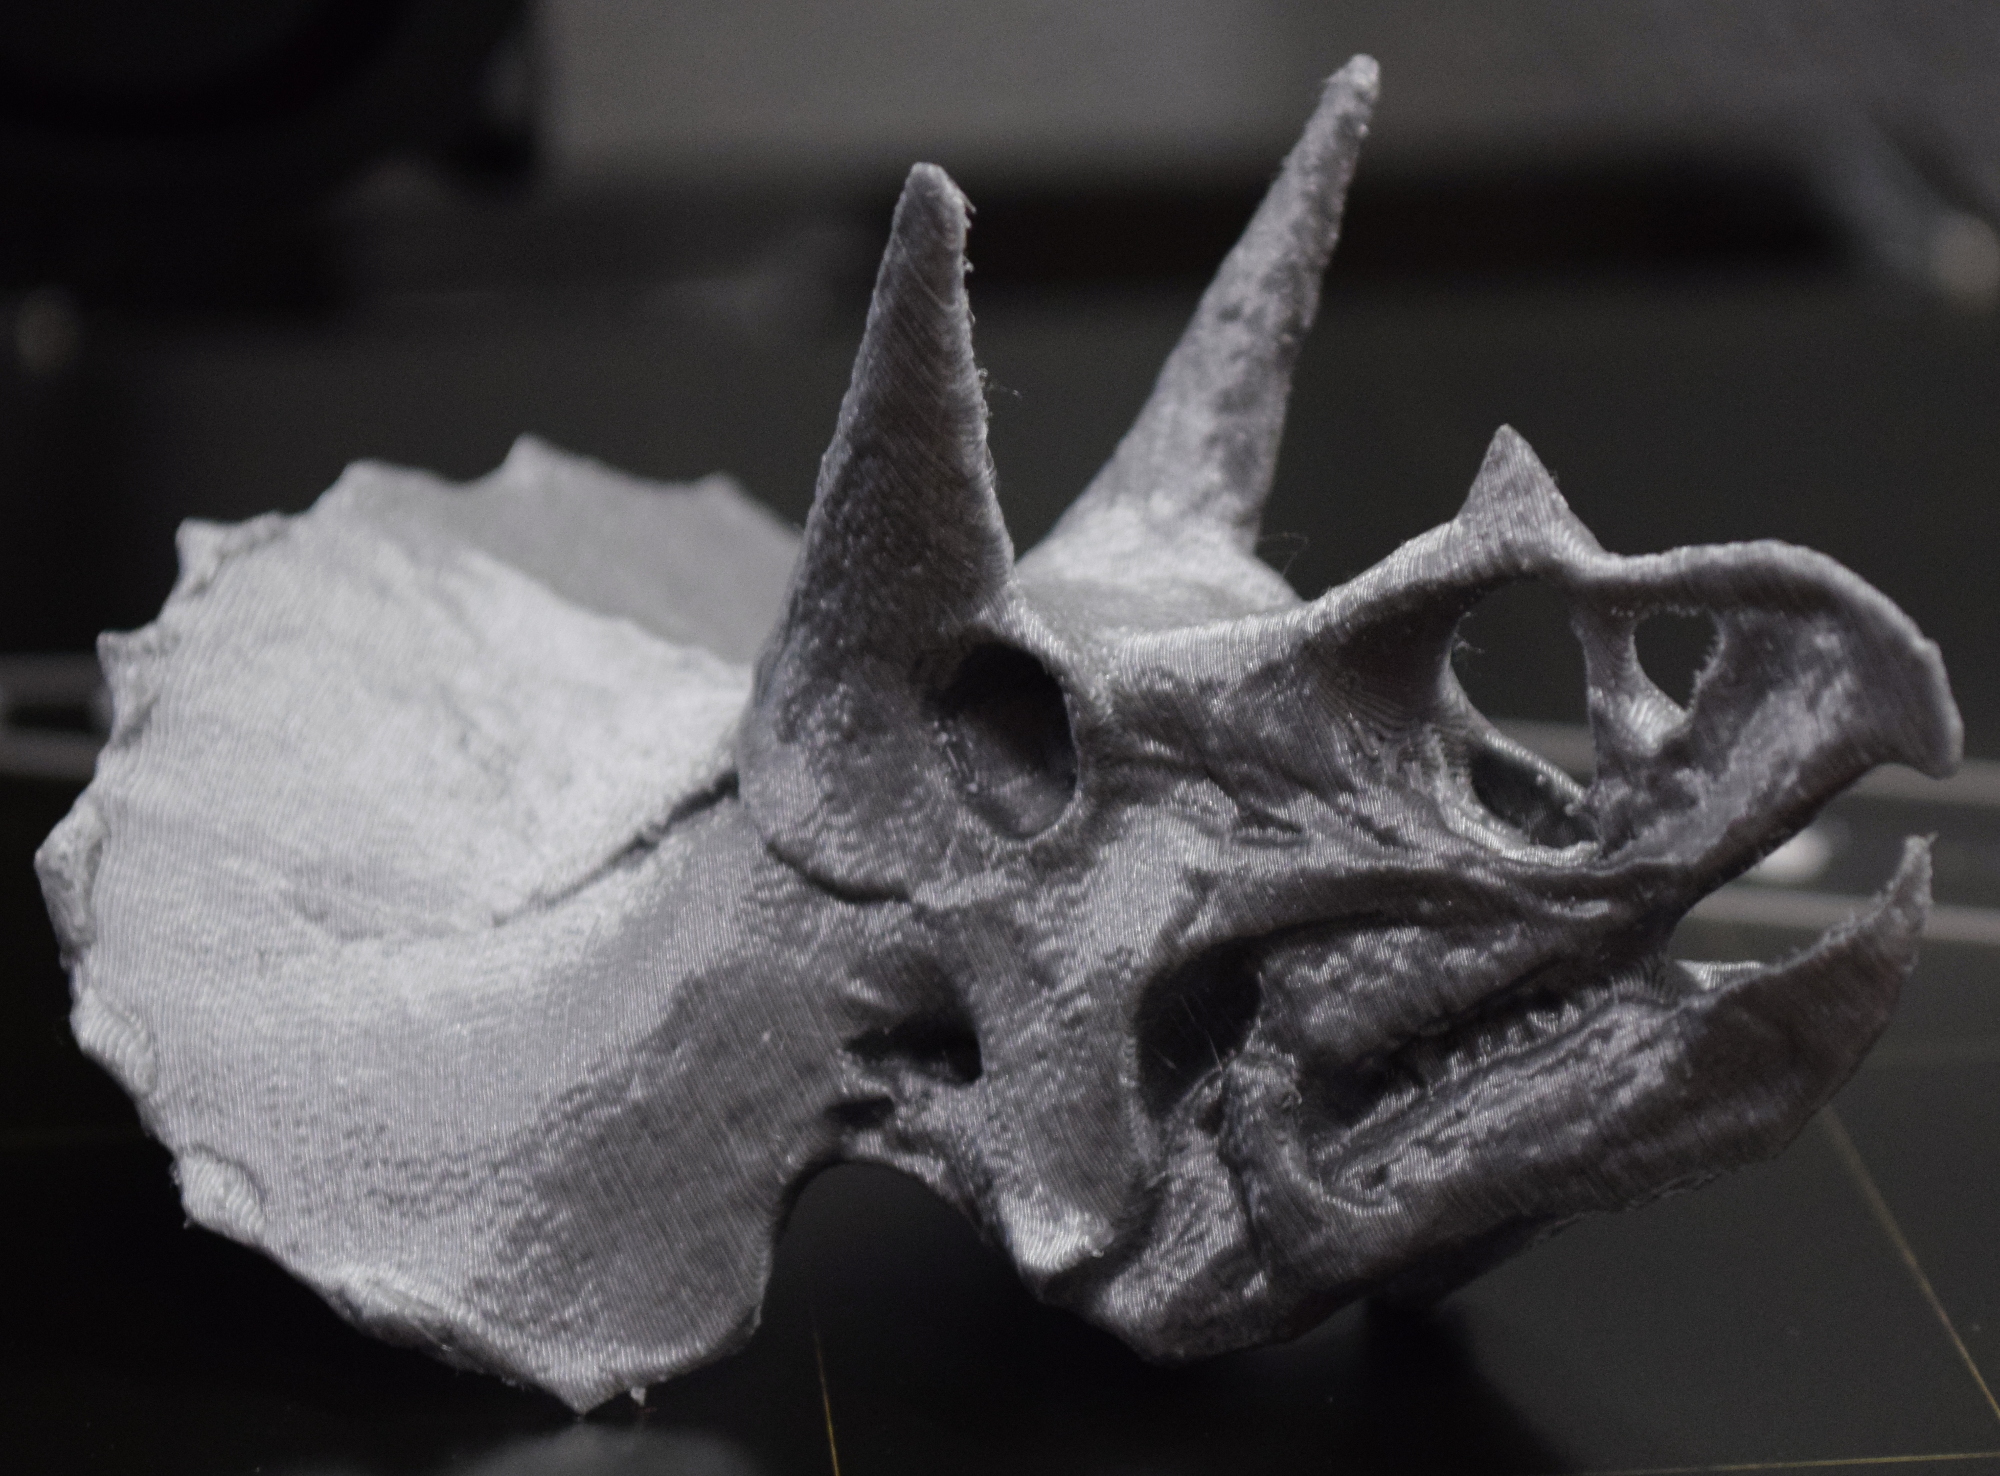
The OP is Raging about the bracket for the y-axis you mentioned in the article. he is completely ignorant of the fact that you are referring to the Triceratops skull as your first print, which was documented in the caption that he no doubt failed to read.
I just helped build one and that *metal* frame isn’t going anywhere.
So just so I’m clear, Charles was right? You did think your Anet A8 was a Prusa MK3?
Is this real life?
Is Thanos messing with the reality stone?
If you follow their directions to the letter, the belt will be fine and no tightening will be needed. My Mk3 has been running happily since February and I’ve never touched the belts.
I question your judgement that it took you this long to buy a Prusa!
I am so done with cheap Chinese printers.
I have put almost 7 km of filament through by MK2S MMU.
I have put about 8KM through my monoprice knockoff but I did replace the head to an all metal hotend.
I also have a rebranded wanhao i3 that i had to downgrade to a mk8 extruder 8km of filament thru it.
*whine* But it costs so muucch! :-p
Hackaday Decrees: everyone can buy whatever printer they want! At any price point!
Prusa’s goal is to make 3D printing essentially foolproof straight out of the box, and they’re getting close.
On the other end of the spectrum, the A8’s (and similar) can require more than their share of hand-holding, at least initially. So there’s a labor cost, but once set-up and modded a bit, they can also spit out problem-free kilometers of filament. At least mine has.
Which is right for you? Which is right for me? (Rhetorical question alert!)
I have put 8km through my Wanhao duplicator i3 version 1 and it goes fine. Must say that a lot of fiddling has been done, but it is stable for some years now.
You never had any issue with the monoprice? If your melzi board hasn’t yet melted down due to the lack of a sufficient power connector and/or mosfet upgrade then your printer’s days are numbered. I have a monoprice duplicator 3 (v2.1) and to date I’ve had to upgrade a number of parts to shore up poor design elements:
– Melzi replaced with Ramps 1.5 (with additional mosfet board) — Repetier Firmware
– Power supply replaced with fanless supply
– 20mm case fan/backplate replaced with custom back plate with silent 60mm fan
– Added RPI3 with Repetier Server
– Changed drivers to Triamic silent steps
– Changed bed to AnyCubic glass bed
– Changed carriage plate with one that doesn’t warp after heating the bed
What the fuck is a ramps 1.5?
A replacement for a Melzi, duh.
To be exact, they’re 3d printer control boards. In the ramps, it’s an Arduino Mega shield that provides a number of endsto and thermistor connections, a couple of mosfet heater outputs, and 5 places for a Pololu Stepstick stepper driver board. The melzi is essentially those three layers of board (Arduino mega, ramps shield, and stepstick drivers) only all on one PCB.
I have a Mendel90 and to me the many I3 variants look very familiar. I see the same threaded rods, belts and motors mounted in the same locations and moving in the same way.
There is one difference that stands out (to me). In the I3 the x-carriage rides on two smooth rods that are mounted one above the other. They are separated along the Z-axis. On the Mendel90 those same smooth rods are mounted one in front of the other. They are separated along the Y-axis.
Are there advantages and disadvantages to these two configurations? My extruder mounts to the top of the carriage and the hotend extends down through a hole. I have noticed a lot of pre-built extruders that I see marketed on the internet expect to bolt onto the side of the carriage. I am considering upgrades such as a bltouch and/or multiple extruders. I am wondering if switching to the I3 style would make this easier.
Mechanically the i3 is pretty similar to a lot of printer designs (or more precisely, they are similar to it, since the i3 is progenitor). The advantage of the mk3 is really in the sensors and controls. Especially, they use some pretty nifty stepper drivers that are able to do a lot of neat things like not requiring limit switches for homing and probing.
“since the i3 is progenitor”
Only if Chris Knopper is a time traveler!
He announced the Mendel90, complete with a picture of a completed unit in December of 2011 and Joseph Prusa designed the i3 in 2012. It doesn’t really matter who came first though. I doubt either really copied the other anyway. They were both offshoots of their true progenitor, Ed Sells’ Reprap Mendel which is perfectly fine as it is open source. They just don’t look much like the Mendel because their design goal was to get rid of the weird threaded-rod frame that was so hard to keep aligned properly.
As for the drive electronics, that’s the kind of thing that one simply upgrades at will with a home-built printer. The Mendel90 design called for Melzi electronics which had soldered on stepper drivers. Judging by the pictures online I don’t think any scratch-builders actually followed that part of the design. Most just did what I did, dirt cheap and common RAMPS + Pololu clones off Ebay, Amazon or similar. The current higher-end choice for a scratch-builder would be Trinamic drivers which are more or less a plug-in replacement for those Pololus and do exactly what you describe with the no-switch sensing in the mk3 and then some. I know they are on my upgrade wish list!
Anyway, that’s why the part that interests me is that difference in a horizontal vs vertically aligned bars in the X-axis. That’s not just a place where people usually just go their own way in construction and so I’m interested in knowing what the benefits and trade-offs are of that.
It’s not just a matter of sticking the parts on a printer to upgrade it. The appeal is that it’s all there, in an integrated package and it works *right now*. Yeah you can get all the same features yourself on a reprap, but you’re gonna spend a ton of time getting everything working together. I like to tinker with my printer too, but a lot of people just want something that works well without fiddling and upgrading, which is what Prusa is selling.
Sure, ok. I didn’t come to put down the I3 nor to “convert” people over to building RepRaps.
I personally don’t care about the difference in electronics because that’s the kind of thing that I will just swap out when I choose to anyway. I’m not saying I expect everyone to feel that way about it. I was just hoping that someone knowledgeable would discuss the pros and cons of the two side-by-side vs vertically stacked smooth rods with me. I came to learn about that in the hopes that it would help me make decisions on future upgrades.
There was discussion about the Trinamics, that the TMC2130 might not be strong enough to handle the no-name weak stepper motors. You need more current, which TMC2660 can handle, but is not yet supported by the Marlin, but should be soon. I’m planning to upgrade my X- and Y-axis to Trinamics, once 2660s are supported.
“TMC2130 might not be strong enough to handle the no-name weak stepper motors”
Interesting. I didn’t know about that, thanks!
Then again, Trinamics aren’t exactly cheap. It surprises me that one would spend the money for them but not buy better motors too.
I wonder now; If you have to choose one or the other, do you get more “bang for your buck” out of investing in better motors or in better drivers? I would have guessed the motors but I am not an expert in this.
My motors seem pretty good. I haven’t had any trouble with them, so it might be, that 2130 would work fine. Still i don’t want to risk it.
There’s always a balance that needs to be found between the components.
There’s the discussion: https://reprap.org/forum/read.php?160,814398,824134
The mendel90 is one of the few designs that can still compete with the i3 — but there’s a *lot* of i3 derivatives.
I’m pretty sure that the Mendel90 (designed by nophead, no Chris Knopper around anywhere then — he’s come out of the closet as being Chris Palmer since then) was a *serious* influence on Prusa’s i3 design. You can see that the i1 and i2 is basically still the RR Mendel, in frame shape, except for the rotation of the X gantry from horizontal to vertical. And the i3 is where you suddenly get the plate material frame, not entirely unlike the nophead designs that were coming out just before.
I’d say that any design that has a moving Y and an X gantry with the X axis being vertically oriented (see also: Anet A8) is highly likely to be an i3 descendant. That said, an X gantry with a horizontally oriented X axis (see also: Anet A6) is not necessarily a real Mendel90 descendant — it’s an i3 with a Mendel90 X axis grafted on, in the same sort of way that an i3 is an i2 with much of the Mendel90 frame grafted on.
I think it’s more about all the bells and whistles that the MK3 brings (I also run a mendel90 variant) — but like… the MK3 can tell if it misses a step, and will re-home itself mid-print and recover… — it can also recover from brown-outs (loss of power), sense when it runs out of filament AND when the extruder is jammed (e.g. it’s not just a limit switch, but the optical encoder from a laser mouse, that tells it if the filament is moving or not). It has all kinds of neat features to make printing more reliable and simple.
That said the Mk3S does in fact have a simple limit switch — albeit the old optical flag type instead of the modern microswitch type — that cannot detect jams, because that optical sensor is amazing — but not entirely reliable, or at least not yet.
(Mk4: comes with both sensors so it knows when the fancy sensor is lying to it?)
paying someone $12/hour to drill brackets seems like more hassle than having a 3d printer do it in the 21st century
Why pay someone ? Print a little robot to do that
“At the time of this writing, over a year after the printer was officially put up for sale, there’s still nearly a month lead time on the assembled version.”
That has absolutely nothing to do with demand and everything to do with Prusa’s idiotic refusal to recognize that FDM is a PROTOTYPING and **LOW VOLUME** production tool. Each printer requires hours of part printing. That’s #$!@ing stupid.
By all means have a lab with a bunch of printers to test your designs. But running dozens upon dozens of machines to do your production? Circlejerk material, nothing more.
“By all means have a lab with a bunch of printers to test your designs. But running dozens upon dozens of machines to do your production? Circlejerk material, nothing more.”
Apparently the future of 3D printing hasn’t arrived yet.
Maybe the “production” work, is just one-offs for many customers, or low quantities. Sort of like a paper print shop. It’s a little pricey to setup for injection molding, or other manufacturing processes, specially if you don’t anticipate needing to keep making the parts. Likely cheaper to 3d print a few 100 parts, than to pay for an injection mold, even if you have to buy several printers to do the job.
Amen.
@sdfdsfsdffsd You seem a little bit angry. You also missed the bit where getting PEI powder-coated beds is the bottleneck in Prusa production, rather than a delay from any of the 3D printed parts.
Production 3D printed parts in lieu of traditional manufacturing which is cheaper, lighter, and stronger means customers are paying more for a lower quality product. It’s like etching/masking/layering/plating/etc your own production PCBs.
Although Prusa’s average customer might value the 3D printed components over a higher quality product, I think the reality is that it makes more business sense for a small 3D printer manufacturer than most think. Making parts with your previous customer’s product involves nearly zero overhead, only costs electricity and has zero investment risk.
Since most of the BOM cost is in non-3D-printed components, the slightly higher MSRP and good enough plastic quality far outweigh the alternatives.
The choice to do that is a philosophical one, not a calculated business decision to lower production costs. The printed parts on the machine are very nice and help to show off the technology (the parts for the MK3 are mostly printed on other MK3s).
It’d be interesting to do a mixture. Make (almost) all parts 3d print*able* and publish the files, but on production machines use mostly injection molded parts. People still have the benefit of being able to print replacements and upgrades, but factory parts are more reliable and easier to produce.
It’d also have some philosophical value. It would show that 3d printed parts are a legitimate path to large scale production parts with a double benefit that users can make their own replacements on demand.
The problem with injection molding is the tooling costs, it’s NOT cheap to get molds made at all. And the costs have to be justified by the production run. In this case, maybe Prusa is making enough machines that they could absorb the tooling costs for injection molding of this part. Or maybe it would be better to contract out for someone to make them metal brackets. I don’t know.
But if the goal is to be able to incrementally improve the product and ship updated versions easily, this might be a point where the tooling costs aren’t worth it. I seem to remember hearing it was $50k for just one mold. Which is a big cost to amortize over the production run. And if the part changes, its a new mold. With a 3d printed part, it’s just use up the old stock and upload the new design and keep going.
It’s all a tradeoff.
Have the plastic bits incrementally improved? Doesn’t appear to be the case.
They currently have ~500 printers, each churns out parts for one new machine each day. That’s an annual capacity of 160k printers. They have at least 7 people continuously keeping the printers up.
https://www.prusaprinters.org/a-quick-look-to-our-printing-farm/
Realistically, hard tooling would be ~$100k in the states and using injection molding would reduce his plastic cost (not MSRP) by ~$12. Savings are from personnel costs mostly.
For a small plastic part the tooling in China is about $3-$5k with almost negligible per piece price, like less than $0.25 per part depending on the material.
In the US it would be a little bit more, but places like ProtoLabs quote tooling at very low prices so for small parts it could be $3-$5k. Their per piece cost is usually higher which is how they get you, usually a few bucks a part.
The problem is that many of their parts are impossible to create by injection molding because of their geometry.
@Kylo Ren
Yes, the plastic bits have incrementally improved. They ship new ones every 6 months or so.
They recently shipped their 100k’th printer, and in January, they shipped 10k+ printers. Which is clearly a record month. They’re just about at the inflection point today where each design lasts between 10 and 50k units each..
Which means they’re only just hitting the sort of volume at which injection molding starts making sense in the Western world.
The Mk4 may well have more injection molded parts. Incidentally, Prusa has been experimenting with injection molding for years — remember the injection molded spool holders? They were allegedly terrible.
Printrbot did a lot of injection molding. Remember them? RIP.
Prusa scales conservatively — which means he might go injection later than would strictly make sense, and he delivers printers late with a waiting list. But it also means his company isn’t bankrupt because they grew too fast to survive a tiny downturn. It’s a business choice.
Maybe…
Using a bunch of printers to make production parts, is a good way to test the endurance of their existing printers…
and to put what is learned from failed “production” printers into the next iteration.
Maybe… “I don’t just own the company, I use the products!”
The difference in the price of the kit and assembled and tested, is about $250. I have enough skill to assemble the kit, but not usually the spare time. I’d probably pay the extra $250, seems reasonable for the work, and hopefully be able to just set it up, and print, same day it arrives, not weeks or a month later, and hope I didn’t mess something up. lots of people lazy (like me), and would pay the extra, which means they likely sell a good number of completed units, which need testing. Why not test them on producing parts for other machines? Bonus, would be that by producing parts, on the same machine you are selling, you get to see where it fails, where the weak spots are, and make the needed changes, upgrades, before too many customers find them first, complain, publicly. By providing the print files openly, any changes customers make, to improve them, can be adopted easy as well. An injection mold can be modified, but it isn’t as easy, not cheap either. Major changes, might mean a whole new mold as well. If you invest in injection molding, you are likely going to keep using those same parts in future models, iven if they aren’t the best choice, limits improvement. Printed parts that wear, or break eventually, would be flagged, and users would suggest printing a few spares, which is a huge time saver, since you don’t have to order a part, and wait for delivery to install, before you can use the printer again.
Mostly though, it’s the company that stands behind their product. Their machine produces production quality parts, that hold up to heavy use, so you can have the same confidence in your own designs.
Is Shipping for the assembled printer also higher (because it would take up more space), or is that included, in the $250 price?
Logically the shipping would be more, and you’ll also have to pay import tax in the US as the total cost will be over the $800 limit. I’ve read (though can’t verify it’s true) that the cost of the kit was specifically set at $749 so it could be shipped to the US without triggering import taxes.
If you REALLY don’t have the time to put the kit together that still might be worth it to you. But personally I had the kit together and printing on the same day. Arrived around lunch time, and was printing the triceratops head before I went to bed.
Shipping might be a bit more in the US, where they use a weird hybrid of size and weight, but shipping cost within Europe is pretty much only based on weight, and the assembled printers are, of course, no heavier than the kit.
Their parts also rely on features that aren’t easily made by an injection molder or can, like integrated ziptie holes, or some of the nut traps. Now, those can be worked around and improved even more, but it serves as a good proof of what the printer is capable of.
Not only was their bottleneck *not* in printing the parts, several part geometries they have would be extremely expensive to tool for injection molding (multiple ejectors and multiple segments in the mold, moving in different directions – a mere clamshell wouldn’t work), and those geometries do help with performance in spite of the parts being 3D-printed. I have printed my Prusa parts all from polycarbonate and could further slim them down. Prusa could also easily iterate the airflow in MK3 print head, and it did require to be tweaked several times. They’d have had to invest lots of money up-front to figure it all out before committing to higher volume injection mold tooling. Furthermore, there is a culture of eating their own dogfood, and they know that they must not screw things up too badly or they mess it for themselves as much as they do for their customers.
Frankly said, the 3D-printed plastic parts on Prusa printers are the least of my concern. In fact, I’d start worrying about their viability if they went all-out for injection molds. They’d have to be selling parts way past the time when improved versions could be otherwise printed. You really want to use injection mold tooling till it wears out, otherwise you’re throwing money away. Maybe you can afford to throw that money away, maybe it’s factored into the price of the product, but then we the customers pay for that waste.
As for running “dozens upon dozens” of machines… you a zero there, it seems.
There’s probably a vintage stamp or punch press going unused where Prusa could buy it dirt cheap, refurbish it then build an automated feeder to chunk out all the metal brackets from rolls of sheet aluminum. The flywheel drive type with a clutch can be really fast.
After WW2 those began to be phased out in favor of larger presses with automatic feeding rather than having an operator for every press manually inserting parts. Those old presses were often on adjustable angle bases so they could be tilted back to aid in getting the parts positioned properly against a backstop. Factories had rows of those where the first guy would insert a flat piece of metal, push two buttons and KERCHUNK the shape would be punched out and drop into a basket. The baskets would be rolled over to the next press where that guy would put the punched parts into his machine to do the next step. Repeat for as many steps as needed to complete the part.
Automation replaced the humans with mechanical systems to insert, align, trigger punch, then transfer to the next press.
A small shop like Prusa could get by with just one press and interchangeable dies. For a metal replacement for that 3D printed pulley bracket, first die to punch 1,000 pieces with the outline of the bracket. Second die punches four holes, two for the axle bolt, two to mount to the frame. Third die just folds the sides up. Feeder tools could be 3D printed.
It gets better: almost all the bending dies can be all 3D printed, and from PLA no less. Some high load or high life dies may need PC, but generally they just work great and are absurdly cheap. You can also have jigging that improves the process. You can also add stepper motors and some mechanisms to automate parts of the part insertion and motion between the “cells”. 3D printing makes it affordable. Look for videos of that stuff on YT, it’s quite amazing, and I confirm that it works exactly as depicted. The only metal dies you need is to do notches and holes. Otherwise, a shear and printed jigs allow for cuts at variable angles, and the rest is done on a press.
The one thing my Anet A8 (Yeah, I know!) is that it uses SC8UU bearings (panel mounting) instead of the LM8UU / U bolt combo detailed in the article. Much better for that particular purpose.
You can always get the tatara frame for the A8 that is a great upgrade
Welp, you know you’ve been spending a bit too much time building your printer when a new version of it comes out before you’re done. (Well, I’m amost done now: just some wiring cleanup, bed leveling and getting back the 8mm lost in each axis due to various building mistakes)
I got my first MK3 in September, bought my second one last week (used, couldn’t pass up the deal). After almost two years of messing with a Monoprice Maker Select, and 10 months on a 10s, there is no comparison. Very much like my MK3s better, and am thinking about selling my other printers.
They are not perfect- I’m ticked that the filament sensor doesn’t work with my black PETG, so I have to disable it, but wow, so much less trouble, and much better user interface (with room for improvement still).
Look up Chris’ Pretty profiles (PETG and PLA). I went from the stock PETG to Chris’ profile, and quality got much better.
Also should be mentioned that Prusa is actively developing in Slic3r. I read he has 3-4 people on it full time. I’m not aware of any other hobby printer company that has full time devs. on a slicer. Kudos to him for that.
Dude!!
A screw-gun?? That’s literally asking for trouble!
I have assembled 10 of the 14 MK3’s in our fablab and never did I use a machine to screw anything. there are so many plastic parts that you can ruin by overtightening the screw – as is mentioned throughout the manual. Of course, it can be done but why take the risk? enjoy the little things like screwing a fastener in place and take the time to assemble a nice machine. (I do however use a drill for the 3mm-nylon filament piece that supports the wires from the extruder – that hole is just a bit too small in my opinion).
The U-bolts on the frame. Yes, not perfect but better than the previous solution. which was – zip-ties.. they’re not clamping down enough. You don’t say if you were using that screw-gun of yours but if you were – that’s the problem. Those bearings have to be tight to make sure the bed doesn’t bind or stick during movements.
Y-axis idler – you’re saying that it has no means for adjustment and you even provided a nice close-up on how you did not read the manual properly! the idler is NOT supposed to be tied down fully – it’s supposed to be loose so you can adjust the y-belt tension from the front of your printer! loose those screws up a few millimeters and adjust the belt a tooth or two. then slightly tighten the idler again – there’s your adjustment!
Also, I don’t think they’re providing the printed manual anymore -at least we didn’t get one on the last 4 printers we got. I think it might relate to that there are too many changes to keep up with to make it a feasible solution to print it all in advance.
I think the Cetus3D is a widely overlooked printer. It costs a bit more than half the costs of the Cetus and comes with a super stable aluminium frame and high-end linear rails a really good printing bed and you only need to fasten about 5 screws to fully assemble it.
It also just as much a no fuss printer as the Prusa, no stupid fiddling needed, it prints great out of the box and calibration is really easy. I dare to say that it prints just as accurate as the Ultimaker 2.
The only reason to go with the Prusa imo is if you need the larger build volume in the xy plane, which at least I personally never had a need for or even came close to.
*It costs a bit more than half the cost of the Prusa i3 Kit.
Ok no, wrong again. Its actually back at lower than half the price of the Prusa..
https://shop.tiertime.com/product/cetus-3d-printer-standard-mkii-china-stock/
I love my MK3. Bought the kit to learn how it goes together so I can fix it when it fails. My biggest problem was setting the Z offset. It took a while to figure it out. If the initial Slic3r settings don’t work and your filament does not stick to the bed your Z offset is incorrect. Slic3r lets us change everything we might need too. The original settings in the Prusa Slic3r version work. My next issue is my first large part failed 9 hours into a 12 hour job with a shift in the X axis and an error in the Z axis on the left side. Hopefully disabling X Crash detection will eliminate this error. Have suspicions that the filament feed might be the issue. All my small parts are fantastic.
Last year we were running six Makerbots 24/7 making parts for our robot with numerous issues getting PLA to stick on large parts. With the MK3 there is no need for taping the platter, nor adding rafts or extra layers. I changed my order back to the original platter after waiting four months, and will buy the powder coated platter when its available.
Yes the MK3 is more expensive. But it works well. And now I have many ideas on how to improve a homemade CNC. Plus a printer to make the parts.
I second this. Picked up a Creality Ender 3 for $225 on Amazon. Add in a roll of filament and you’re at $250. Within an hour of the box showing up, The printer was assembled and up and running and printing the sample file. This is my first 3d printer and I’m hooked. Quality is excellent. Comes with all the tools you need, plus spare screws and the like. The 220x220x250 print area is great and the heated bed has no adhesion problems at all.