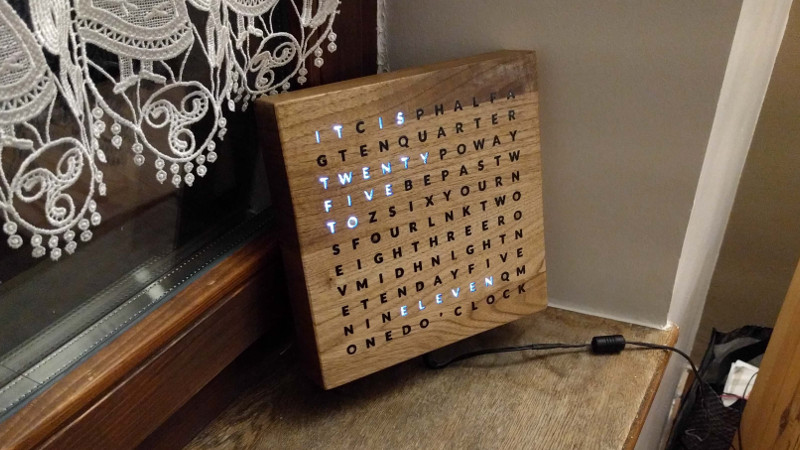
Word clocks use natural language to display the time. They’ve been in vogue in the last 20 years or so, as low-cost digital technology makes them particularly cost effective and easy to build for the average maker. The hardware and software is a solved problem, so presentation is everything. Luckily, [watsaig]’s effort does not disappoint.
The build began with a timeframe of just seven days — a narrow window given [watsaig]’s lack of experience with lasercutting and woodworking. Not content to let that get in the way, it was time to get to work. Wood was sourced from Amazon and designs laid out, before lasercutting began in earnest.
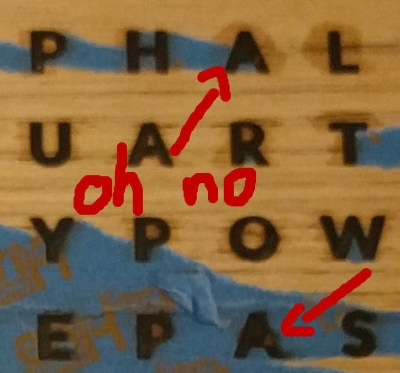 [watsaig] decided to fill all of the letters with epoxy to achieve a flat finished surface that also served as diffuser for the LEDs. To avoid using an unsightly stencil font, the centers (the cut out portion) of letters like O, A, and R had to be placed by hand. Unfortunately his turned out quite badly. When using a squeegee method to work epoxy into the letters, the inserts tended to shift, ruining the face plate.
Undeterred, the clock face was recreated from scratch, and it was determined that a pipette was a far more suitable tool, allowing the letters to be filled with epoxy without unduly disturbing the letter inserts. The final result is visually attractive, finished with a wonderful stain and giving a pleasing glow thanks the careful attention to diffusion and masking. The hidden Happy Birthday message may have been lost in the rush, but it’s the thought that counts, after all.
For a Continental take, check out this word clock in Catalan.


Has anyone used a CNC router to create the front plate? In this case it would be easy to mill the characters (or only the critical characters like A) and leave 0.1 mm of wood. After the front plate is filled with epoxy, one just needs to sand down the back of the plate.
If the only tool you have is a laser cutter, then every project looks like a…
I was wondering about a second piece of material behind the wood held to it with something like double sided tape. I was thinking metal but would the laser reflect off that and burn the wood? Then I was thinking a thick piece of wood that the laser would not cut all the way through. But I’ve never had the chance to mess with a laser cutter much so I don’t know if they need to be able to cut through the material completely.
But looking at his pictures, it seems he could have taken something covered in double sided tape and put it over the front of the piece after cutting to hold the centers in place.
I guess one could leave a portion of the letters “unburned” to leave bridges for the center parts, and then sand or scrape the bridges off after the epoxy sets…
Exactly what I mentioned in my previous comment (which got deleted ?). It would be easier, if you use a CNC router.
Oh. Or which didn’t show up… Hmm
If you like word clocks this is on sale today (thu 27):
https://www.amazon.com/gp/product/B00JPNWR3G/ref=ox_sc_act_title_1?smid=AGD2Q5TM0YZBM&psc=1&tag=tbdirect-20&ascsubtag=c8c8632e-c8f7-489e-a19b-9b928e02cc8f
Where is the fun of making it yourself?
How does the epoxy he’s using react to a laser cutter, it they don’t burst into flame he could have filled in the letters with epoxy, let it dry then cut out holes for the letter inserts. If the epoxy burns he could have used a dremel.