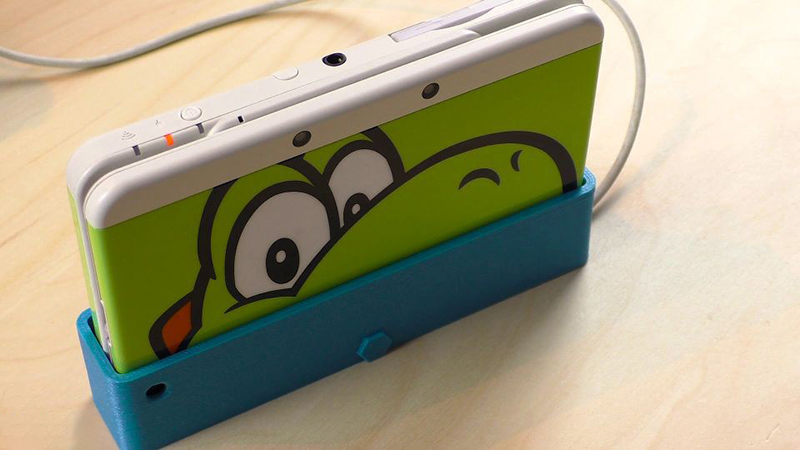
The Switch is the new hotness and everyone wants Nintendo’s new portable gaming rig nestled in a dock next to their TV, but what about Nintendo’s other portable gaming system? Yes, the New Nintendo 3DS can get a charging dock, and you can 3D print it with swappable plates that make it look like something straight out of the Nintendo store.
[Hobby Hoarder] created this charging dock for the New Nintendo 3DS as a 3D printing project, with the goal of having everything printable without supports, and able to be constructed without any special tools. Printing a box is easy enough, but the real trick is how to charge the 3DS without any special tools. For this, [Hobby Hoarder] turned to the small charging contacts on the side of the console. All you do is apply power and ground to these contacts, and the 3DS charges.
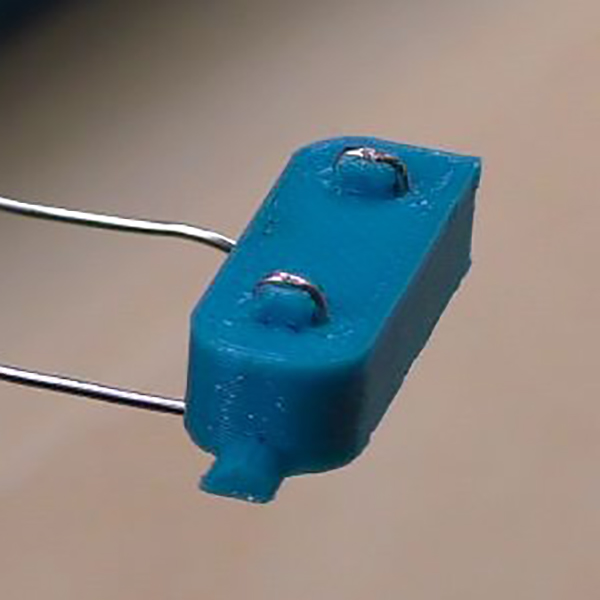 Normally, adding contacts requires pogo pins or hilariously expensive connectors, but [Hobby Hoarder] has an interesting solution: just add some metal contacts constructed from LED leads or paper clips, and mount it on a spring-loaded slider. A regular ‘ol USB cable is scavenged, the wires stripped, and the red and black lines are attached to the spring-loaded slider.
There is a slight issue with the charging voltage in this setup; the 3DS charges at 4.6 Volts, and USB provides 5 Volts. If you want to keep everything within exacting specs, you could add an LDO linear regulator, but there might be issues with heat dissipation. You could use a buck converter, but at 0.4 Volts, you’re probably better off going with the ‘aaay yolo’ theory of engineering.
[Hobby Hoarder] produced a few great videos detailing this build, and one awesome video detailing how to print multicolored faceplates for this charging dock. It’s an excellent project, and a great example of what can be done with 3D printing and simple tools.


A germanium diode is around 0.3v Put one in forward bias on USB power and you get around 4.7v
You could use a schottky diode for a 0.4V drop.
You don’t need the voltage drop, the charging circuit in the 3ds can handle 5v just fine.
Thank you, I feel very humbled for having this project featured on your blog.
I’d just like to clarify about the diodes that are coming up. Yes, I’m aware you can use a diode and it will work just as well, but the diode is much smaller than an LDO and so will get that much hotter, which isn’t desirable in such a small case with plastic that starts to deform at ~50’C. By using LDO, you can always put a heatsink on.
But like I’ve written in the original guide, there’s hardly any point in going through all the trouble; 3DS will charge just fine at 5V.
Depends on the diode being used… you can get diodes in all sorts of packages. Look up TO-220-2 diodes, for example. So, no, it won’t necessarily get much hotter, and it’s dissipating a known amount of power all the time (relative to the 3DS’ charge current), rather than also being dependent on the incoming voltage. If you find ones that are 0.2V drop, you can use two of them in series and have double the heat dissipation action, too.
Besides, making a heatsink to keep the temperature down a little isn’t exactly difficult…
https://www.instructables.com/id/Heat-Sink-For-Diodes/ <- talk about a hack!
All that being said, an LDO is probably still the right answer, just in case there's some sort of unexpected surge. The LDO may protect the 3DS, where the diode will only drop it by a few tenths of a volt.
That’s an excellent explanation, thank you!
Do you have a prototype where the new 3ds is lying down like the original 3ds?
I’m afraid I don’t. Would you be interested in one? What are the benefits if the 3DS is lying down?
the one for the original 3ds XL would let you have the screen open while charging so you could play while using it (my charging port broke)
How much did all this cost? I know that 3d printers can be relatively pricey, but what about the others?
The price of printers has dropped dramatically over the last 2 years. You can now buy Creality Ender 3 for around $150-200 and it’s quite a good printer once you iron out the quirks and calibrate it properly. It would have no troubles printing this.
As for the materials costs, it’s basically nothing. The entire dock is well under $1 in material costs, and both the wire and the spring are basically free stuff that you can find around the house. So really, if you have a printer, this is near free.
I guess. I don’t really understand the cheap printer craze though.
They are almost always either super flimsy or have tiny build volumes. With the parts that are available these days building a printer is a long way from the challenge it used to be. For the price of a wobbly Creality or a tiny Monoprice one could easily build something with the build area of the Creality, the stability of the Monoprice and a nice heated bed with glass.
If we have the design file, it is also possible to use a 3d printing company to print it for you. That way, you don’t need to buy a 3d printer.
4.6V vs 5V is smaller difference than 10% which is common used acceptable tolerance.
First “upcycle” now “aaay yolo”. It’s not even just a “yolo” it’s an “aaay yolo”!
Wow Brian. I can’t wait to see you upload your video of yourself balancing with your yuke in one hand and Starbuck coffee in the other as you ride your Schwinn with the single-gear conversion down the street!