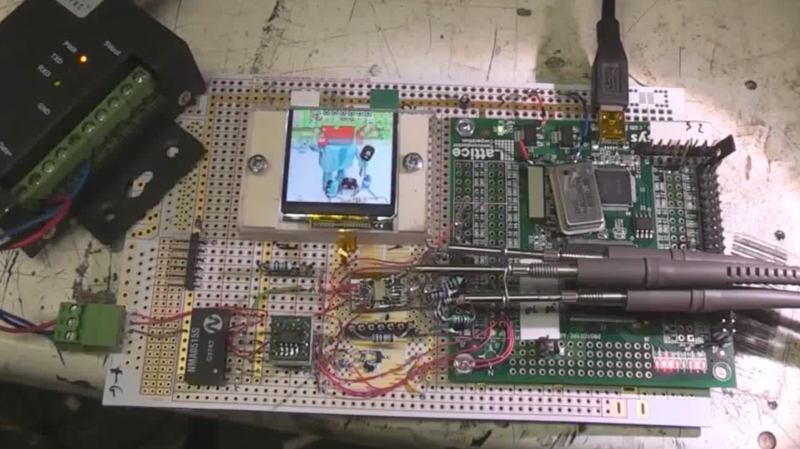
[Mike Harrison] produces so much quality content that sometimes excellent material slips through the editorial cracks. This time we noticed that one such lost gem was [Mike]’s reverse engineering of the 6th generation iPod Nano display from 2013, as caught when the also prolific [Greg Davill] used one on a recent board. Despite the march of progress in mobile device displays, small screens which are easy to connect to hobbyist style devices are still typically fairly low quality. It’s easy to find fancier displays as salvage but interfacing with them electrically can be brutal, never mind the reverse engineering required to figure out what signal goes where. Suffice to say you probably won’t find a manufacturer data sheet, and it won’t conveniently speak SPI or I2C.
After a few generations of strange form factor exploration Apple has all but abandoned the stand-alone portable media player market; witness the sole surviving member of that once mighty species, the woefully outdated iPod Touch. Luckily thanks to vibrant sales, replacement parts for the little square sixth generation Nano are still inexpensive and easily available. If only there was a convenient interface this would be a great source of comparatively very high quality displays. Enter [Mike].

This particular display speaks a protocol called DSI over a low voltage differential MIPI interface, which is a common combination which is still used to drive big, rich, modern displays. The specifications are somewhat available…if you’re an employee of a company who is a member of the working group that standardizes them — there are membership discounts for companies with yearly revenue below $250 million, and dues are thousands of dollars a quarter.
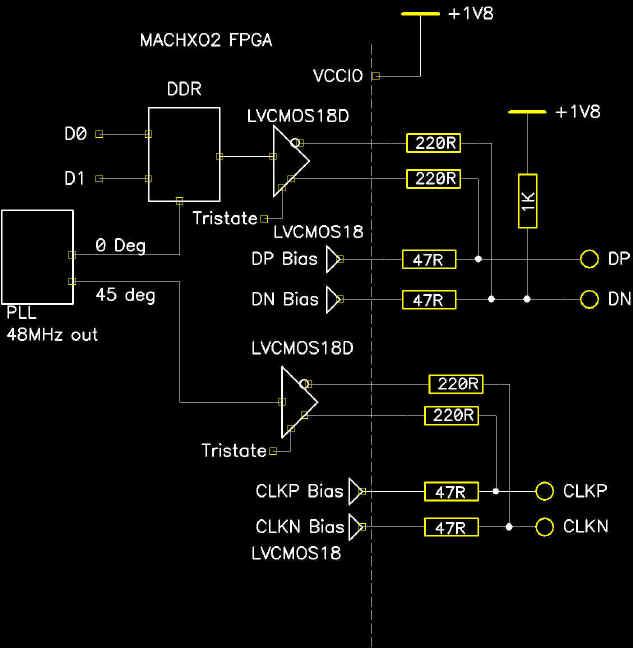
Fortunately for us, after some experiments [Mike] figured out enough of the command set and signaling to generate easily reproduced schematics and references for the data packets, checksums, etc. The project page has a smattering of information, but the circuit includes some unusual provisions to adjust signal levels and other goodies so try watching the videos for a great explanation of what’s going on and why. At the time [Mike] was using an FPGA to drive the display and that’s certainly only gotten cheaper and easier, but we suspect that his suggestion about using a fast micro and clever tricks would work well too.
It turns out we made incidental mention of this display when covering [Mike]’s tiny thermal imager but it hasn’t turned up much since them. As always, thanks for the accidental tip [Greg]! We’re waiting to see the final result of your experiments with this.


Nice, but as expected – with it being old technology, there is better/easier out there at a similar price. Eg https://www.crystalfontz.com/product/cfaf240240a1013t-240×240-color-tft-lcd-display
Big difference between a relatively slow spi interface display like you linked (which likely doesn’t support reading back display data thus requiring buffering full frame data in the host controller) and a dsi screen driven with high speed differential video when frame rate is the primary goal.
True enough. I took the gist of the article being the ppi.
Those small/cheap TFT display drivers usually do support 8/16-bit parallel interfaces and reading display RAM/command register contents, the pins just usually aren’t broken out on super-cheap modules because Arduinos usually don’t have the I/O or computing power to take advantage of them.
On the other hand I got a super cheap LCD from Aliexpress (320*240 for $2) which has broken out ONLY the parallel interface. And to use full color depth you have to feed it 18bit (or 2*9 bit) values. Quite wasteful in pins.
This where they all ended up:
https://youtu.be/b9yqnrx8OBM
Full playlist of ipod nano videos :
https://www.youtube.com/playlist?list=PL0KZLmPyL6Ak1bArDuLo77yhx95yMsjHL
Thanks Mike, that’s some great work!
Wow, pretty incredible installation!
THIS WALL!!! I love it!
I can’t decide whether the reverse engineering tutorial or the final work of art is more impressive. Thanks, Mike!
That n’th frame triggering for counting pulses looks like a great feature. I just do time difference and hope that I can measure the shortest well enough to divide and make an educated guess. But actually having the machine count them for you is priceless.
Also, laughed when you did a 2nd round of data sheet search and found something that you’d already discovered. That happens to me _every time_. But if I did that second round first, it wouldn’t have been as much fun. It’s like reading the last page of a novel. :)