There are hundreds if not thousands of artifacts from the Apollo program scattered around the globe, some twisted wrecks at the bottom of the ocean, others lovingly preserved and sitting in museums or in the hands of private collectors. All of what’s left is pretty much pure unobtainium, so if you want something Apollo-like, you’re probably going to have to make it yourself.
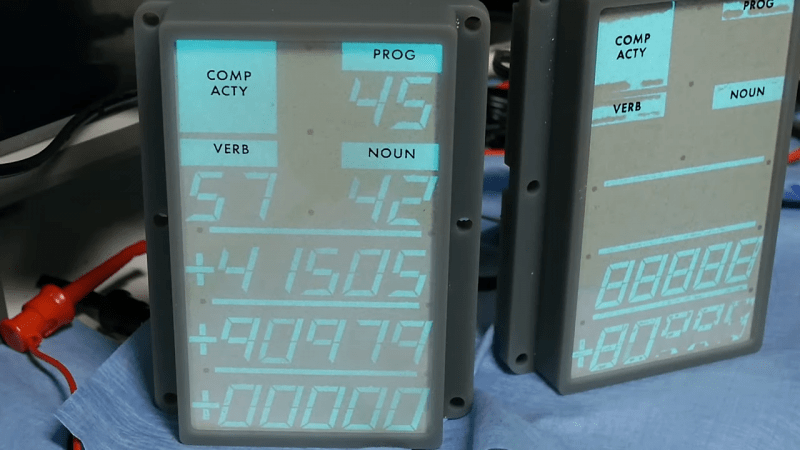
[Ben Krasnow] took up the challenge to make an electroluminescent Apollo-era DSKY display from scratch, with outstanding results. The DSKY, or “display and keyboard”, was the user interface for the Apollo Guidance Computer, the purpose-built digital navigation system that got a total of 24 men there and back again. [Ben] says it took a long time to recreate the display, and we can see why. He needed to master quite a few skills, including screen printing to get the glass-panel display working. The panel is a sandwich of phosphorescent paint, a dielectric, and conductive ink. The ink is silkscreened on the back to form the characters, all applied to indium tin oxide (ITO) conductive glass. A PCB with the same pattern of character segments lays behind that, driving each segment with 300 volts or so through a trio of HV507 high-voltage shift registers. It’s an impressive bit of engineering and gives off a decidedly not-homebrew vibe.
In the video below, [Ben] goes into detail about the trials he experienced on the way to this amazing endpoint, not least of which was frying chip after chip due to ineffective protection diodes in the shift registers. That’s an epic debugging story that’s worth the price of admission all by itself. It’s not the only DSKY in town, of course – [Fran Blanche] has been working on one for a while too – but there’s just something about that blue glow that we really like.


WOW, that’s some interesting stuff!
Thanks for posting.
Very nicely done. Good solution on the negative undershoot problem. Seems like the other way to solve the problem with protection diodes that clamp the electrode drive pin would work, but would use a bunch of extra diodes that you would have to make room for on the board. The solution you came up with was elegant. Great job with the debug process.
BTW – not sure how you seal the EL elements to keep moisture from degrading them, but that might be something to look at in the future.
The asymmetric drive currents was definitely the highlight of the video. I guess what caught Ben off guard was that the protection diodes are typically for ESD, not current drive protection. They’re fast but can’t dissipate much energy, so they tend to cook pretty quickly. His solution was elegant too.
That custom screen is pretty damn sweet. I also hope that it proves to be moisture stable without a bunch of fiddling during assembly(nitrogen flushing and such); but I’m very very impressed for a custom job; and it doesn’t risk anachronism the way throwing a bitmapped LCD at the problem would.
Nice work as always Ben
Hi there Ben,
One question, which conductive epxy did you end up using?
Brand and product code?
Thank you!