Real Radar Scope CRT Shows Flights Using ADS-B

Real-time flight data used to be something that was only available to air traffic controllers, hunched over radar scopes in darkened rooms watching the comings and goings of flights as glowing phosphor traces on their screens. But that was then; now, flight tracking is as simple as pulling up a web page. But where’s the fun in that?

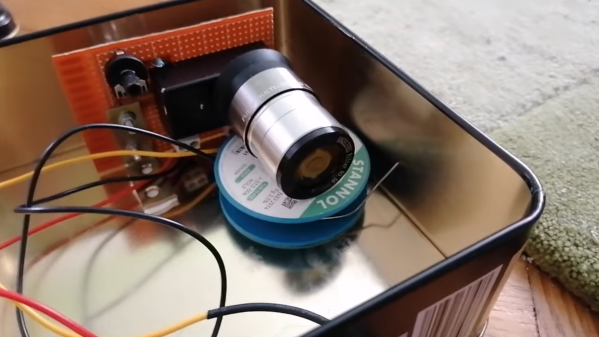
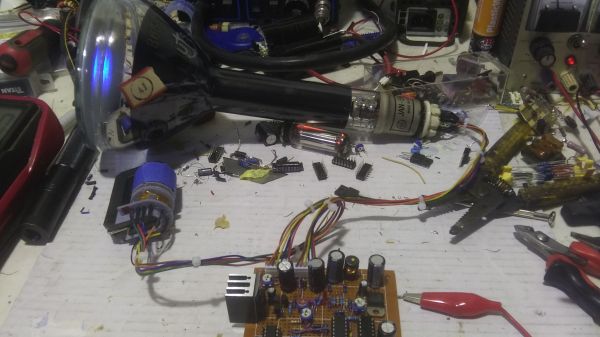
To bring some of that old-school feel to his flight tracking, [Jarrett Cigainero] has been working on this ADS-B scope that uses a real radar CRT. As you can imagine, this project is pretty complex, starting with driving the 5FP7 CRT, a 5″ round-face tube with a long-persistence P7-type phosphor. The tube needs about 7 kV for the anode, which is delivered via a homebrew power supply complete with a custom flyback transformer. There’s also a lot going on with the X-Y deflection amps and beam intensity control.

The software side has a lot going on as well. ADS-B data comes from an SDR dongle using dump1090 running on a Raspberry Pi 3B. The latitude and longitude of each plane within range — about 5 nautical miles — is translated to vector coordinates, and as the “radar” sweeps past the location, a pip lights up on the scope. And no, you’re not seeing things if you see two colors in the video below; as [TubeTime] helpfully explains, P7 is a cascade phosphor that initially emits a bright-blue light with some UV in it, which then charges up a long-persistence green phosphor.

Even though multicolored icons and satellite imagery may be more useful for flight tracking, we really like the simple retro look [Jarrett] has managed to pull off here, not to mention the hackery needed to do it.

Continue reading “Real Radar Scope CRT Shows Flights Using ADS-B”

A Loving Look Inside Vacuum Fluorescent Displays

Everyone knows we’re big fans of displays that differ from the plain old flat-panel LCDs that seem to adorn most devices these days. It’s a bit boring when the front panel of your widget is the same thing you stare at hour after hour while using your phone. Give us the chunky, blocky goodness of a vacuum fluorescent display (VFD) any day of the week for visual interest and retro appeal.

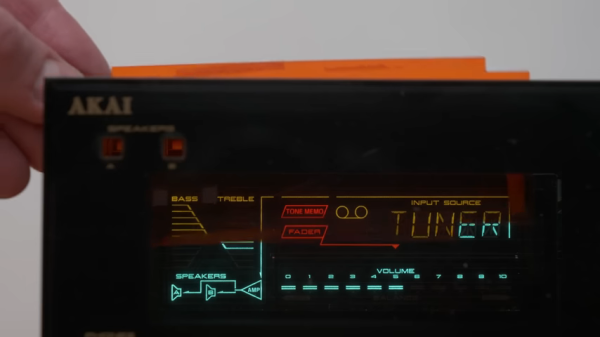
From the video below, it seems like [Posy] certainly is in the VFD fandom too, rolling out as he does example after example of unique and complicated displays, mostly from audio equipment that had its heyday in the 1990s. In some ways, the video is just a love letter to the VFD, and that’s just fine with us. But the teardowns do provide some insights into how VFDs work, as well as suggest ways to tweak the overall look of a VFD.

For example, consider the classy white VFDs that graced a lot of home audio gear back in the day. It turns out, the phosphors used in those displays weren’t white, but closer to the blue-green color that VFDs are often associated with. But put a pink filter between the display and the world, and suddenly those turquoise phosphors look white. [Posy] does a lot of fiddling with the stock filters to change the look of his VFDs, some to good effect, others less so.

As for the internals of VFDs, [Posy]’s look at a damaged display reveals a lot about how they work. With a loose scrap of conductor shorting one of the cathodes inside the tube, the damaged VFD isn’t much to look at, and is beyond reasonable repair, but it’s kind of cool to examine the spring mechanisms that take up slack as the cathodes heat up and expand.

Thanks to [Posy] for this heartfelt look into the VFDs of yesterday. If you need more about how VFDs work, we’ve covered that before, too.

Continue reading “A Loving Look Inside Vacuum Fluorescent Displays”

Hackaday Links Column Banner

Hackaday Links: December 4, 2022

Well, this is embarrassing! Imagine sending a multibillion-dollar rover to an ancient lakebed on Mars only to discover after a year of poking around at the rocks that it might not actually have been a lake after all. That seems to be the impression of Jezero Crater that planetary scientists are forming after looking at the data coming back from Perseverance since it nailed the landing in what sure as heck looked like a dried-up lake, complete with a river delta system. A closer look at the sediments Perseverance has been sampling reveals a lot of the mineral olivine, which on Earth is rare near the surface because it readily reacts with water. Finding lots of olivine close below the surface of Jezero suggests that it either wasn’t all that watery once upon a time, or that what water was there was basically ice cold. The results are limited to where the rover has visited, of course, and the nice thing about having wheels is that you can go somewhere else. But if you were hoping for clear signs that Jezero was once a lake teeming with life, you might have to keep waiting.

In other space news, we have to admit to taking NASA to task a bit in the podcast a couple of weeks back for not being quite up to SpaceX’s zazzle standards with regard to instrumenting the SLS launch. Yeah, a night launch is spectacular, but not having all those internal cameras like the Falcon has just sort of left us flat. But we should have been more patient, because the images coming back from Artemis 1 are simply spectacular. We had no idea that NASA attached cameras to the solar panels of the Orion spacecraft, which act a little like selfie sticks and allow the spacecraft to be in the foreground with Earth and the Moon in the background. Seeing Earth from lunar distance again for the first time in 50 years has been a real treat, and getting our satellite in the frame at the same time is a huge bonus.

Continue reading “Hackaday Links: December 4, 2022”

Weird Phosphor Conversion LEDs Found In Cheap LED String

[Tim] recently found himself tinkering with a cheap string of LEDs. Far from an advanced, IC-controlled addressable set, these were merely a string with LEDs of four colors that could be switched on and off. However, digging in to the LEDs themselves turned up a curious find.

The LEDs were set up in a parallel/anti-parallel fashion. The two power lines ran the length of the string, with all the LEDs installed across them. If polarity was applied in one direction, the red and yellow LEDs would light up, in the other, the blue and green LEDs would light together.

This raised a question for [Tim], as typically, different LEDs light up at different forward voltages and this can cause issues when running different color LEDs in parallel together. What he instead found was that all the LEDs were actually blue LEDs in their fundamental construction. However, the red, yellow, and green LEDs had all been given a phosphor coating. In these devices, when the blue LED underneath lit up, the phosphor converted the light into the desired color. [Tim] was able to confirm this behaviour by illuminating the phosphor manually using an external UV-A LED.

It’s an interesting choice, but it’s certainly one way of making a multicolored string of LEDs. If you wanna get fancier though, consider studying this tutorial on working with addressable LED strings!

[Thanks to J Peterson for the tip!]

Apollo DSKY Display Glows Again

We love seeing old technology brought back to life, especially when it’s done in the context of how the device was originally intended to be used. And double points when it’s space gear, like what [Curious Marc] and his usual merry band of cohorts did when they managed to light up a couple of real Apollo DSKY displays.

The “Display and Keyboard” formed the human interface to the Apollo Guidance Computer, the purpose-built machine that allowed Apollo missions to fly to the Moon, land safely, and return to Earth. Complete DSKYs are hard to come by, but a lucky collector named [Marcel] was able to score a pair of the electroluminescent panels, one a prototype and one a flight-qualified spare. He turned them over to AGC guru [Carl Claunch], who worked out all the details of getting the display working again —  a non-trivial task with a device that needs 250 volts at 800 Hertz.

The first third of the video below mostly concerns the backstory of the DSKY displays and the historical aspects of the artifacts; skip to around the 12:30 mark to get into the technical details, including the surprising use of relays to drive the segments of the display. It makes sense once you realize that mid-60s transistors weren’t up to the task, and it must have made the Apollo spacecraft a wonderfully clicky place. We were also intrigued by the clever way the total relay count was kept to a minimum, by realizing that not every combination of segments was valid for each seven-segment display.

The video has a couple of cameos, like [Ben Krasnow], no slouch himself when it comes to electroluminescent displays and DSKY replicas. We also get a glimpse of well-known component slicer and MOnSter 6502-tamer [TubeTime] too. Continue reading “Apollo DSKY Display Glows Again”

[Ben Krasnow] Makes A DSKY

There are hundreds if not thousands of artifacts from the Apollo program scattered around the globe, some twisted wrecks at the bottom of the ocean, others lovingly preserved and sitting in museums or in the hands of private collectors. All of what’s left is pretty much pure unobtainium, so if you want something Apollo-like, you’re probably going to have to make it yourself.

[Ben Krasnow] took up the challenge to make an electroluminescent Apollo-era DSKY display from scratch, with outstanding results. The DSKY, or “display and keyboard”, was the user interface for the Apollo Guidance Computer, the purpose-built digital navigation system that got a total of 24 men there and back again. [Ben] says it took a long time to recreate the display, and we can see why. He needed to master quite a few skills, including screen printing to get the glass-panel display working. The panel is a sandwich of phosphorescent paint, a dielectric, and conductive ink. The ink is silkscreened on the back to form the characters, all applied to indium tin oxide (ITO) conductive glass. A PCB with the same pattern of character segments lays behind that, driving each segment with 300 volts or so through a trio of HV507 high-voltage shift registers. It’s an impressive bit of engineering and gives off a decidedly not-homebrew vibe.

In the video below, [Ben] goes into detail about the trials he experienced on the way to this amazing endpoint, not least of which was frying chip after chip due to ineffective protection diodes in the shift registers. That’s an epic debugging story that’s worth the price of admission all by itself. It’s not the only DSKY in town, of course – [Fran Blanche] has been working on one for a while too – but there’s just something about that blue glow that we really like.

Continue reading “[Ben Krasnow] Makes A DSKY”

Make Your Own Phosphorescent Material

Phosphors are key to a whole swathe of display and lighting technologies. Cathode ray tubes, vacuum fluorsecent displays, and even some white LEDs all use phosphors to produce light. [Hydrogen Time] decided to make a green phosphorescent material, and has shared the process on Youtube, embedded below.

The aim is to produce zinc sulfide crystals doped with copper impurities. This creates a phosphor with a familiar green glow. [Hydrogen Time] starts by noting that it’s important to make sure all chemicals used are of good quality, as even slight impurities can spoil the final product.

Zinc sulfide is made into an aqueous solution, before a highly diluted copper sulfate solution is added, along with ammonium chloride to act as a flux. The mixture is stirred, before being heated in a tube flushed with argon. After firing, the phosphor is washed with water and allowed to cool.

The final product is demonstrated to glow a vibrant green under UV light, showing the process to be successful. [Hydrogen Time] intends to use the homebrew phosphor in future work to produce a display. It recalls us of [Jeri Ellsworth], producing her own EL wire at home. Video after the break.

Continue reading “Make Your Own Phosphorescent Material”