Before RadioShack decided the best business model for an electronics store was to harass its customers into buying overpriced batteries and cellphones, it was a great one-stop shop for most discrete components, knobs, resistors, radio equipment, and even a popular computer. That computer, the TRS-80, is a popular one in the retrocomputing world and if you can’t get original parts to restore one, you can always build your own clone.
This build comes to us from [Glen] aka [glenk] who is known for retrocomputing builds like this classic PET we featured a little over a year ago, and this TRS-80 is his latest project. He really gets into the weeds on the hardware, too. This isn’t an FPGA or Raspberry Pi running a TRS-80 on lookalike hardware. [Glen] has completely redesigned the computer from the ground up using modern CMOS components in order to make a modern, perfectly functional replica of the RadioShack classic.
Because of the level of detail [Glen] goes into, this one is a must-read for anyone interested in computing hardware (as opposed to the software, which you could learn about through a more simple emulator) and retrocomputing in general, and also brings most of us back to a more nostalgic, simpler time where a trip to RadioShack was fun and interesting.


So, after the 1st section of the PDF there is what looks like, for lack of a better description, an cross between a chicken and an alpaca, but its photo is not captioned and I am curious what this beast is doing there?
Strange creature and all, this is a very cool project!
It’s a silkie chicken of some sort. They’re known to have excellent soldering skills.
I just googled “furry chicken”. It’s a “Silkie”. In the PET write-up, there are ducks.
That chicken is absolutely clucking crazy looking…
(Sorry, I had to.)
Sort of brings back memories… Mom was part of the “back to the land” thing in the 1980s and early 1990s… we had a chicken house and a quarter-acre market garden doing organic produce “before it was cool” (also sorry, but factually correct, to the extent that such is reasonably possible). I have fond memories, from that time, of gathering eggs for a local independent health-foods store about 45min up the road in a suburb of a much larger city than this little town here. (The place is still there… mind you, this was long before Whole Foods even existed… heck, there was *another* health food store in that town that’s now a Whole Foods, but it was called “Wellspring” before that, and this was before that store even was built…)
The eggs coming out of that henhouse were always brown, and since I was quite young (we had to move temporarily, for various reasons, when I was about eight… we did come back though!) and of course didn’t know a dang thing about biology, I always did wonder if that meant the eggs took a different path through the chicken from white eggs.
Now I’m 33, and although the house is still here, it’s mostly Mom’s now — she’s become disabled over the years (sadly) and we don’t see eye-to-eye so good anymore, so I have a little apartment a few miles away… trust me, things are simply better that way. The henhouse and its occupants are all long gone, and the market garden is now a weed patch and a stack of faded, tattered memories. I still smile at them, though — and, although I now know *just* enough biology to know that my earlier ideations about how brown eggs must be made differently from white ones were patently absurd, I must admit that those particular memories make me giggle impishly a little bit, even still.
Funny how that works.
While a somewhat atypical posting for HaD,. It was entertaining to read, and with a little more detail, would be a great story for one of those public radio shows like “The Moth Radio Hour”.
+1
Many years ago when my son was a little kid, he thought that different colored cows produced different liquids. The white ones made milk (of course!), the brown ones made chocolate milk, and the black ones made coffee!
I was “today” years old…
I want a black and white cow which would be coffee with creamer.
Nothing odd here, just a chicken with cat fur.
I didn’t see any info about the physical construction of the enclosure. Are blank rack cases like that easily available off the shelf? And how did they go from a blank front panel to that thing of beauty? I imagine a CNC mill must have been involved?
https://uk.farnell.com/c/enclosures-racks-cabinets/cabinet-racks/19-cases
These cases are fairly common to find, even as surplus.
Next at least a drill press and a set of files to make not circular holes are necessary.
About the labels, there are various methods to write them.
Maybe using a plotter and a solvent ink pen, and then a transparent lacque.
I normally use an embossing label marker….
Labels are easy as you say. Some manner of toner covered paper, laser printed or from a copier and you can iron on the labels. Probably add a couple layers of clear coat to protect them. Another possibility is stencils, electricity and salt water to etch the labels on to the front cover. Last Christmas I etched Yeti mugs for my family. Printed out the label, laid down some painters tape on the mug, glued the label to the tape, cut through the label and tape with an xacto knife and then used electricity to etch the label on to the mug.
Another option to cutting metal for the front panel is a company called FrontPanels.com.
https://www.frontpanels.com/
I have seen some really nice stuff that they did, but not used them myself.
Another option for front panels and such is FrontPanel.com. I have not used them myself, but have worked with stuff that other people ordered and it looks really good. They have a web based cad system to do the design work.
Sorry, FrontPanelExpress.com is the one I was thinking of
” didn’t see any info about the physical construction of the enclosure. Are blank rack cases like that easily available off the shelf? And how did they go from a blank front panel to that thing of beauty? I imagine a CNC mill must have been involved?”
Rackmount kits (shipped knocked down, generally) are available in lots of places, at varying prices and quality. There are places on the Internet that will make you a beautiful, CAD-drilled/milled front panel, anodized and with filled-in milled lettering – which you create with their proprietary, easy to use software, but it will cost you dearly.
Otherwise, it’s a slow process of very careful measuring, drilling, hogging out, and filing :(. I have had good luck with color laser printing on Tyvek “paper” for non-critical projects.
Buy a rack case from par-metal.com (about $75). Take the front panel and send it to frontpanelexpress.com along with a file from their free software (which also ouputs common formats if you want to take your business elsewhere) . Pay a modest fee IMO and receive a perfectly drilled, engraved, in-filled panel in return. Plus gummy bears.
Fantastic piece of work !
Very nice job, for both TRS and PET…
One question though : why not an ATX format design ?
Would fit in so many existing cases…
Nostalgeric attakk!
*sigh*
One of my 2 work horses was modded to run CP/M, albeit with still the ugly 64×16 display format but nevertheless I miss CP/M more than TRSDOS and NewDOS/80v2.
But then… playing with TRS-80 or CP/M emulations on *nixens, ESP8266 and ESP32 it is not the same. I miss directories! Even if some emulations put all drive/userarea combinations into subdirs it is not the same because it is static. Disk juggling was a perfect emulation of directories back then. I think, I’ll someday try to get disk juggling back by using 25Qsomething (SQI flash) as physically removable drives with an emulator… time will cॐ… I hope…
There was an article in Kilobaud where someone with their own Z80 computer decided it woukd be nice to run BASIC, so they bought the extended BASIC rom for the TRS-80.
It was cheap, and off the shelf since you could buy it to upgrade the Radio Shack computer.
So the article is about what he did to be compatible with the TRS-80. Something about the keyboard, work on the cassette interface, maybe change the memiry map. But in tge end he had a TRS-80 clone that didn’t look like it, and was probab!y better.
http://www.z80ne.com/eng/main.asp
In the ’90 in Italy was made a TRS-80 clone in DIY kit.
The site linked above has a malicious (adblock-blocking) script; as a courtesy to others who may be interested in viewing it, the following filter rule will block the attack:
@@||z80ne.com^$generichide
z80ne.com##script:inject(bab-defuser.js)
There were numerous TRS80 clones http://www.trs-80.com/wordpress/trs-80-computer-line/clones/
My personal favorites was the LNW80 which could run @ 4MHz and had hires color graphics capabilities https://fjkraan.home.xs4all.nl/comp/lnw/index.html
I still have a couple of TRS-80 5 1/4 inch floppy disks from a college course in the late 1970’s.
Beautiful build! Every detail is phenomenal.
My first computer was a TRS80. Expensive on its own, It cost a few more pay checks to upgrade the memory and add floppy disks. Sold it all in 1982 after I built a LNW-80 (TRS80 Model 1 clone kit). Still have the LNW-80, but haven’t powered it up in 35 years.
Behold the power of this sometimes operational cassette tape storage medium! (and that was when it was brand new)
And if your formative years were spent fiddling with that volume control, you can probably still remember the exact position you eventually dialed in on as best (mine was a hair below ‘2’) even if you can’t remember the password you changed last Friday.
Kind of funny this article because this video has a TRS-80 as one of the cores available.
https://youtu.be/e5yPbzD-W-I
I believe HaD has covered these devices before.
What’s nice about this build for TRS-80 enthusiasts, besides lots of selectable options, is the keyboard design. Although it uses a modern PS/2 keyboard which is obviously more common nowadays, the circuit is separated by a ribbon where you could plug in a purely mechanical keyboard. Since the keyboard array was in memory and entirely software-decoded, you’d need that if you want to hold down 8 keys at once for some programs.
Those of us who used NEWDOS would remember these triple-key combinations that don’t always work in emulators:
1-2-3 to jump into Debug anytime,
J-K-L as the Print-Screen key
D-F-G to jump into Mini-DOS in the middle of a running program.
(TRSDOS was so bad that everyone had their favorite alternate: NEWDOS, LDOS, DOSPLUS, MultiDOS, etc. There was a big market for working DOSes!)
If Glen was 40 years older he’d be a Billionaire!
Not necessarily, there were 100s of competing systems in the late 70s. There was even a handful of 16 bits out before the IBM PC which you’ve never heard of.
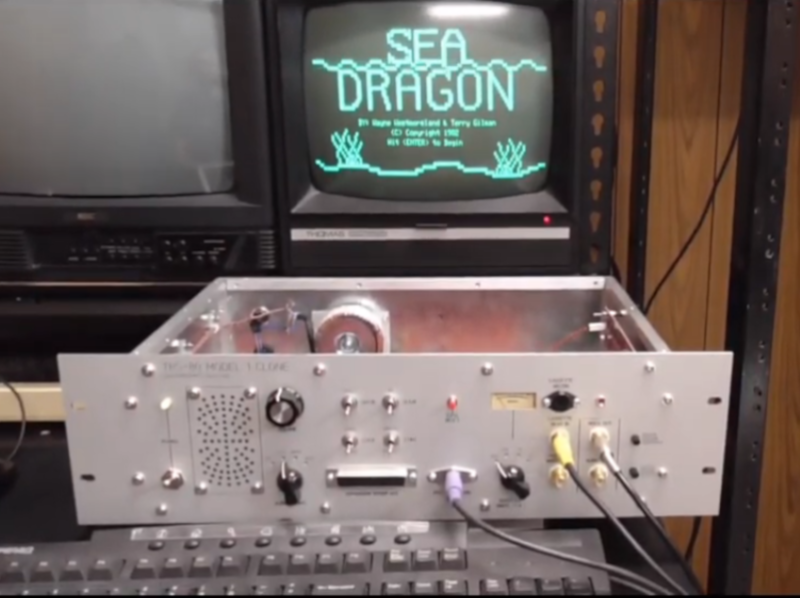
“Seaaaaaa Dragon….Please wait while I initialize the system……”
In the movie Knives Out, all of the security monitors are TRS-80 Model I monitors.
In the pdf, the author mentions the weird 10.6445 pixel clock. To cut costs, Radio Shack used the cheapest crystal they could find for clock generation. Back in 1977 that was a 3.579545 MHz NTSC color crystal.
Fun fact: The TRS-80 was the first computer I laid hands on. My knowledge of computers was limited, so I bought the TRS-80 Technical Manual with the schematics. After all, that was how I’d studied every other piece of electronics, so why should this piece of hardware be different? :)