For the vast majority of readers, the act of taking a photograph will mean reaching for a mobile phone, or for a subset of you picking up a digital camera. A very small number of you will still use chemical film for its versatility and resolution, and we’re guessing that more would join those ranks if some of the cost barriers to doing so could be reduced.
It would be near-impossible to reduce the cost of a chemical photograph to the infinitely repeatable click of a digital camera shutter, but at least if the cost of a darkroom is intimidating then [Sroyon Mukherjee] has an interesting post over at 35mmc about how a darkroom for black-and-white printing from negatives can be equipped for less than £100 ($123). It’s a fascinating read even if your photography remains firmly in the digital, because along the way it explains some of the mysteries of the process. Few people had this type of equipment at home even in the days when most of us took our films to the drugstore, so as time passes this knowledge is concentrated among an ever narrower group.
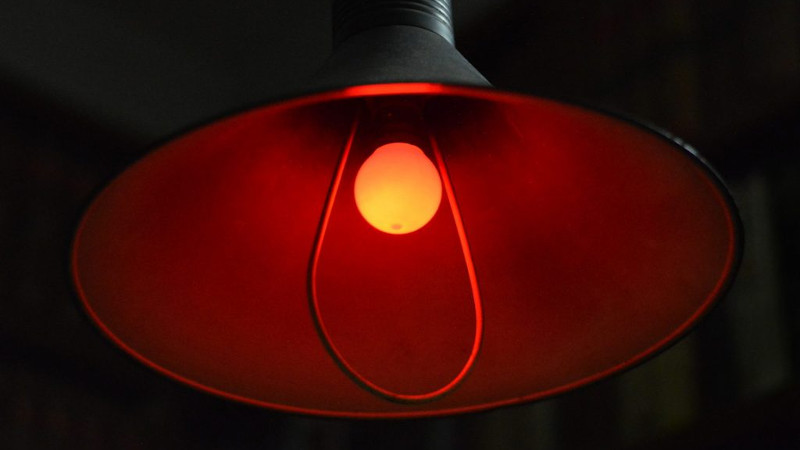
The guide is full of useful hacks. Finding a second-hand enlarger takes an element of patience, but once it has been secured there are a variety of other essential items. The red safe light can be as simple as a mobile phone flashlight with a red filter, but we learn the trick of exposing a sheet of photographic paper with a coin laid on it to check that no white light is sneaking in. One of the main points of the piece is that there is no need for a special room to make a darkroom, and we take a tour of a few photographers’ set-ups in hallways, bathrooms, and basements.
So if you spot an unloved enlarger just waiting for a hacker to pass by, this might inspire you to do something with it. He doesn’t cover the development process, but if you throw caution to the winds you could always try coffee and vitamin C.
[via Hacker News]


To reduce the cost even further, dispense with the coin. It’s just there to make you think you’re doing something. If there’s light leakage the paper will darken, coin or no. I used to work in a camera shop with the Fuji machines and we just loaded the paper magazines in the bathroom.
And here I thought the coin was to provide a guaranteed unexposed area to compare the darkened area to…
Or, you could compare it to a paper that was already developed and see the same difference.
It’s much easier to see the difference if the unexposed area is on the same paper. The human eye is extremely sensitive to boundaries. And putting a coin on the paper is hardly a “cost” – surely everyone has a few coins lying around?!
You could fold the paper in half, or just use the next sheet of paper. Anyway you have to take the coin off to develop the paper, so if there’s a light leak… oops! Or you could 3D print a light-proof box for the red light with a hole that the red light can through, or just use an Arduino.
You cover the tray when developing.
All my early childhood photographs were produced with nothing more than a Kodak Brownie, a film developing tank, a contact printing frame, and a light socket with both a white and a yellow bulb. Why anyone would bother with stinky chemicals nowadays, is beyond me.
Superior resolution and dynamic range compared to even the best digital cameras.
That’s no longer true, at least not for 35 mm color film. In addition, digital has more options to enhance the image, such as combining multiple shots using different exposures.
Well for a start, 80% of that digital magic was named after the dark room processes it emulates. Then the other 20% is still accessible by scanning the negatives and doing the same thing.
Try doing an unsharp mask in the wet darkroom. That digital magic was orignally a darkroom process too. I’m not sure what your point is.
Never really been in a darkroom with someone who knows what they’re doing then?
Glass plate with vaseline smeared on in places you want to soften in path between neg and paper, or use “cheaters” to cover areas of photo paper you don’t want to expose yet, and expose selectively with the enlarger in or out of focus.
Okay, I’m off a bit since it’s been 3 decades since I saw it done, but here’s the preferred procedure described in middle of article …
https://www.shutterbug.com/content/sharpening-basics-here%E2%80%99s-how-unsharp-masking-makes-your-photos-look-extra-crispy
Yeah, that hasn’t been true for a while now.
And you can tell since most use film nowadays precisely to highlight aspects of its limitations, i.e. for aesthetic reasons, not because it’s technically superior. Remember Lomography?
You can now technically have better digital images if you pay top dollar for a top-of-the-line camera. At the consumer level, digital cameras actually went down in quality when they started the megapixel race and switched to CMOS instead of CCD.
A modern day 20 Mpix pocket camera takes pictures that resolve no more than a 10 Mpix camera of 10-15 years ago, and it produces more noise due to the smaller pixels, which is then squashed down with heavy processing that ruins the picture some more. Then there’s other problems like the slower scan of a CMOS sensor that produces the rolling shutter effect – no more snapping pictures of moving objects – and the cameras are slow as heck anyhow. The manufacturers have started removing features like RAW or “fine” jpeg compression because they want to sell you the “professional” cameras instead.
If you pick a similarly priced (inflation adjusted) 35 mm film camera and suitable film from back when, you’ll take superior pictures all day long. If you take a large format camera, you’ll be unmatched by anything you could reasonably afford from the digital side. It’s just that nobody uses film anymore, so there’s no point of comparison – the digital camera manufacturers can push substandard products because the competition is only against cellphone cameras anymore.
It’s kinda like digital TV. First it was better because digital eliminates noise and ghosting. Then it went worse because they reduced the transmission power to save money (picture starts to stutter with missing frames), and reduced the bandwidth to fit in more channels with more commercials, and “HD” resolutions to add more pixels which they couldn’t afford to transmit in the first place.
I just did a test between an old Canon superzoom from 2008 with a busted zoom mechanism and dust inside the lens, and a 2019 Sony superzoom. 12 vs. 18 Mpix, CCD vs CMOS. I set them for the same ISO, shutter, aperture, white balance, and shot the same frame of a city skyline. Then I took a small crop out of both images and scaled up the Canon’s picture 1:1 with the Sony’s picture.
Result of the comparison: the Sony picture was noticeably darker and had more grain to it. The image appeared slightly shaper, but the details were masked by the noise. After applying a median filter to get the noise down to equal the Canon, the Sony’s picture was noticeably softer with fewer details. The gamma curve of the two cameras was different – the Sony had a stronger drop-off in the shadows and bringing the two in line by equalizing the curves just revealed more noise. A soft image you can deal with, but not when it’s noisy because all the sharpening filters bring out the grain even more, and the JPEG compression turns it into mush.
I bought the Sony to replace the broken down Canon because they lauded it for its fast lens and superior sensitivity and performance in low light conditions – because it has a slightly larger sensor than the others. Naturally I assumed the industry went forward in a decade, but since it’s CMOS and it has smaller pixels it struggles with noise even in broad daylight where the older CCD has almost none. If this is among the best, I dread how bad the competition is, or how much more you have to pay to have what used to cost $200-300 ten years ago. Trouble is, you can’t go much higher without buying a DSLR and a bunch of lenses, and it won’t fit your pocket anymore.
The only thing that got better is the viewfinder. Everything else went to ****.
Because it’s fun. Because making pictures with a certain atmosphere is more fun than spending yet another hour behind a computer screen, replicating that look. Because the color rendition and resolution of slide film is amazing and only matched by projector-camera setups that cost more than a thousand euro, for the cost of a €25 camera, €7 film and €5 development. Because many people enjoy having a durable physical artifact of their work. Because you can work with actual professional equipment for sometimes 1/100th of the original price.
Besides that, the modern chemicals hardly have a smell. Today’s fixer only releases h2s when almost saturated. The house smells much worse after frying an egg.
I used to have a darkroom a few years ago, in a closed underneath a stair case. These days i can only do 6x9cm contact prints but those are fun too, and are very easy to make.
+1 My SLR died a horrible death while photographing wildlife in South Africa in early 2002 and was the last I’ll own. Darkrooms likewise. Particularly when working with color film and paper – utter madness.
All of the BS about film “being better” reeks of the same kind of puffery that sells jumper cables as audiophile speaker wire and coffee beans that have been run through the alimentary canal of civet cats as something other than disgusting.
None of it is better, particularly with color photography, with one caveat: Everyone should develop a print once in their life – standing in in a tiny room full of dim red light and stinky chemicals watching an image come into existence on a previously blank sheet of paper is a magical experience. Then go back to what you were doing.
Hi, I’m the author of the original post. I never said film photography is “better”. I do it for the first reason Lauren gave above, because it’s fun. I take digital photos too, and also dabble in alternative processes. I enjoy it all. If you prefer to stick to digital (which the vast majority of photographers do) that’s totally fine and understandable. Whatever you do, enjoy it – that’s what counts. :) Ideally without disparaging the choices of others.
I was given several hundred rolls of B&W 120 film (maybe over a thousand) and developer and I had a camera. I also had an Epson V600 Photo scanner. I was amazed at the results of developing the film and scanning the negatives. I use to mostly for portraits. There is also a lot of photo paper and I think about it once in a while in case I have some shots so great they need archival printing. Plus, I have negatives have remained unchanged for 100 years, not to mention outlived five or six generations of digital media.
Ironically, film is used to archive digital movies. More info: https://www.fujifilm.com/products/motion_picture/lineup/eterna_rds/
This should be *exactly* the motivation for doing all the things we feature on Hackaday, because it’s cool, fun, or interesting. Thanks so much for sharing it with us in the article!
If you get a Brownie or other large format (big film negative) camera, you can get a taster of home developing by loading a piece of photosensitive paper in the back in the dark/dim-red taking a photo, then developing that paper negative, in a tupperware of developer on a table draped over with a heavy blanket. Then with with modern magic, scan it and make negative image positive on your computer. That’s your real minimal investment approach to dipping a toe. Not sure it’s so easy to find Brownies or other box cameras for next to nothing any more though, you might find yourself paying $10 for one. One can do it with a 35mm camera (SLR or other) but then you’re playing with scissors in the dark more to size the paper, and the paper negative is small. After securing the camera, then it’s the price of a box of photo paper and bottle of developer or developing fluid. We’ll assume you can find a tub or tray big enough to sit the paper in and cover with minimal developer. Alternatively, if you know someone who does this, you may be able to scrounge a few sheets and a hundred ml of developer.
Great memories – I did this in my early teens, except I made a pinhole camera out of a cardboard box. The “shutter” was a bottle top that fitted in the end of a cardboard tube around the pinhole, and the pinhole itself was in a piece of kitchen foil glued over a larger hold in the box. My darkroom was the house attic and my safe light was my bicycle rear light. I can’t remember how I made a positive image – maybe I just didn’t bother, or maybe you can/could get negative paper? But it definitely took photos!
The “magic” of it was only superceded when I built a crystal set that could pick up radio stations without batteries!
As kid: I always made positives from pinhole prints by making contact prints, paper-to-paper rather than film-to-paper. Make sure the emulsion sides are in contact, put a sheet of glass over, and voila!
Contrast is intrinsically low, so you probably want the highest contrast paper for the transfer. It’s trickier for the exposure — the extra latitude of low-contrast paper helps with the imprecision of exposure.
Then I got my hands on 4×5″ sheets of Tri-X for cheap. Then I started shelling out for Polaroid PN instant film, made possible by part-time employment at a frozen yogurt joint. All downhill from there…
But I must have made a teenager-year’s worth of pinhole photos on paper-paper. It gets a slightly hazy/dreamy quality that in retrospect is a good match for pinholes, but in my resolution-obsessed youth was a downside.
Although direct positive paper (print out paper) appears not to be commercially available any more, it is technically possible with a more complicated process to use normal enlarging paper to make a positive image without a negative.
Expose the paper with an image and develop, then stop bath and rinse thoroughly. Expose paper to a strong light and develop thoroughly with a toning or staining developer. Stop, wash, then bleach away the silver. Wash again. The result is a dye image from the toning developer.
For a direct positive silver image: Expose the paper with an image and develop, then stop bath and rinse thoroughly. Next, dissolve the developed silver without attacking the remaining silver halide (that’s the tricky step, it can be done but I don’t know the relevant chemicals required.) Rinse, expose thoroughly, develop, stop, wash thoroughly.
Search for Ilford harman direct positive paper
I wrote this post because I read the linked article and thought “That’s really cool!”. It’s my criterion for writing something for Hackaday, if I think it’s cool I hope you will too.
Sure you don’t need to process your own film in 2020. Hell, I don’t! But reading about someone else doing it, and in a hacky way that means he does it cheaply? Beyond cool!
I gave my enlarger away years ago. I had a heavy curtain I could hang in front of the bathroom door and that had power and water. A board from the toilet tank to the sink was the workbench. I only did B&W and E6 (color slides) but working with the large format from my Yashica Mat Gs was always more fun and 35mm or the 126 or 110 I would do for friends.
I built a darkroom for about that much money back in the late 60’s or early 70’s. I had a place down the street that got long pallets covered in cardboard, just the thing for framing in light tight walls in the corner of the basement. My room was so light tight you could leave film out in it. The enlarger was a bit of an amalgamation made out of a couple enlargers and some glass that I cut, but it got the job done. I think the most expensive piece was the tank and reels for developing roll film. I upgraded things as I got drips and drabs of money. I started out with paint trays for developing trays. I did not have a timer at first, just counted out the seconds. Later on I built a 555 based timer with a relay. I used to love playing with film. I did all kinds of neat things with it. Stupid simple things next to what you can do digitally today, but cool and fun back in the day.
Over the years I built up my collection, and than the world went digital. I sold my 35mm stuff, I very sadly sold my large format stuff. I have one nikon 35mm camera that I have not seen in years, and a speed graphic camera. I keep thinking some day I am going to make some glass plates and fire that up. I doubt it will happen but I hung onto it for that project. I also have this idea of a pinhole camera only with a drop of water for the lens. Perhaps someday…
When you have done everything yourself, from exposure to developing and printing, there is a sense of satisfaction that you don’t get with a digital image. A nut tastes sweeter when you’ve cracked it yourself. That being said, I still wouldn’t want to give up my digital camera and editing software.
I last decanted my old college-era enlarger about 15 years ago, when my son was in Scouts and I offered to teach the photography merit badge to the kids in the troop. I had a bulk loader and cans of old B&W film going to waste, so the kids were free to shoot all the pictures they wanted, which is really the best way to learn. They had fun developing it, and everyone loves that first time watching the print appear in the developer tray.
A few years later when digital SLR bodies reached about 10MP resolution, I bought a nice Canon, and the film cameras were sent out to pasture. The last time I remember checking, the iris had seized up on the prime lens from my Pentax, rendering it useless. And honestly, once my wife and I had iPhone 5s, none of our digital cameras have been powered on since.
While cameras on phones have become quite good, they still fall short in some aspects such as not being great in low light conditions due to relatively small sensor sizes and little to none optical zoom.
I learned long ago the camera you have with you is infinitely better than whatever camera you left at home.
I used to carry an ELPH in my pocket when we went on trips, and would fill up an SD card or two whenever I could, but no more. Phones are “good enough” for most of life’s moments, and I’ve stopped trying to be the purist who gets that “perfect shot”. I’m just happy for any phone snap of my granddaughter playing in the yard, a picture of a friend sitting in his new car, or my wife smiling at something. Pictures of mountains or monuments or museums aren’t something we go back to — pictures of family are.
It was the flexibility of the chemical process, and the hardware available. 5×4 plate camera, Beseler enlarger. The triumph of a photograph of the inside of a pocket watch, 4 feet by 4 feet and pin sharp, produced by me, working in a fabulous huge light-tight darkroom, formerly a men’s public lavatory. The photo was for a museum display, and was on show for years.
Photography class in High School was so much fun. I would LOVE to be able to set up a dark room and get back into it again.
Technically, if you open the film cover, then put a light source behind your old 35 mm camera and cover around it for light leaks you can make it into an enlarger by placing it on a tripod.
Getting a safe light is pretty easy nowadays: just use red LEDs.
I’ve done the basement / laundry room darkroom thing, rental darkrooms, home-made B&W developers of my own design, reversal processing to make B&W slides, alternative processes, E-6 (colour slides) at home, RA-4 prints (colour prints from colour negs) etc. — you name it. All lots of fun in its time. I don’t do much of it anymore.
By the mid-2000s I had amassed a small collection of interesting film cameras, but slowly got rid of most of them. In particular, as digital cameras got better and cheaper, the draw of 35mm film photography disappeared (for me at least). The film camera I’ve kept (and still use for fun) is a nice Rollei TLR from the 1950s. Manual-everything, big 6x6cm negatives on roll film, very contemplative. I enjoy the act of using the camera more than I enjoy printing negs, so I develop the film at home and then scan the negs for further processing.
Developing film is pretty mechanical, but I think every serious photographer should, at some point, at least take an introductory traditional printing course (prints from negatives) as an educational exercise — it is a visceral process in the way that Photoshop is not.