Mix Your Own ECN-2 Development Chemicals

After the digital camera rose to prominence, it became a cool hobby to keep taking photos on film. It was even cooler if you did the same with an old motion picture camera. The retro film revival has kept a dedicated bunch of photo labs in business over the years, but it’s still possible to save some cash on development by doing it yourself. If that’s your game, you might try mixing up your own development chemicals. 

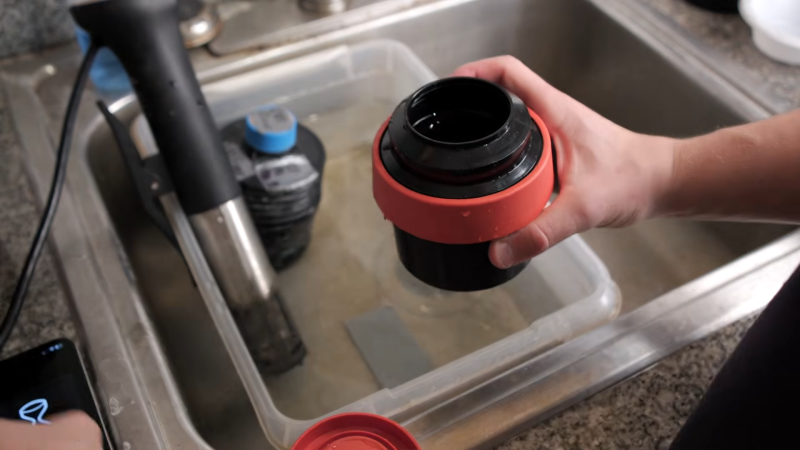
As explained by [No Grain No Gain], it’s quite possible to mix up your own ECN-2 chemistry from scratch if you know what you’re doing. ECN-2 is the chemistry you’ll want if you’re trying to develop any of Kodak’s Vision3 films, along with CineStill films.

The problem with traditional methods of making developer is that once it’s mixed up, it doesn’t keep well, and the more you use it, the worse the quality gets. To beat this problem, this method involves producing two stock solutions which can be kept on the shelf for long periods of time. They can then be combined together with a little CD-3 developer on an as-needed basis. This makes it easy to always have fresh developer on hand for the best possible results on every roll processed. To make everything, you’ll need sodium sulfite, potassium bromide, sodium carbonate, sodium bicarbonate, and the specialist CD-3 developing agent. It’s then a simple job to mix up the dry chemicals with a bunch of distilled water to make the two necessary solutions to keep on hand. The video also explains how to deal with RemJet films if you happen to be shooting those.

[No Grain No Gain] estimates that this method can cut the cost of development to as little as 50 cents a roll. There’s plenty of labor involved, but if you want the freshest, best developer on hand for your home lab, it’s a method worth considering.

We’ve explored modern film development techniques before, too. Video after the break.

Continue reading “Mix Your Own ECN-2 Development Chemicals”

Panoramic Film Camera Made From 3D Printed Parts

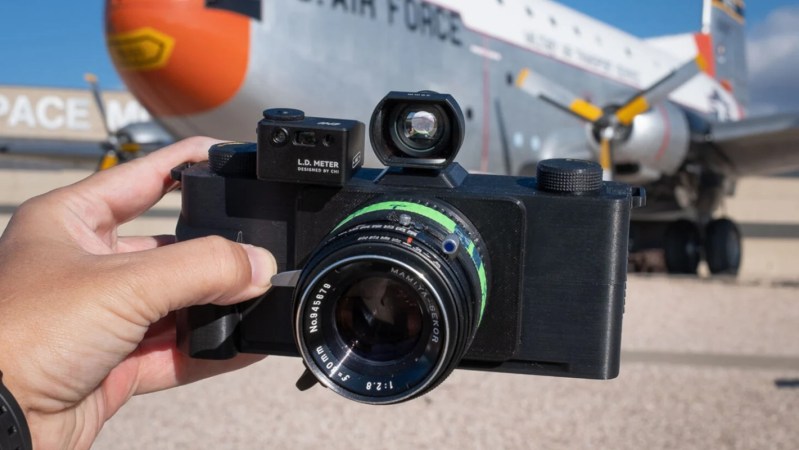
Even though digital cameras have lowered the barrier of entry to photography dramatically, as well as made it much easier for professionals and amateurs alike to capture stunning images without the burden of developing film, the technology behind them is considerably more complex than their analog counterparts. In fact, an analog film camera (not counting the lens) can be as simple as a lightproof box and a way to activate a shutter. Knowing that, any kind of film camera could be built for any number of applications, like this 3D-printed panoramic camera from [Denis Aminev].

The custom-built camera works by taking a standard roll of 35mm film, which is standardized to take 36 pictures, and exposing a wider section of the film to create a panorama. This reduces the number of pictures on the roll to 19. This is the fifth version of this camera, called the Infidex 176 V, and has everything a standard film camera would have, from an exposure counter, pressure plate for the film, a winder, interchangable lenses, a viewfinder, and a tripod mounting point. It does take a bit of work to assemble, as shown in the video linked below, but the final result is impressive and delivers a custom finished product not easily found or reproducible in off-the-shelf cameras.

The path to creating this camera was interesting as well, as [Denis]’s first custom film camera was a pinhole camera. From there he moved on to disassembling an SLR camera and attempting to reproduce all of its parts with 3D printed ones. With that in hand, he was able to modify this design into this panoramic camera which he likes because it reproduces the feel of widescreen movies. Although this camera reproduces all of the bells and whistles of a high quality analog camera, not all of these features are strictly necessary for taking pictures on film. Have a look at this minimum viable camera as well.

Continue reading “Panoramic Film Camera Made From 3D Printed Parts”

Analog Surround Sound Was Everywhere, But You Probably Didn’t Notice

These days, most of the media we consume is digital. We still watch movies and TV shows, but they’re all packaged in digital files that cram in many millions of pixels and as many audio channels as we could possibly desire.

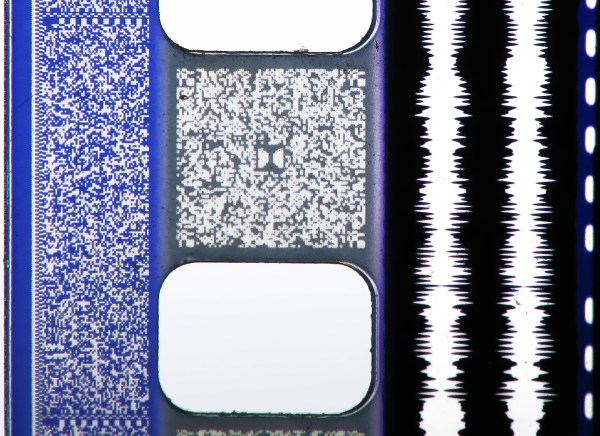
Back in the day, though, engineering limitations meant that media on film or tape were limited to analog stereo audio at best. And yet, the masterminds at Dolby were able to create a surround sound format that could operate within those very limitations, turning two channels in to four. What started out as a cinematic format would bring surround sound to the home—all the way back in 1982!

Continue reading “Analog Surround Sound Was Everywhere, But You Probably Didn’t Notice”

A 3D Printed 16mm Movie Camera

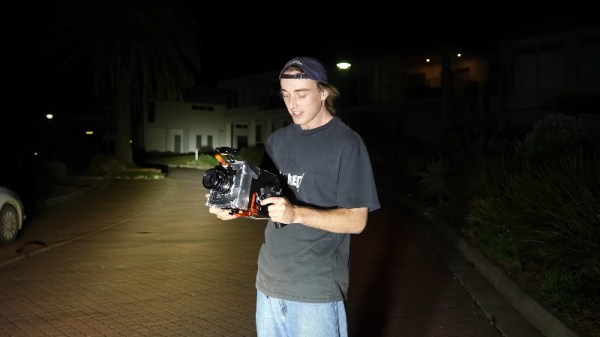
The basic principles of a motion picture film camera should be well understood by most readers — after all, it’s been well over a hundred years since the Lumière brothers wowed 19th century Paris with their first films. But making one yourself is another matter entirely, as they are surprisingly complex and high-precision devices. This hasn’t stopped [Henry Kidman] from giving it a go though, and what makes his camera more remarkable is that it’s 3D printed.

The problem facing a 16mm movie camera designer lies in precisely advancing the film by one frame at the correct rate while filming, something done in the past with a small metal claw that grabs each successive sprocket. His design eschews that for a sprocket driven by a stepper motor from an Arduino. His rotary shutter is driven by another stepper motor, and he has the basis of a good camera.

The tests show promise, but he encounters a stability problem, because as it turns out, it’s difficult to print a 16mm sprocket in plastic without it warping. He solves this by aligning frames in post-processing. After fixing a range of small problems though, he has a camera that delivers a very good picture quality, and that makes us envious.

Sadly, those of us who ply our film-hacking craft in 8mm don’t have the luxury of enough space for a sprocket to replace the claw.

Continue reading “A 3D Printed 16mm Movie Camera”

Using Four Rolls Of Film To Make One Big Photo

Typically, if you’re shooting 35 mm film, you’re using it in an old point-and-shoot or maybe a nice SLR. You might even make some sizeable prints if you take a particularly good shot. But you can get altogether weirder with 35 mm if you like, as [Socialmocracy] demonstrates with his “extreme sprocket hole photography” project (via Petapixel).

The concept is simple enough. [Socialmocracy] wanted to expose four entire rolls of 35 mm film all at the same time in one single shot. To be absolutely clear, we’re not talking about exposing a frame on each of four rolls at once. We’re talking about a single exposure covering the entire length of all four films, stacked one on top of the other.

To achieve this, an old-school Cirkut No.6 Outfit camera was pressed into service. It’s a large format camera, originally intended for shooting panoramas. As the camera rotated around under the drive of a clockwork motor, it would spool out more film to capture an image.

[Socialmocracy] outfitted the 100-year-old camera with a custom 3D-printed spool that could handle four rolls of film at once, rather than its usual wide single sheet of large format film. This let the camera shoot its characteristic panoramas, albeit spread out over multiple rolls of film, covering the sprocket holes and all. Hence the name—”extreme sprocket hole photography.”

It’s a neat build, and one that lets [Socialmocracy] use more readily available film to shoot fun panoramas with this old rig. We’ve featured some other great film camera hacks over the years, too, like this self-pack Polaroid-style film. Video after the break.

Continue reading “Using Four Rolls Of Film To Make One Big Photo”

Three 3D printed, spring loaded contraptions sit on a wooden shield. There are arrow shafts connected to the end and a piece of monofilament fishing line extending away from them and through a small eyelet at the edge of. the shield.

How To Shoot Actors With Arrows Sans CGI

Today, movie effects are mostly done in CGI, especially if they’re of the death-defying type. [Tyler Bell] shows us how they shot actors with arrows before CGI.

Almost every medieval movie has someone getting shot with an arrow, but how do you do that non-destructively? [Bell] shows us two primary methods that were used, the pop up rig and steel pronged arrows. The pop up rig is a spring loaded device with one end of an arrow attached that pops up when a mechanism is triggered. [Bell] 3D printed his own version of the mechanism and shows us how it can be used to great effect on shots from the side or rear of the victim.

But what about straight on shots where the rig would be blatantly obvious? That’s when you get to actually shoot the actor (or their stunt double anyway). To do this safely, actors would wear wooden body armor under their costumes and arrows with two small prongs would be shot along a wire into the desired impact site. We appreciate [Bell] using a mannequin for testing before letting his brother shoot him with an arrow. That’s definitely the next level above a trust fall.

We even get a look at using air cannons to launch arrow storms at the end which is particularly epic. Looking for more movie magic? How about the effects from King Kong or Flight of the Navigator?

Thanks to [Xerxes3rd] on Discord for the tip!

Continue reading “How To Shoot Actors With Arrows Sans CGI”

How Much Resolution Does Film Really Have?

Have you ever scanned old negatives or print photographs? Then you’ve probably wondered about the resolution of your scanner, versus the resolution of what you’re actually scanning. Or maybe, you’ve looked at digital cameras, and wondered how many megapixels make up that 35mm film shot. Well [ShyStudios] has been pondering these very questions, and they’ve shared some answers.

The truth is that film doesn’t really have a specific equivalent resolution to a digital image, as it’s an analog medium that has no pixels. Instead, color is represented by photoreactive chemicals. Still, there are ways to measure its resolution—normally done in lines/mm, in the simplest sense.

[ShyStudios] provides a full explanation of what this means, as well as more complicated ways of interpreting analog film resolution. Translating this into pixel equivalents is messy, but [ShyStudios] does some calculations to put a 35mm FujiColor 200 print around the 54 megapixel level. Fancier films can go much higher.

Of course, there are limitations to film, and you have to use it properly. But still, it gives properly impressive resolution even compared to modern cameras. As it turns out, we’ve been talking about film a lot lately! Video after the break.

Continue reading “How Much Resolution Does Film Really Have?”