On older vehicles, if you noticed that the lights had gone out behind one of your gauges, you knew it was time to snake your hand back there and replace the little incandescent bulb that had given up the ghost. But what are you supposed to do if you’re seeing the same problem on a modern vehicle that’s already made the leap to LED dash lighting? That’s what [Tysonpower] recently had to find out when the fuel indicator on his Alfa Romeo Giuletta QV went dark.
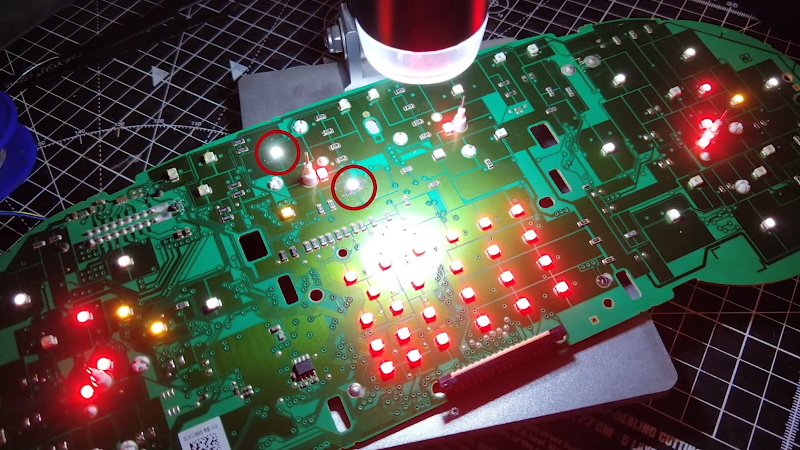
 In the video after the break, [Tysonpower] details how to remove the instrument cluster from the Giuletta’s dash, which we imagine would be a useful little tutorial for anyone who owns the same vehicle. Once he has it out on the bench, he strips it down to the bare PCB and starts (literally) poking around.
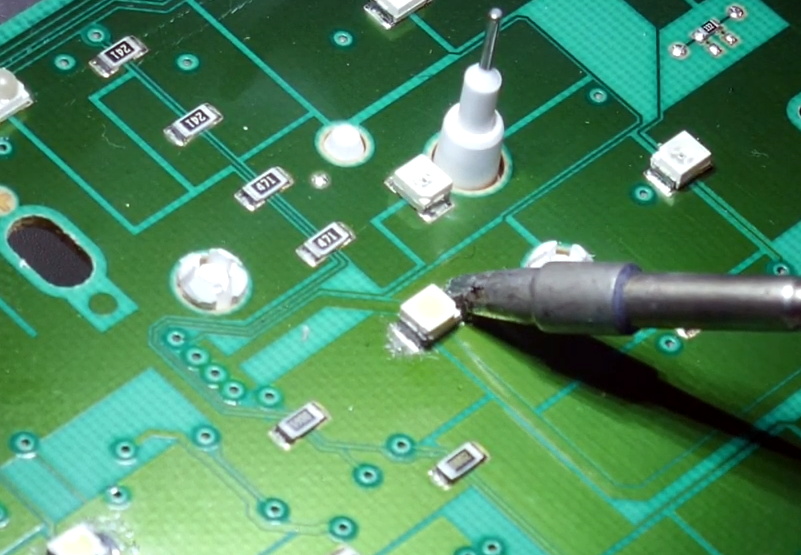
He eventually noticed that if he pushed on the board near the fuel indicator he could get the appropriate 3528 SMD LED to light up, but touching up the solder joints didn’t seem to fix the issue. Assuming the LED must be defective internally, he simply replaced it and all was good again.
Well, not exactly. The light produced by the new part didn’t match the color or brightness of the other dozen or so white LEDs that were installed on the board, so [Tysonpower] decided to just dive in and replace them all. While it obviously took a lot more time and effort, he says the end result is that the instrument cluster looks noticeably brighter and crisper when driving at night. Not bad for an afternoon’s work and a couple bucks worth of LEDs.
Most of the time, when we see somebody messing around behind the dash it’s because they intend on replacing the original instruments with something more capable. But projects like this, which add just a touch of refinement to the existing hardware, prove that stock components aren’t always a disappointment.


I did a similar LED soldering job on a friend’s BMW E46, several warning lights were not lighting up when switching the gauge cluster to test mode. It turned out that some of the LEDs had been blatantly ripped out by a previous owner.
A continuity tester came in handy to figure out the polarities and check the solder joints, as it’s voltage was enough to light up the LEDs.
I had a completely dead dash come to me one time, it had a blown power diode, $3. Not a common car, I think it was a Buick Riviera, saved them probably $100 at least.
Of course their whole dash was dead, so it was easy to start at the power side.
Neat to replace all the LED, I am a goof because I would have attempted a red changeover, probably due to me owning an 89 BMW, it was like a jet fighter in the cockpit of that thing.
Are we going to have to update the joke book to – how many X does it take to change the LED?
I had to do something similar to keep the gauge cluster going on my ’91 Volvo 940T, although admittedly it was a fair bit less difficult – the PCB was starting to have intermittent flakiness and it turned out the shotgun approach to fixing it was basically “resolder everything”. Fortunately it was a pretty simple job. After disassembly of the actual gauge cluster, I just did a lot of remove + replace on solder which was nice and straightforward due to the lack of anything even remotely sophisticated, being largely a carry-over from early ’80s design.
Similarly had lights dying on my car’s dash, though mine were the little tiny wedge base seed bulbs that are just an incandescent filament in a bit of glass with the leads sticking out and bent around the body. There’s virtually no room for any replacement, but I did find some tiny LED versions… and didn’t consider that when it’s just an LED and a resistor, they have polarity. (Almost any other bulb has a FWBR in there or a polarized connector.) So I put all the parts back and still had two dead lights, had to pull it back apart and flip them. So dumb. If you’re replacing bulbs, keep this in mind.
Buying 50 non identified type LED from a random ebay seller is way better idea then buying from let’s say 5 pcs (for the same price) from reputated distributor…
all things come in the end form china… here in our local distributor called “Conrad” its almost the same or the same as on ali
Jup Conrad sells the same Stuff but for 5x the Price :)
The LEDs came in a reel and seem to be quite okay from a quality standpoint. Nothing to complain really.
These type of SMD LEDs are sensitive to moisture and some of them to materials containing sulfur.
Moisture penetration usually only causing issues if they passed through the reflow owen: the humidity gets into the silicone optics, during the reflow it boils creating small explosions around the bond wires weakening/breaking the bond wires.
Some LEDs has silver coated tabs/bond wires, which starts corroding when gases/materials get in touch with the optics:
https://imgur.com/a/pNZk4Rp
Personally I do not consider Conrad as a reputated seller.
Having the LEDs received in a reel means should not make high expectations. Digikey, Mouser, RS-Online just to name a few sends usually sends the moisture sensitive the parts in sealed bags with humidity indicators.
Anyway I hope you will not need to repeat the disassembly procedure due to the quality of the new LEDs
A necessary joke:
Why Alfa Romeo owners don’t greet themselves at the workplace?
Because they’ve already met at the car mechanic earlier that day.
LOL!
As a former owner of an Alfa Romeo Alfetta GT, I can relate.
Everyone should own an Alfa.
Once.
A brighter dash is actually less safe at night, f* up your night vision, especially so with blue and white ones that most newer cars these days have.
Set your interior dimmers and save your night vision, and the inside of your windshield !! Then maybe it will be possible to see the road without having to drive with the high beams on all the time ;-)
Hi,
question which pins you connect to get the LEDS on? and how many volts is on it? 5v or 12v?
Looking for this but its hard to find a good wire diagram, hope you could help me?
Oh wow, this exactly the reason I came to this page 😁 I hope you (we) get a reply and thanks.
Did you find out? I’m about to do this as well.
These are raw 3528 LED’s – NOT 5V or 12V. They are powered from 5V and the MCU, do you see the dropping resistors?