If you have a pile of old VHS tapes collecting dust in your attic or basement that you know you’ll never watch again, either because all of those movies are available on DVD or a streaming service, or because you haven’t had a working VCR since 2003, there might be a way of putting them to good use in another way. With the miles of tape available in just a few cassettes, [brtv-z] shows us how to use that tape as filament for a 3D printer.
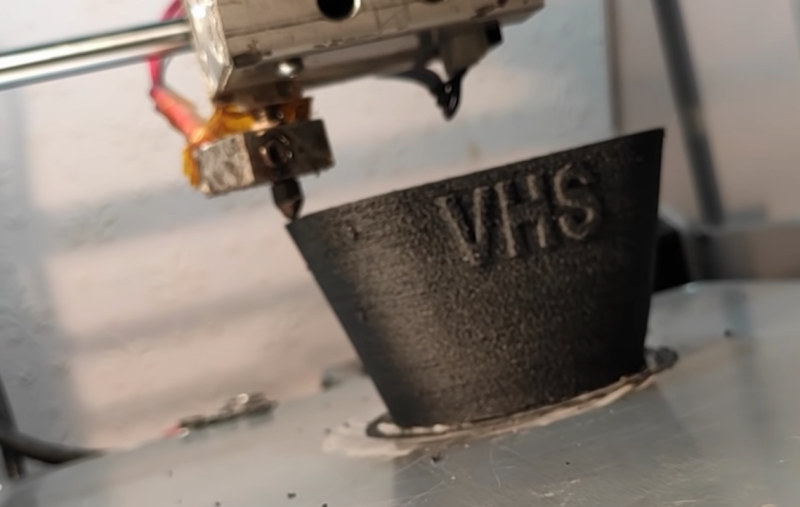
The first step of the build is to actually create the filament. He uses a purpose-built homemade press to spin several tapes into one filament similar to how cotton or flax is spun into yarn. From there the filament is simply fed into the 3D printer and put to work. The tape filament needs to be heated higher than a standard 3D printer filament so he prints at a much slower rate, but the resulting product is indistinguishable from a normal print except for the color. It has some other interesting properties as well, such as retaining its magnetism from the magnetic tape, and being a little more brittle than PET plastic although it seems to be a little stronger.
While the VHS filament might not be a replacement for all plastic 3D prints, it’s still a great use for something that would likely otherwise head straight to the landfill. There are some other uses for this magnetic tape as well, like if you wanted to build a DIY particle accelerator.


That’s really genious!
So any thoughts on what I could do with the 80,000+ VHS tapes I need to dispose of?
Now that’s delightful. It’s definitely a hacked together solution, but it works better than I would have expected! I suspect the consistency of tapes actually makes them good feedstock for creating consistent filament.
Yes a very entertaining video.
I wonder if you could make the filament “on the fly” feeding the printer as it consumes it, with a single loop to take up the slack, as it were?
You’re looking for “pellet extruder”.
Would drying out the filament increase the smoothness ?
Ive seen this done with trimmer line…
Also would the recording on the tape affect the magnet force ? E.g. blank vs full tape and you could fine-tune the force ?
Sorry, I don’t understand English well.
The filament is not hollow, very strong.
I have not tried to record anything on the filament, but this is in the plans)
I doubt that this would work. The oxide, which is in a pretty pure form on the surface of the tape, will get mixed with the PET, diluting its magnetic properties. As thin as the tape is, the oxide layer is even thinner, so the bulk of the filament would be just PET plastic.
But then I watched the rest of the video. So yeah! I’m quite surprised that the tape can be lifted with a magnet, but that does suggest some interesting experiments.
“Will drying out the material help improve performance?”
Поможет ли высыхание материала улучшить характеристики?
“Also would the recording on the tape affect the magnet force ? E.g. blank vs full tape and you could fine-tune the force ?”
Также повлияет ли запись на ленту на силу магнита? Например. пустая или полная лента, и вы могли бы точно настроить силу?
https://translate.google.com/
“I’m wondering what the RF characteristics of the material is like how a signal is attenuated when sweeping from ULF to Gamma Rays Frequency?”
Мне интересно, каковы ВЧ характеристики материала, как ослабляется сигнал при переходе от УНЧ к частоте гамма-лучей?
Tune the force by recording/blanking tape – no. Make custom pattern of magnetisation with electromagnets near printhead – probably yes. That should align magnetic particles in desired direction as plastic cools.
The recording modulation used in VHS tapes is DC-balanced, meaning there are the same number of particles arranged N-S as there are arranged S-N, so anything above the micron scale, it all averages out to a random orientation of particles, which should be indistinguishable from a fully degaussed tape.
There’s also the temperature of printing to consider. If this is above the Curie point for the magnetic particles, this would “erase” it as well. Not that I have any idea what the Curie point for VHS tape particles is.
So, re-bias the filament before it sufficiently cools!
B^)
Hello everybody. Sorry, but I don’t speak English well .. I also print with various other secondary materials. For example, foam, DVD discs, medical masks, disposable plastic dishes.
I want to cleanse our planet of garbage at least a little.
Join!
Good idea! Udachi!
I bought a VHS player last year at a pawn shop for $30.
When I played one of my old movies in it, the low resolution of VHS was something I didn’t remember.
My daughter refused to watch the movie because of it.
Well, at least some of those old movies are available on DVD or digital download.
Oh yes, after the breakup of the Soviet Union, we sent a truckload (or so) of 9 track tapes to Russia, as we heard they still used those. Now, I can expect they are also becoming printing filament.
Did you watch it at analog tv (with big fat back)? I can remember The Abyss to be crystal clear on mine. Now FHD looks a bit blurry ;P
If my child snubbed their nose at something I was trying to share with them we would have a problem.
Oh, yeah, there is a problem!
Yeah, it’s called your kid doesn’t like you.
I think there in your country the service to convert the vhs to digital softcopy… In Kuwait i provide this service to people.
I’m thinking about how to use it’s magnetic properties. It’s cool that it sticks to a magnet but would be cooler if it was a magnet itself.
My first thought is a magnet stuck to the side of the melt chamber might do it. Or would you want it closer to the nozzle?
But if subsequent layers are laid down in different directions that would cause it to cancel out right? You could hack a slicer to only lay down plastic in one direction. But that would probably create a weak print and definitely make the print take longer.
Maybe if it were an electromagnet it could be powered through an h-bridge. If the goal is to simply make the whole print a magnet then the printer’s firmware could be programmed to control the h-bridge based on the current direction of movement.
Then again, maybe it would be desirable to control it from G-code. Then you could make a print with different magnetic regions.
I suppose the most refined version of this idea would be a mix of both. G-code would tell the printer when it should/should not be magnetizing the material and if so, should it be NS or SN. The firmware would look at the current direction of movement and translate that into magnet current / polarity.
Would this really work that way?
For prints that can be done in “vase mode”, you automatically get the same orientation on all layers.
Also, if you are applying a magnetic flux across the filament, if the printing temperature is above the Curie point for the metallic compound, you have to keep the field applied until it cools to below the Curie temperature. And no, I have no idea what temperature that would be for the stuff VHS tapes are made from.
But never fear: tapes were made to be magnetized fairly easily, so it shouldn’t be difficult to magnetize it after printing, which might be easier anyway.
My immediate thought – because I’ve been trying to figure out a good way to do it for a while – was to use this to print custom transformer cores. In a twist of fate, one of the things I want to use those cores for is building rotary transformers, a contactless rotating electrical coupling that made getting the signals to and from the read/write heads on VCRs possible.
I have a few stacks of working VCRs (for varying definitions of “working” and various definition of “VCR”), around a thousand tapes all containing movies or series I like, a few hundred tapes that I still use for taping over when something new comes along (I even tape stuff off the internet sometimes – yes, I’m THIS crazy)
What I lack is time to watch them.
What are the tools you use to make the filament?
Look at 2:44. It’s essentially just an extruder (with a large bore nozzle). Rather than the filament being pushed through the nozzle, it is being pulled through. As such, I imagine the temperature must be in the range where the plastic softens considerably but doesn’t fully melt.
So, I didn’t see what I was really interested in seeing. Ever since PETG became available on the filament market, I’ve been wondering how PET from 2-liter bottles would print. In the video, I see that it seems to print just fine, but [Brother] skipped over the part where he made the green filament. As cleaver as the method for making filament from the tape was, I’d be very interested to know how the bottles were turned into filament.
Get the bottles into small bits, (I’ve seen printed shredders work for this) feed it through a filament extruder like they were pellets, usually mix with some % of virgin material to keep levels of degradable components like plasticizers to an acceptable amount.
10% to 15% virgin plastic added to regrind gets pretty close to original properties.
For that, see his earlier video: https://www.youtube.com/watch?v=Yby5fxWbwhE
Essentially, it’s a 2-step process:
1) Shred the bottles into bits. You can use various devices for this, such as heavy-duty paper shredders. Some folks have used sink disposals.
2) Feed the bits into an auger-driven filament extruder. There are various commercial devices for this, or you can make your own. There’s also a kit; see: Filastruder.
*) Optional step to make life easier: get an auto-winder. See: Filawinder.
Wondering if can make easily using the similar demonstrated design system like in the ways the rope or cane material is made. https://www.youtube.com/watch?v=GSBh77bjz_Q
Yep, the Youtube AI just suggested Brother has done already from the PET ribbons directly and he seems positive regarding the quality: https://www.youtube.com/watch?v=AmJzqdA3zSg
Cool! I never would have tried feeding flat filament into a round extruder/hotend, but it does appear to work. I guess the next problem is splicing together strips from multiple bottles!
I just invested in my first 3D printer, a Monoprice mini V2 3D for $100. Thinking was overpriced… though other than being reported not working from the SD card… works with no issues.
The design isn’t going to be suitable from what I can see yet for the direct flat filament feeding since has the tube design detached… though looking at ordering a hotend for the PID I have to begin my first attempts at recycling plastic to make 3D printer filament.
My worst prints were due to splicing since I was thinking with my first prints to cut to length the amount of filament calculated by the splicer algorithm. Then I thought I can just splice by hand with a lighter… worst ever… and I did that in three tries before that ended.
Wondering if something that is like the hot end split in two with a hinge so can splice and press together after the hot end is clamped down after doing some studies maybe even with a timer to cue optimal time relating to temp?
Lol! Problems with splicing filament. A number of years ago, I made a sculpture of 2mm solder, using a soldering iron to make joints. It was .. educational. Every failed attempt to make a “T” joint resulted in three loose ends, requiring three splices before getting to try to make the joint again. Uncontained liquids don’t like to sit still. I feel your pain.
Not had to do it, but for manual splicing with ABS filament, I’d think of trying an old tape splicing rig and ABS cement.
I used most of my old VCR tapes with Acetone and made Ferro-fluid. Great to see that stuff being attracted to magnets. With the DV25 tapes I have acquired from where I work…I’ve got some GOOD material to use. Fun, fun, fun. ;)
If you allow the acetone to evaporate from your fluid does it become a solid, non-sticky plastic?
Sure, if you have muuch time and keep the goo over the boiling point of acetone
“Wondering how the material electric and magnetic characteristics are as is and maybe as noted about processing through a magnetic filed before cooling maybe to effect orientation of not only the magnetic materials… maybe the polymer properties… though thinking isn’t like metal processing to effect magnetic permeability.”
Интересно, какие электрические и магнитные характеристики материала такие, как есть, и, может быть, как указано в отношении обработки с помощью магнитного поля перед охлаждением, возможно, чтобы повлиять на ориентацию не только магнитных материалов … возможно, свойств полимера … хотя мышление не похоже на металл обработка для воздействия на магнитную проницаемость. Спасибо, что поделился!
“Also, you can select transcript, or the CC button for closed caption, when watching the video to see what the English is. Not certain how works for other languages viewing videos for translation. Using google translate to ease the communication differences.”
Кроме того, вы можете выбрать транскрипт или кнопку CC для скрытых субтитров при просмотре видео, чтобы узнать, что такое английский. Не уверен, как работает для других языков просмотр видео для перевода. Использование Google Translate для облегчения общения. еще раз спасибо
I wonder if betamax tapes give better quality prints?
Well Sony says it will.
Here’s a thought, magnetic Edison cylinders! Print in case mode, as fine as you can, and then make a read/write head that rides in the groove with the head alignment slightly to one side so it’s positioned above the raised print line. The alignment part could be a wheel with a narrow edge that rides/rolls in the groove. It would be mono (no biggy) and probably only suitable for low grade voice recording, but still, that would be pretty awesome.
Any thoughts on whether the magnetic particles being distributed through the plastic rather than the on the surface would effect the ability to record?
So is it now cheaper to go to the goodwill and get a bunch of tapes instead of buying filament? Also can I grind up the cases of the tapes to make filament?
Sure, for ABS filament.
3D printed Halbach arrays (like flexible fridge magnets) by using a printer with dual, independent heads, with a reversible polarity electromagnet on the 2nd head?
3D printed radiation shielding? It’s already magnetic. Printed out in the right configuration a low amount of power could be run through it to add to the magnetic field.
This is the comment i was looking for.
I worry about the potential for toxic fumes using these recycled materials. Probably a good way to get cancer or lung problems
One of the reasons why investing in good ventilation and ducting is crucial in the shops. Even in the house with filtration if the outside air quality isn’t the best is a good idea so where you’re sleeping has good or even better quality. Plants help too.
I’ve been working on a range of cost effective PAPR designs (originally for welding) and what’s helpful is there are quite a few designs on thingiverse to aid with making the adapters for the cost effective filters or even improvised from say air purifiers, vacuum or other HEPA filters. Would be nice to find the STEP files though for the range of connections.
I plan to use a pre-filter before the fan, then the HEPA filter, then the carbon filter and then a post filter on the CPAP hose for the welding and maybe painting or other VOC’s or fumes that are nasty. Otherwise, probably just need a dust (pre) filter for cutting or grinding most materials.
This design was somewhat the fan and filter I started working on (4.5V 25W inflator though using CPAP hose and stalled on the filter): https://www.youtube.com/watch?v=cX-glTu6tz0
Then this design got me thinking using the cylindrical conical filters and HDPE pipe since I no way want to use PVC pipe: https://www.jiobit.com/blog/jiobit-n100-papr-as-part-of-the-chicago-rapid-response-team
Then decided to take a more RAD-UM design since a more cost effective filter box paradigm of thinking: http://rad-um.com/projects/diy_papr
Similar HaD has a cost effective design that I’ve pondered using the Prius air intake or cabin air filters: https://hackaday.com/2007/05/25/diy-powered-respirator/