Social Engineering And Menus

If you follow cybersecurity hacker methods — or just watch Mr. Robot — you probably know that the best way to get someone’s password is to ask for it. Sure, you probably can’t just say “Hi, I’m a bad guy. Can I have your password?” But there are all sorts of tricks you can use like pretending to be in the person’s IT department, someone in management, or by making up a crisis to overcome their better judgement with a sense. But of course, as wise computer people, we are immune to such things, right? We also don’t need those kinds of tricks in our arsenal.

Is that true? It is amazing how many subtle things influence what we think are rational decisions, no matter who we are. Consider going to eat in a restaurant. Simple, right? You look at the menu, pick what you want, and order. No one is influencing you. But they are. According to a BBC article, there’s a whole industry of menu “engineering” that figures out how to get you to order pricey food.

You might not think social engineering for menus is a great skill for us. But maybe your new open source project needs collaborators. Maybe your startup company needs investors. Maybe you’d like someone to look at your resume. Maybe the same tricks that work with diners will work in those cases, too.

Continue reading “Social Engineering And Menus”

Sub-mm Mechanical 3D Scanner With Encoders And String

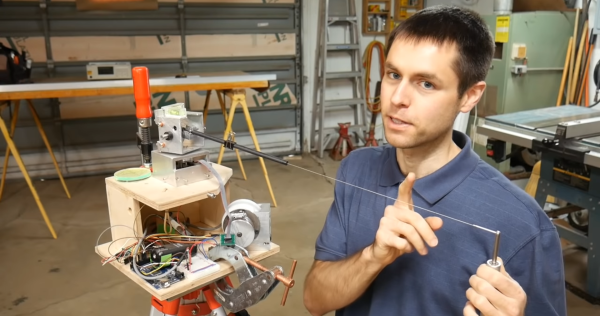
[Scott Rumschlag] wanted a way to precisely map interior spaces for remodeling projects, but did not want to deal with the massive datasets created by optical 3D scanning, and found the precision of the cost-effective optical tools lacking. Instead, he built a 3D cable measuring device that can be used to map by using a manual probe attached to a cable.

The cable is wound on a retractable spool, and passes over a pulley and through a carbon fiber tube mounted on a two-axis gimbal. There are a few commercial machines that use this mechanical approach, but [Scott] decided to build one himself after seeing the prices. The angle of rotation of each axis of the gimbal and the length of extended cable is measured with encoders, and in theory the relative coordinates of the probe can be calculated with simple geometry. However, for the level of precision [Scott] wanted, the devil is in the details. To determine the position of a point within 0.5 mm at a distance of 3 m, an angular resolution of less than 0.001° is required on the encoders. Mechanical encoders could add unnecessary drag, and magnetic encoders are not perfectly linear, so optical encoders were used. Many other factors can also introduce errors, like stretch and droop in the cable, stickiness of the bearings, perpendicularity of the gimbals axis and even the spring force created by the encoder wires. Each of these errors had to accounted for in the calculations. At first, [Scott] was using an Arduino Mega for the geometry calculations, but moved it to his laptop after he discovered the floating point precision of the Mega was not good.

[Scott] spend around 500 hours building and tuning the device, but the end result is really impressive. There are surprisingly few optical machines that can achieve this level of precision and accuracy, and they can be affected by factors like the reflectivity of an object.

If you do want to get into real 3D scanning, definitely take the time to read [Donal Papp]’s excellent guide to the practical aspects of the various technologies. Most of us already have a 3D scanner in our pocket in the form of a smartphone, which can be used for photogrammetry.

Continue reading “Sub-mm Mechanical 3D Scanner With Encoders And String”

Pi Pico Game Boy Flash Cart Gets Slim RP2040 Upgrade

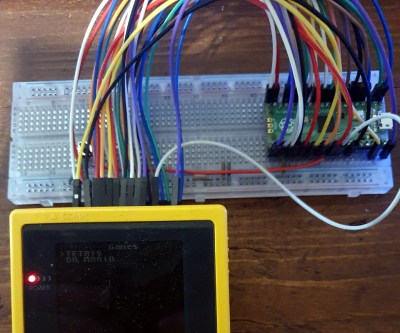
The story for this one starts a few months ago, when [John Green] released his PICO-GB project. His code allowed the Raspberry Pi Pico to stand in for a Game Boy cartridge, complete with a simple text menu that let the user select between ROMs that had been baked into the microcontroller’s firmware. The project was particularly notable for the fact that it was entirely a software solution; while a custom breakout cartridge made for a handy temporary solution, you could have permanently wired the Pico’s pins directly to the Game Boy’s cartridge connector if you wanted to.

PICO-GB running on the full-size Pi Pico

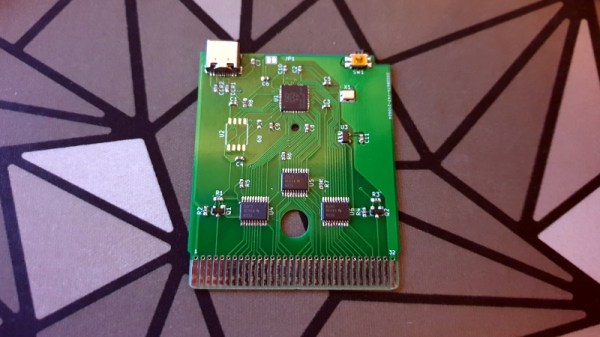
Then in early June, the RP2040 chip that powers the Pi Pico went up for sale in single unit quantities. That opened up the possibility of building the PICO-GB functionality into a cartridge small enough to actually fit inside the Game Boy. So [Martin “HDR” Refseth] got to work creating the slick cartridge PCB you’re seeing now.

The RP2040 is joined by a trio of Texas Instruments TXB0108 level shifters, and there’s a spot for adding a SPI flash chip. The RP2040 supports a maximum of 16 MB of external flash, but given the size of Game Boy games were generally measured in kilobytes, that shouldn’t pose much of a problem.

Looking ahead, the original PICO-GB documentation mentions enhancements like loading ROMs from SD card, as well as hardware additions like a real-time-clock for the more advanced games that supported it. We assume those concepts will become part of [Martin]’s PCB eventually, but these are still early days.

We’ve seen Game Boy cartridge emulation with a microcontroller in the past, but we’re exited to see how the unique capabilities of the Raspberry Pi Foundation’s custom silicon can improve the state-of-the-art.

[Thanks to Itay for the tip.]