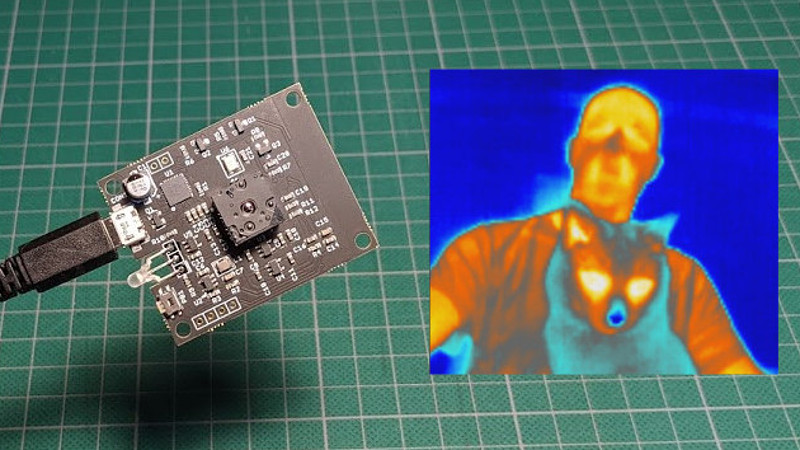
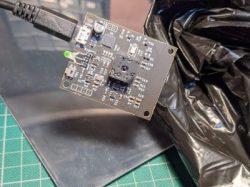
A thermal camera is a tool I have been wanting to add to my workbench for quite a while, so when I learned about the tCam-Mini, a wireless thermal camera by Dan Julio, I placed an order. A thermal imager is a camera whose images represent temperatures, making it easy to see things like hot and cold spots, or read the temperature of any point within the camera’s view. The main (and most expensive) component of the tCam-Mini is the Lepton 3.5 sensor, which sits in a socket in the middle of the board. The sensor is sold separately, but the campaign made it available as an add-on.
Want to see how evenly a 3D printer’s heat bed is warming up, or check whether a hot plate is actually reflowing PCBs at the optimal temperature? How about just seeing how weird your pets would look if you had heat vision instead of normal eyes? A thermal imager like the tCam-mini is the tool for that, but it’s important to understand exactly how the tCam-mini works. While it may look like a webcam, it does not work like one.
What It Is
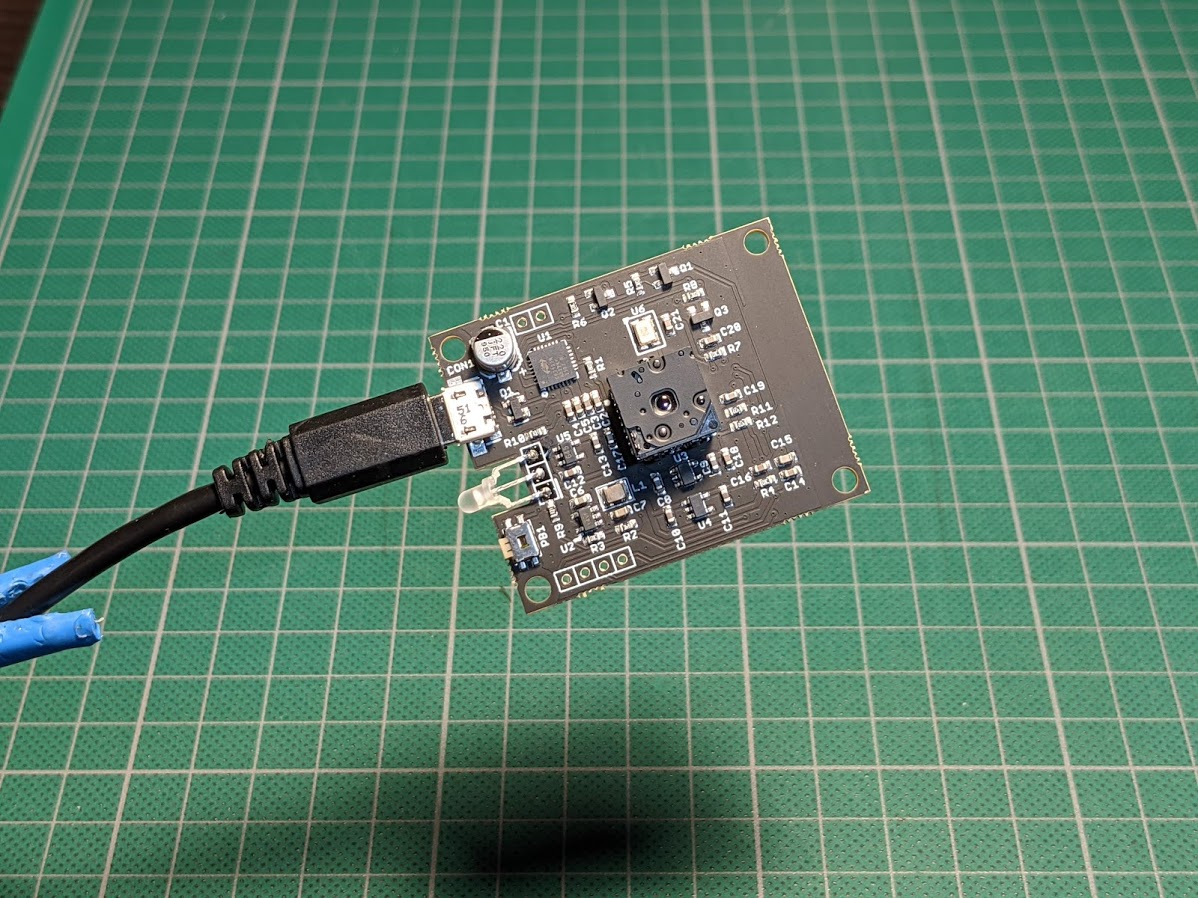
tCam-Mini is a command-based, wireless ESP32-driven board using the Lepton 3.5 sensor for thermal imaging. In the images here, the USB cable is being used to deliver power, but all thermal image data is being exchanged with a desktop application over WiFi. tCam-mini uses a JSON-based packet interface, and the easiest way to get up and running is to use the desktop application to view images and stream video.
The tCam-Mini is intended as a small, network-only device. The desktop application provided by Dan is the easiest way to stream data and access the full functionality of the sensor, but a web app and Python library are also in development.
What It Isn’t
The tCam-Mini is not a self-contained camera device, and it does not work like either a webcam or digital camera. There is no screen, no memory card on which to store photos and videos, nor are there any hardware controls on the camera itself. The closest thing it has to a display is a single red/green status LED, and the only button on the board performs a WiFi reset. The tCam-Mini is really intended to be a remote camera, accessed over WiFi by a host. (Also, the tCam-mini should not be confused with tCam, which is a larger and more full-featured, battery-powered version with touchscreen display that is still under development.)
While the tCam-Mini is a camera with a WiFi interface, it is not running a web server and it cannot serve up thermal images through a browser interface directly. It must be used via its command interface, for example by using the desktop app.
Setup and Desktop App
The first thing the tCam-Mini does when it powers up is enable WiFi so that it can accept connections from a host. Power can be provided via the USB cable, or by applying power directly to the 5 V input on the board.
By default, the camera boots into AP mode (acting as a wireless access point) with a fixed IP address of 192.168.4.1. One must connect the host computer to the tCam-Mini’s access point, then run the desktop app and click the “Connect” button. Once the board accepts the connection (the status LED will turn green to indicate this), all functions will be available in the desktop app, including streaming of thermal images.
The desktop app can also be used to change the tCam-Mini’s startup behavior, instructing it to connect to an existing wireless network (optionally with a static IP) instead of booting into AP mode. If things go terribly wrong, simply hold the button on the tCam-Mini down for several seconds until the status LED blinks, and all will be forgiven as the tCam-mini returns to its default AP-mode behavior.
Sample Thermal Imagery
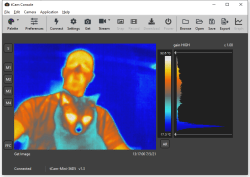
The tCam-mini is capable of representing thermal data using a variety of color palettes, and here are a few of them. Once an image is exported, it is just an image, but stills or video saved natively from within the desktop application can have different palettes applied (or temperature read from different points in the image, if the image was taken in radiometric mode) freely. This makes it useful for analyzing data after the imagery was saved.

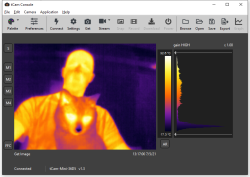

Thermal imagery is neat, and can be occasionally surprising or counter-intuitive. For example, through the lens of the tCam-mini, my eyeglasses look like sunglasses. Also, two materials in particular had interesting properties when I viewed them through the camera: an opaque black garbage bag was transparent, and a sheet of mirrored acrylic was opaque.
To show off some dynamic results, here is a short video of the build platform of my Prusa MK3/S 3D printer pre-heating to 60 °C. (In the video, monitoring points are placed and occasionally moved to different areas of interest. The temperature of each point is shown just above the video window. S is the central square marker, the others are m1 through m4.)
As you can see, after about two minutes, the pre-heating is complete and the surface of the build platform is quite uniform. For anyone who noticed that the surface of the bed appears to end up a few degrees shy of 60 °C, this is a good time to point out that while the Lepton 3.5 sensors are excellent at profiling temperature changes, they technically have a stated accuracy of +/- 5-10 °C. While recording the video, I occasionally spot-checked areas with my non-contact thermometer. These readings always seemed to agree with what the tCam-mini was reporting, which was good enough for me, but Dan has nevertheless been looking to improve the accuracy of the Lepton 3.5 sensors.
Radiometric versus Automatic Gain Control (AGC) Mode
Two terms that will come up regarding the Lepton 3.5 sensor are Radiometric and AGC mode. The camera can work in either of these two operating modes, and the desktop application allows switching between them.
In radiometric mode, every pixel of the image contains a temperature reading. AGC mode on the other hand prioritizes image quality, but at a cost: every pixel will no longer contain its own temperature reading. AGC mode creates a better visual representation of a scene’s temperature changes and gradients, whereas radiometric mode is more “pure” in its role as a temperature sensor.
Both modes work similarly as far as the interface is concerned, with the exception that setting more than one measurement point is not possible while in AGC mode.
Resource Roundup
The tCam-Mini is a piece of hardware with a very specific role, and because it is not quite plug-and-play, it is important to understand how it works. Understanding what it does (and doesn’t) do will avoid problems during setup and operation. The good news is that the device isn’t at all difficult to use, and the excellent desktop application makes it very easy to operate and manage.
Since there are many different parts to the tCam-mini, here is a cheat sheet of where to find the necessary reference information.
| tCam-mini at GroupGets | Original campaign page |
| GitHub Repository | For everything tCam related (tCam and tCam-mini) |
| tCam-mini Resources | Details specific to the tCam-Mini |
| Desktop Application | How to use tCam’s Desktop Application |
| Download page | Download page for Desktop Application (and firmware) binaries |
| Hackaday.io project page | Project page for details and news regarding tCam development |
Thermal Imaging Has Come a Long Way
I’ve always been more than a bit fascinated with anything that allows one to see beyond the normal ranges of our senses, and thermal imaging is definitely that. In fact, it blows my mind that this is possible in such a tiny device. If you have a favorite extra-sensory tool, or favorite thermal imaging application, I’d love to hear about it, so share in the comments!


What about seeing pin sequence on ATM?
Really disappointed I missed out on that campaign. I’ve randomly looked for thermal imaging devices for two decades but never found anything with a price\feature combo I could go for. All this capability for $50 is unreal. Really hope they’re planning on making more so I can get one.
You still need the actual optical sensor which is an additional ~200$. Still seems to be a good deal for thhe resolution.
The sensor isn’t included for that price.
The board cost was $50, but the sensor cost was $199. But, impressive results.
The control board is $50, but the sensor is another $200. Thermal is still pretty expensive it seems.
Yeah, especially when you consider you can get a thermal cam like the the original android seek thermal for 249, doesn’t require assembly, and somebody has developed a desktop app (windows) that works with the cam. Sure, you dont get wifi, but it has better resolution and performance. There’s even a version in usb-c for the same money.
I like the idea of diy thermal cams, I want to see more, but those lepton sensors are seriously underwhelming for the cost vs the specs.
Incredible indeed. I have a few years back ordered a 15x15px Aliexpress thermal imager which I think set me back about €180 (which was one in a series of investments that will probably pay itself back somewhere in the next 20-30 years… – next to the window glazing I have mainly taken photos of cups of tea and my cats.)
That’s the best HaD blog entry in a long time. Fine work! Thank you!
No mention of the native resolution of the device :(
Hardware details are on the linked page.
Resolution: 160h x 120v pixels
Didn’t have a chance to look at the specs at the time, which is why it would have been nice to include in the article.
Another thing to note is that we shouldn’t be holding our breath for high resolution devices, as these are dual use technologies subject to strict export controls.
pretty sure that can be overcome with a array of these sensors , a smart optical set-up with custom lenses and some software.
pulsars sensors have 640×480 @50 hz
no export.restrictions since from russia.
160×120. It’s worth noting that whilst it’s $50 for the board you still need to buy the camera module separately and that’s $199.
IR cameras can be so damn useful. They’re so expensive for hobby stuff though. Very unfortunate.
Correction: I meant *thermal# cameras. not IR.
Thermal is IR, just longer.
True. Just wanted to avoid the “the raspberry pi camera is cheap and ir” type of reply, since what I was really talking about was the more specific imaging.
I agree! I’ve been a paranormal investigator for 34 years now, and have Manu gadgets and equipment. I bought a FLiR Pro 1, and it’s ok. I built a stability rig because it seemed to fall out of the phone. This sounds really nice!!, I do wish it was a tad less expensive; I’d love to have one.
Markov chains comments are getting better and better every day.
I see you’re excited but let me explain how you got scammed. You paid $250 for some bare board and an overpriced and nerfed 160×120 FLIR sensor.
For the exact same bucks hou could get an HT101 which actually has a body, 220×160 resolution and a kind of better optic. For 350 bucks you could get an HT201 with better optics and 340×240 resolution which starts to depart from “one week of fun and forget” and approaches actual usability with electronic components becoming clearly visible. I personally broke the bank and got myself an HT301 (384×288, relatively gargantuan manual optics and 25fps) and I’m SO glad I didn’t cheap out on this particular thing. I can post lots of sample pictures and videos if you’re interested.
I *just* placed an order for the ht301 and would love to hear more about how people are using the “humidity” measure ive seen in the online app images.
In my building energy conservation work i do a lot of looking for moisture damage and i have a pair of forensic (minerals prospecting) grade UVc and UVa lights emitting 265 and 365 nanometers and it’s interesting to see how well it displays fungi!
Would be interesting to see how i can COMBINE the UV flourescent imagery with IR to find and document moisture!
I bought a Flir one addon for android smartphone and I’m wondering whether there’s a PC client for it that runs under Linux. I wonder whether this client would work with it (the Flir one isn’t with me for some months).
BTW I urge anybody who wants to get a thermal camera to look for cheap defective Flir one units as most of the time they’re fine and they just needs a new USB port or a new battery. I got mine for 80€ and it was perfectly working which is a pretty good deal for a 80×60 thermal camera!
I also have a FLiR One for my Android S-20 +. I’ve had fairly good results with it, but my only complaint has been the unit falling out of the phone even though I used the thumb wheel. Since there is nothing like searching the floor in the dark with a flashlight after midnight, in a old building– I built my own stabilization rig to make it much easier, using a triangular mounting board, handle, an old car phone holder, OTG cable and a little luck. I had a gal try to buy it from me, but I’m not into mass production… lol!
You might try starting here:
https://www.dpin.de/nf/thermal-camera-on-linux-flir-one-pro/
The project the author used was apparently originally meant for the flir-one.
Got one and it is very easy to use. The ony remark I can make is putting the Esp32 directly on the back of the Lepton sensor maybe not a good idea, as the ESP is heating up everything to 35-40 degrees Celsius.
Yes, I definitely worried about this and pored over the spec but it appears the main thing to be careful of is a thermal gradient across the sensor. It can operate fine at slightly elevated temperature (although my design will be limited at very high temperatures as the Lepton will shut down at 80°C). I did some testing (aiming the camera at a uniform surface) and it appears although the ESP32 is heating up the camera is seeing a fairly consistent gradient. One thing you will notice is that while the camera warms up the Lepton will do more frequent FFCs. It runs a FFC periodically or when the sensor temperature has changed more than 1.5°C. However it seems very stable once it has reached equilibrium.
I was also encouraged by the fact that my Flir Pro One gets pretty hot when it’s running as well.
Thanks a lot for the reply ! I didn’t know about the auto FFC when temperature rises, very good point. I was worried about the noise as well, but it seems there is no increase with the temperature.
The TCAM-Mini WiFi Thermal Imager is truly a game-changer in the world of thermal imaging technology! This hands-on review provides valuable insights into its compact design and wireless capabilities. The seamless integration of WiFi functionality adds a new level of convenience, allowing users to capture and analyze thermal data with unprecedented ease. As someone always on the lookout for cutting-edge tools, this review has piqued my interest, and I’m eager to explore the capabilities of this mini thermal imager firsthand. Kudos to the reviewer for offering such a comprehensive and informative take on this exciting gadget!