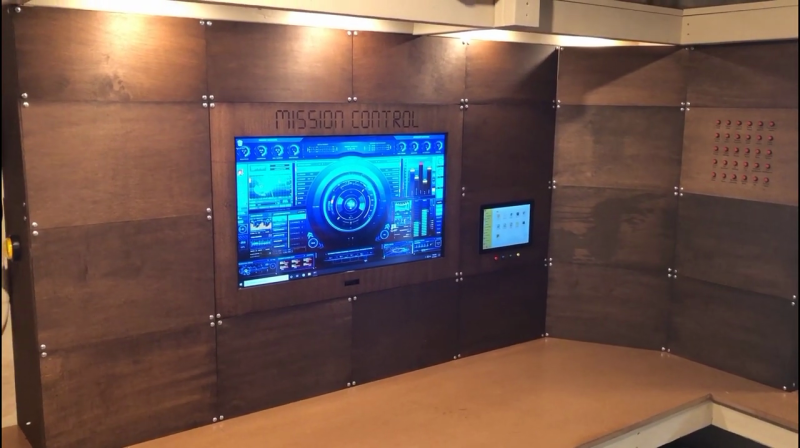
Tired of all your completed (or half-completed) projects cluttering up your workspace? Or you toss them in a box and later forget which box? Well [Another Maker] aka [Develop With Dan] came up with a solution which he dubs Mission Control — panelize your projects and store them in one of many cubbyholes which are provided by a false wall.
Each project gets a panel and is neatly stored away when not in use. For some project, this could be simply for storage. For other projects, this might serve as a showcase. Occupying the center of Mission Control is a large monitor, presumably a permanent installation. It looks like there are two different sizes of panels, but we wonder whether more and smaller panels might be more useful. As he’s putting this together, we particularly like one piece of advice that [Dan] offers regarding his custom tool, the Cornerator 3000:
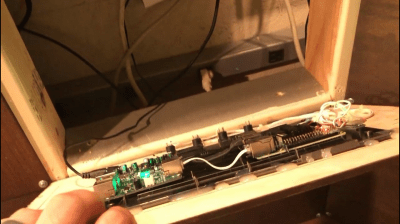
Never hesitate to make a jig when you want to repeat something.
[Dan] will be posting this workspace on his GitHub repository along with code and documentation for various projects he posts on YouTube. He’s also proud to have built this system out of 100% recycled material, or as he says, he went dumpster diving. Do you have a good system for storing / displaying projects in your lab? Let us know in the comments below.


Hmm. some of those panels should be table or car sized for my projects…
I came up with a system that works good for me but it was really my SO’s idea for knitting. She wanted a flat surface about 18×14″ and a lip about an inch high to keep things from sliding off. I built two of them with hinges on one end and a clasp on the other. She hated it, but she liked one half. I took the other and it worked real well for holding a couple solderless breadbords and loose parts and pieces. I liked it so much I made more. They are only about an inch and a quarter high so I can stack a few of them.
I very much like your idea of stackable trays, I have been struggling with storage of ongoing projects and this could well be the solution!
I found a second-hand architects plan chest handy, as it allows me to store the projects and organise them by dropping a magnet on the bottom of the metal drawer behind the PCB, holding the project in place (otherwise they tend to disappear out of sight at the drawers’ far end).
My solution is to finish the half-completed projects.
(Shameless plug) I’m currently working on a project that uses psychology methods to give people motivation to finish their projects. If you have a lot of half-finished projects, this might help.
https://hackaday.io/project/180726-motivation
I downloaded you github repository, but only through half of the download (half-finished, I think). I don’t feel like getting up to redo the download. I do it in a week, .
The github repository is set to private – I don’t know what you’re downloading, but it’s probably not the one for my project.
Swoosh!
LOL, now I’m half way though this comments section, I’ve lost interest, maybe I’ll read the rest later. :tumbleweed:
That more or less my street corner Packstation:
https://www.inside-digital.de/img/hl-packstation-1.jpg
but with a barcode reader, and touch screen.
404 not found…
Nicht gefunden. :(
https://www.inside-digital.de/img/dhl-packstation-1.jpg
Transparent tupperware/rubbermaid/dollar store tubs. Three sizes, but they all fit on 12″ deep, 12″ spaced wire shelves. The smaller ones double-stack.
Doesn’t matter what the stuff is: Stock, components, tools, jigs, works in progress, whatever. It all goes into a labeled tub and goes on a shelf. A few similar ones also hold hanging files for material that suits that formfactor.
Dozens of them, covering four walls. Instant access to a huge amount of stuff. All visible. Totally versatile. Best system I’ve ever used. Credit to technomad Steve Roberts, who gave me the idea a couple of decades ago when he was at UCSD.
Picture??
No pictures of my shop, but here’s Steve’s more recent instantiation of the idea, after moving to the mobile lab: He’s added retainer strips so they actually stay on the shelves while mobile…
https://microship.com/wp-content/uploads/2016/05/parts-bins-retainers.jpg
This ^ I’ve been doing that for years using stack-able Sterilite bins. (With locking lids) Very compact and all project specific stuff is together. Need a replacement bit for that thing you were working on 10 years ago? It’s there. I stack them under my workbench, several layers deep. Current projects and common materials ones in front. Clear so you can semi scan though the contents quickly although I do label a few like “Brass Tubing” etc. Keeping current project parts all in one place is so great and it’s easier to put a project on ice/resume since all the stuff is together. When ever they’re on sale at Joanna’s I get some more. I only wish I had a better solution for static in the bins.
I’ve never ever had an issue with static in the bins. Polypropylene are they? I do keep the static-sensitive stuff in conductive foam or in anti-static bags anyway.
But what works great for anti-static is just a spray bottle with a 1:10 dilution of hand dishwashing detergent in water. Spray until just damp, rub in a bit, let dry. Works fantastically for carpet and the plastic carpet protector mats, and I’m betting it will work fine for plastic bins too.
Best idea I’ve heard of, is racks of sheet trays. You can get them from a restaurant supply store. Gives you a little bit of height and a flat surface for each project, that all stack into a single rack. I almost bought one last year, may still do so. A lot more scalable than the old “healing bench” approach. Not as beautiful as this one though.
Thanks for the write up! The plan is to be able to subdivide the panels. The reason they’re 11×16.5 is to be able to also do
6@5.5 x 5.5 or one large 11×11 and 2 @ 5.5 x 5.5 on the sides or any other weird combination of that because that’s what fits in my laser cutter :)
It looks like the lower deck of the space shuttle. Modular bins, can’t have stuff floating around for sure.