Homebrew ROM Reader Saves Data From A Vintage Minicomputer

Have you ever heard of a Centurion minicomputer? If not, don’t feel bad — we hadn’t either, until [David Lovett] stumbled upon a semi-complete version of the 1980-ish mini in all its wood-trimmed, dust-encased glory. And what does a hacker do with such an acquisition but attempt to get it going again?

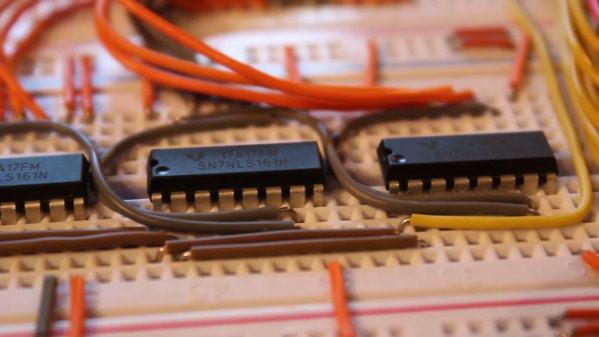
Of course, getting a machine from the Reagan administration running is not without its risks, including the chance of losing whatever is on the machine’s many ROM chips forever. When finding a commercial ROM reader supporting the various chips proved difficult, [David] decided to build his own. The work was eased considerably by the fact that he had managed to read one chip in a commercial reader, giving him a baseline to compare his circuit against. The hardware is straightforward — a 12-bit counter built from a trio of cascaded 74LS161s to step through addresses, plus an Arduino Nano to provide clock pulses and to read the data out to the serial port.

The circuit gave the same results as the known good read, meaning results would be valid for the rest of the chips. The breadboard setup made supporting multiple ROM pinouts easy, even for the chips that take -9 volts. What exactly the data on the ROMs mean, if anything, remains a mystery, but at least it’s backed up now.

Before anyone notes the obvious, yes, [David] could have used a 555 to clock the reader — perhaps even this one. We’d actually have loved that, but we get it — sometimes you just need to throw an Arduino at a job and be done with it.

Continue reading “Homebrew ROM Reader Saves Data From A Vintage Minicomputer”

FreeBSD Experiment Rethinks The OS Install

While the medium may have evolved from floppy disks to DVDs and USB flash drives, the overall process of installing an operating system onto a desktop computer has been more or less the same since the 1980s. In a broad sense you could say most OS installers require more clicking than typing these days, but on the whole, not a lot has really changed. Of course, that doesn’t mean there isn’t room for improvement.

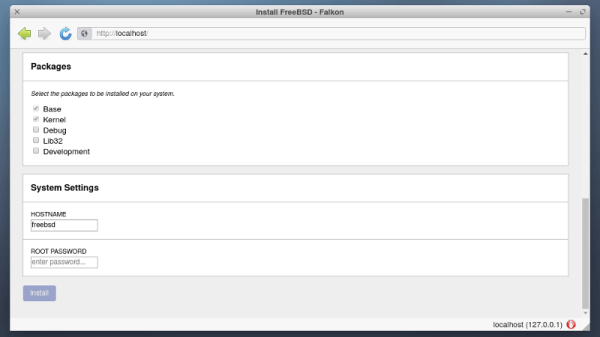
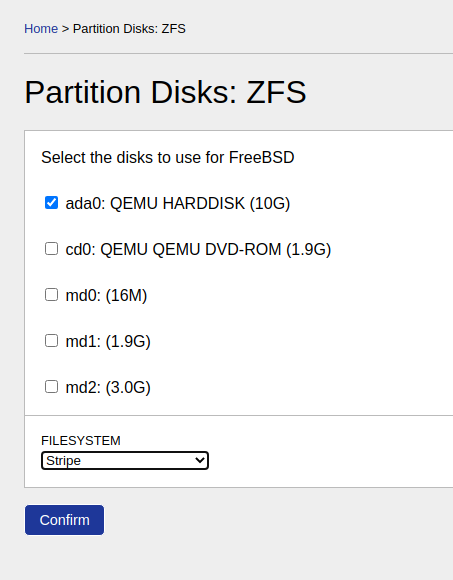
Among the long list of projects detailed in FreeBSD’s April to June 2021 Status Report is a brief update on an experimental installer developed by [Yang Zhong]. In an effort to make the installation of FreeBSD a bit more user friendly, the new installer does away with the classic terminal interface and fully embraces the modern web-centric design paradigm. Once the user has booted into the live OS, they simply need to point the browser to the loopback address at any time to access the installer’s GUI.

Now that alone wouldn’t be particularly groundbreaking. After all, Google has implemented an entire operating system with web frameworks in Chrome OS, so is making the installer a web app really that much of a stretch? But what makes [Yang]’s installer so interesting is that the web interface isn’t limited to just the local machine, it can be accessed by any browser on the network.

That means you can put the install disc for FreeBSD into a headless machine on your network, and use the browser on your laptop or even smartphone to access the installer. The Graybeards will point out that savvy users have always been able to access the text installer from another computer over SSH, but even the most staunch Luddite has to admit that simply opening a browser on whatever device you have handy and pointing it to the target machine’s IP address is a big usability improvement.

While the software appears complete enough to get through a basic installation, we should remind readers these are still early days. There’s currently no authentication in place, so once you’re booted into the live environment, anyone on the network can format your drives and start the install process.

Some sections of the GUI aren’t fully functional either, with the occasional note from [Yang] popping up to explain what does and doesn’t work. For example, the manual network configuration panel currently only works with WiFi interfaces, as that’s all he personally has to test with. Quite a modern installer, indeed.

Some would argue that part of what makes alternative operating systems like Linux and BSD appealing is the fact that they can happily run on older hardware, so we imagine the idea of an installer using a memory-hungry web browser to present its interface won’t go over well with many users. In our testing, the experimental installer ISO won’t even boot unless it detected at least 4 GB of RAM onboard. But it’s certainly an interesting experiment, and something to keep an eye on as it matures.

[Thanks to Michael for the tip.]

ESP8266 Network Meters Show Off Unique Software

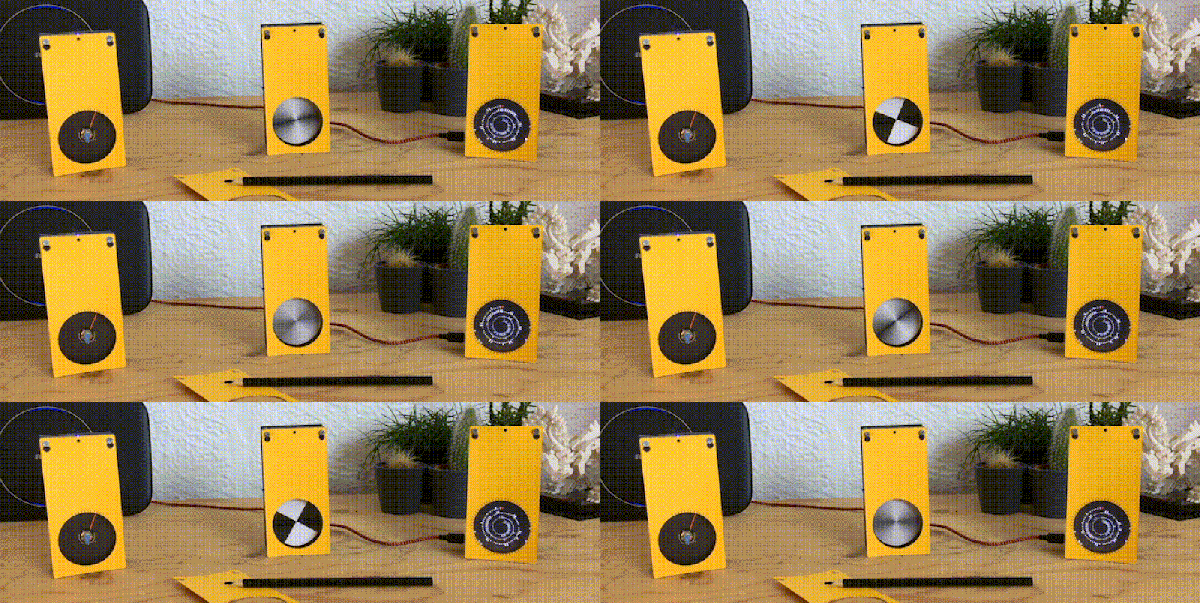
Like the “Three Seashells” in Demolition Man, this trio of bright yellow network monitors created by [David Chatting] might be difficult to wrap your head around at first glance. They don’t have any obvious controls, and their constantly moving indicators are abstract to say the least. But once you understand how to read them, and learn about the unique software libraries he’s developed to make them work, we’re willing to bet you’ll want to add something similar to your own network.

First-time configuration of the monitors is accomplished through the Yo-Yo WiFi Manager library. It’s a captive portal system, not unlike the popular WiFiManager library, but in this case it has the ability to push the network configuration out to multiple devices at once. This MIT-licensed library, which [David] has been developing with [Mike Vanis] and [Andy Sheen], should be very helpful for anyone looking to bring multiple sensors online quickly.

The Device Wheel

We’re also very interested in what [David] calls the Approximate library. This allows an ESP8266 or ESP32 to use WiFi signal strength to determine when its been brought in close proximity to particular device, and from there, determine its IP and MAC address. In this project, it’s used to pair the “Device Wheel” monitor with its intended target.

Once locked on, the monitor’s black and white wheel will spin when it detects traffic from the paired device. We think this library could have some very interesting applications in the home automation space. For example, it would allow a handheld remote to control whatever device the user happens to be closest to at the time.

Whether you follow along with the instructions and duplicate the meters as-is, or simply use the open source libraries that power them in your own project, we think [David] has provided the community with quite a gift in these unique gadgets.

Making A Left-Handed NES Controller

The controller for the original Nintendo Entertainment System is a classic, but perhaps not best known for its adherence to good ergonomic principles. Regardless, it can grow awkward to use for long stretches of time. To help alleviate this, [Taylor] whipped up an easy way to convert a NES controller to left-handed operation.

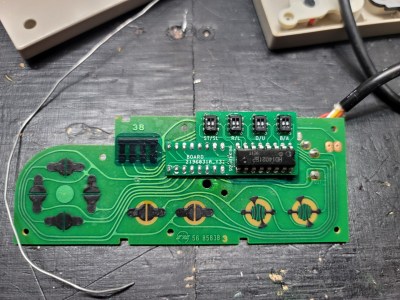
The mod board in question, installed on a NES controller PCB.

The crux of the hack is simple, with the controller’s buttons swapped left-to-right to enable the controller to be flipped upside down. In this orientation, the D-pad is used by the right hand and the action buttons by the left–the opposite of the usual way. Thus, left and right on the D-pad must be switched, as well as A and B, so all the controls are otherwise in a logical layout.

This is achieved through the use of a little mod board of [Taylor]’s own design. The original HD14021BP chip is desoldered from the controller’s PCB, and installed in the mod board instead. The modboard can then be soldered back into the controller, rerouting the traces to swap the buttons. There’s also a version that [Taylor] designed that can flip between right-handed and left-handed operation thanks to some onboard DIP switches.

It’s a tidy hack that could save the thumbs of some dedicated Tetris players. Alternatively, you can always make your own NES controller from scratch. Video after the break.

Continue reading “Making A Left-Handed NES Controller”

Building An Army Of Faux Cameras In The Name Of Art

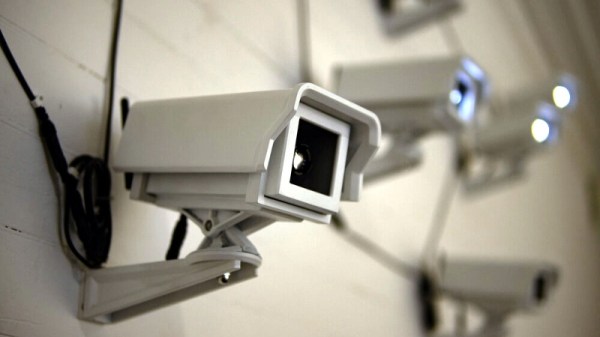
After taking mental note of the number of surveillance cameras pointed at him while standing in line at the local Home Depot, [Mac Pierce] was inspired to create A Scanner Darkly. The art installation uses beams of light projected by mock security cameras to create a dot-matrix character display on the opposing wall, which slowly blinks out US surveillance laws and regulations.

[Mac] has put together an extensive behind the scenes look at how he created A Scanner Darkly, which among other things covers the incredible time and effort that went into producing the fifteen identical cameras used to project the 3×5 grid. Early on he decided on 3D printing each one, as it would give him complete control over the final result. But given their considerable size, it ended up taking 230 hours and 12 kilograms of PLA filament to print out all the parts. It took a further 55 hours to sand and paint the camera housings, to make sure they didn’t actually look like they’d been 3D printed.

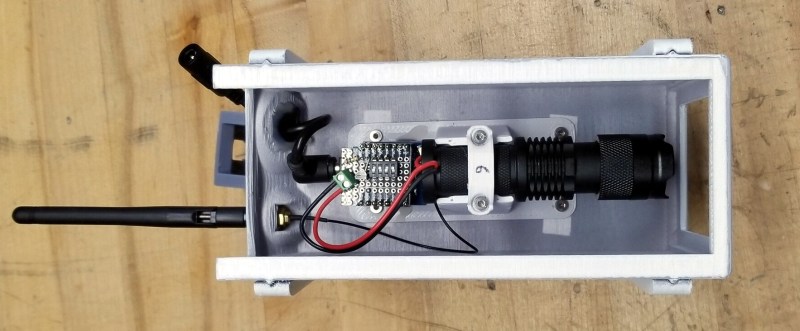
Internally, each camera has an off-the-shelf LED flashlight that’s had its power button rigged up to an ESP8266. Once they’ve been manually pointed to the appropriate spot on the wall, [Mac] can turn each camera’s spotlight on and off over WiFi. Rather than rely on the gallery’s infrastructure, all of the cameras connect to the ESP32 M5Stack that serves as the central controller via ESP-Now.

From there, it was just a matter of writing some code that would load a text document from the SD card, convert the current character into a 3×5 array, and then command the appropriate cameras to turn their lights on or off. [Mac] has not only provided the STL files for the 3D printed camera, but the client and server Arduino code to control the lights. Combined with his excellent documentation, this makes A Scanner Darkly something of a viral art piece; as anyone with the time and appropriate tools can either duplicate the installation or use it as a base for something new.

While some will no doubt argue that [Mac] could have completed this project far faster had he just modified some commercial dummy cameras, it’s important to remember that as an artist, he had a very specific look in mind for A Scanner Darkly. This project is a perfect example of how a creator’s passion can take an idea to new heights, and we think the end result proves it’s worth the time and sweat to put in the extra effort.

Continue reading “Building An Army Of Faux Cameras In The Name Of Art”

Charles Lindbergh The Famous… Inventor?

Most people remember Charles Lindbergh for his non-stop solo flight across the Atlantic which made him an international celebrity. If you are a student of history, you might also know he was at the center of a very controversial trial surrounding the kidnapping of his child or even that he had a dance named after him. But did you know he was also the co-inventor of a very important medical device? Turns out, medicine can thank Lindbergh for the creation of the perfusion pump.

Continue reading “Charles Lindbergh The Famous… Inventor?”

New Contest: Halloween Hackfest

It’s as if Halloween was made for hardware hackers. The world is begging us to build something cleaver as we decorate our houses and ourselves for the big day. And one thing’s for sure: the Hackaday crowd never disappoints. This year we’re fully embracing that with the Halloween Hackfest, our newest contest beginning today along with the help of our sponsors Digi-Key and Adafruit.

The animated video combined with the 3D-printed prop makes for an excellent effect.

Wait, isn’t it the beginning of August? Why are we talking about Halloween? The procrastinator’s dillema, that’s why! Start working on your build now and it will be epic by the time the day actually rolls around. Decorating for trick-or-treaters is a good place to start. For our money, projected heads are a really cool party trick, like these singing Jack-o-laterns, or these disembodied heads inspired by Disney’s Haunted Mansion. Or maybe you’re more of a flamethrower-hidden-in-pumpkin type of person?

It doesn’t take much tech to bring a good costume to life — a few LED strips make a plain old princess dress light up the night and builds some permanent memories for the lucky little one who’s wearing it. Speaking of memories, we doubt the little one will remember this mechwarrior family costume, which is why you’ve always got to make a video of these things.

Over the year’s we’ve seen claw machines for candy delivery, and even a pumpkin piano. Of course pumpkin carving is an entire category unto itself where five-axis CNC machines are fair game. Look around, get inspired, and build something!

Three top winners will receive $150 shopping sprees in Digi-Key’s parts warehouse. If your build happens to use an Adafruit board, your prize will be doubled. We’ll also be awarding some $50 Tindie gift cards to the most artistic projects.

Get started now by creating a project page on Hackaday.io. In the left sidebar of your project page, use the “Submit Project To” button to enter in the Halloween Hackfest. You have from now until October 11th to spill the beans pumpkin seeds on what you’ve made.