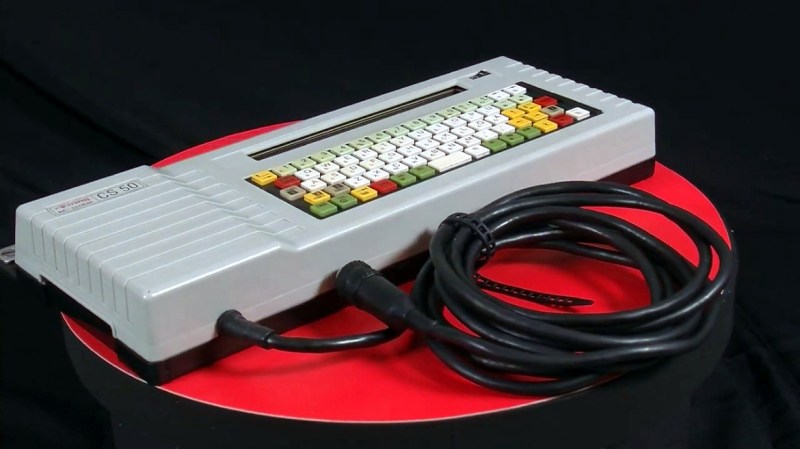
If you’re of a certain vintage and have ever done any technical drawing, chances are good that you used a r0tring of some kind, be it pencil or pen. Well, r0tring makes more than writing implements. They also made electronic scribers — a small plotter that pens ISO lettering on technical drawings based on typed input. This was a huge time saver over doing it freehand or stenciling each letter. The CS-50 is designed to hold the top-of-the-line r0tring drawing pen, which turned out to be the most expensive part of this restoration aside from the time spent sniffing out issues.
[Atkelar] likes to open things up and give them a visual inspection before powering them on. We think this is good practice, even if the suspense kills you. But really, [Atkelar] did so much more than that. He started by replacing the likely late-80s-era coin cell even though it registered north of 3 V. Then he swapped out all the electrolytic caps and one tantalum, cleaned the rubber dome keyboard parts with a cheap electric toothbrush, (another great idea), and completely disassembled the x-y mechanism to clean and re-oil it.
Then came the moment of truth. The input works and shows up on the screen, but the steppers don’t move. The waveform from the motors looked good, but seemed to be over voltage by about 3 V. Although [Atkelar] couldn’t find a manual online, he did find a blog post about this machine that confirmed 15 V on the steppers is right.
As it turns out, there was a ground issue. The sheathing of the power cable acts as a common ground, so pressing it against the bottom plate of the disassembled case made steppers work. But after a while, they quit. [Atkelar] cleaned terminals, but nothing had changed — the steppers would work for a while and then stop.
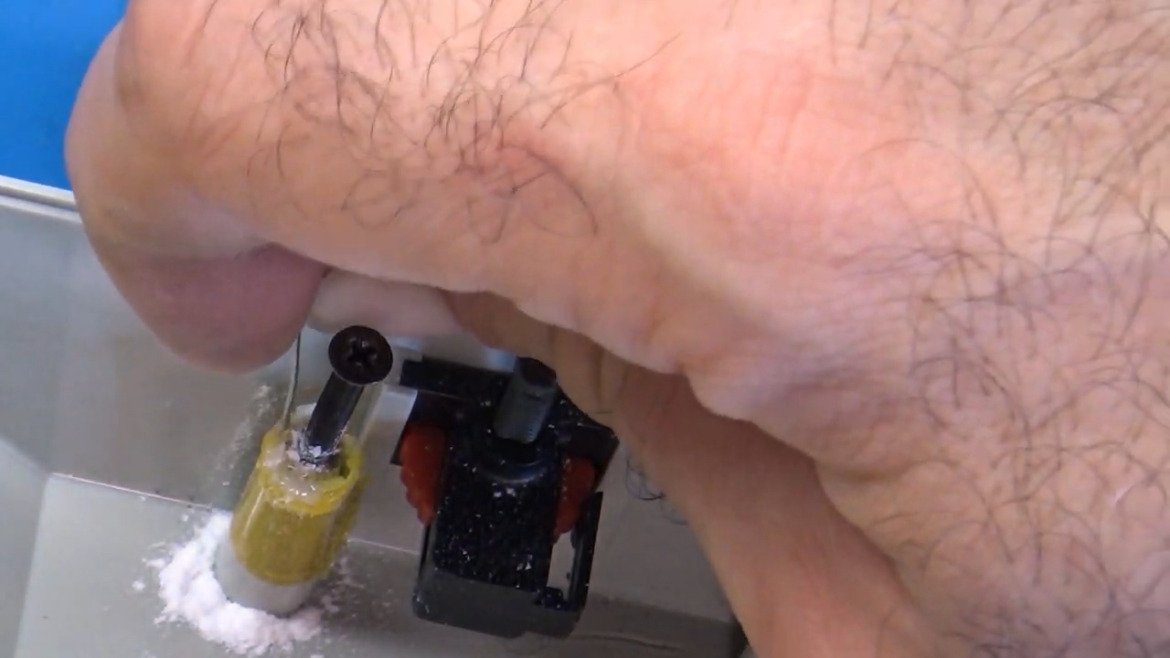
We thought this would turn into a Fail of the Week for sure, but [Atkelar] checked more of the motor pins and found that one of the driver chips was dead. Fortunately, he found a replacement and the thing works like new. Check out the complete restoration video after the break, and look for our favorite part. That’s when [Atkelar] molded a new screw boss end by building a wall with polyimide tape and filling up the cavity with cyanoacrylate glue and baking soda.
In the mood for more restorations? You can’t go wrong with something by [drygol], that’s for sure.
Thanks for the tip, [macsimski]!


My appetite to understand the mechanics of this thing are not satisfied. Would love to see a more in depth discussion of the motion systems
It’s similar to the Ultimaker motion system. A carriage with a linear rod goes across a set of outer linear rods for both X and Y, and the pen holder is confined to where the perpendicular rods meet. The outer rods double as the rollers for the belts. The up/down mechanism is just a solenoid that tilts a plate that lifts the end of the pen holder.
My note about “the outer rods double as the rollers for the belts” doesn’t seem to apply here (though it does for the Ultimaker). Here they use an extra set of rods for that.
Great restoration project. Very cool machine. Only missed the original Isograph pen ;-D
From 02:50 to about 03:10 there is a lot of sped up hand waving and shaky video.
If you pause the video there you have quite a good look at the mechanism.
At the end of those 20s the extending arm is bumped a bit and you can see how that part works
I wish my dog was that good at restoration !
I didn’t know a device like this existed.
Pretty neat (unlike my handwriting B^)
Thank you for featuring one of my more obscure projects; I had fun with the device and it serves me well for the occasional label ever since!