Illustrated Kristina with an IBM Model M keyboard floating between her hands.

Keebin’ With Kristina: The One With The Key Cap Map

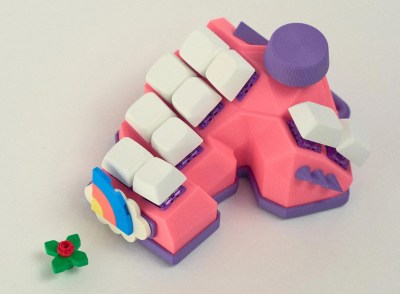
So, [zyumbik]’s trademark seems to be sexing things up, and the Artsey layout did not escape their gaze. This is the Sexy Artsey. Let’s back up a bit.

A pink and purple 10-key keyboard with a rotary encoder, spikes, and a custom area with LEGO attached.
Image by [zyumbik] via reddit
Artsey is a keyboard layout for chording, and this keyboard is built for it. It’s a one-handed keyboard meant for pressing multiple keys at a time to produce each character. With some use, [zyumbik] discovered that the Taipo layout might be a better fit, so there are currently some elements of both.

If you’d like to make this adorable keyboard, everything is waiting for you to download, including files for various thingamabobs you can stick on the side there where the rainbow is now. There’s also a groovy flower version of the knob.

Controller-wise, you can use a Seeed Studio Xiao in either BLE or RP2040 format, or the Waveshare RP2040 Zero. The firmware is written in ZMK.

Remember the death metal macropad? (Who could forget that tentacled nightmare?) This is the same creator. Kind of hard to believe, innit? Well, except for the spikes. Apparently they’re for thumb discipline.

Via reddit

Continue reading “Keebin’ With Kristina: The One With The Key Cap Map”

Wrap Your Keyboard With A Vacuum Former

Coloured keycaps are a common customisation when it comes to making your input device special. If you are working with modern tech it’s easy, there are plenty of vendors who can sell you keycaps for any purpose. With retro tech it’s never so simple, if a keycap hasn’t been made for decades you’re out of luck. This doesn’t faze [Drygol] though, who has solved the coloured retro keycap in a unique and non-destructive way. Wrap them in vinyl film using a vacuum former.

Vacuum formers are an often-underrated tool in the hardware arsenal, but as this project shows, they can produce startlingly good results. Original keycaps are placed on a 3D-printed scaffold before the vinyl is formed over them, then they are carefully cut out and a triangular edge on both sides is folded underneath, The result is an Amiga with a striking orange keyboard, and for us the best bit is that the original key is safely preserved under the vinyl.

[Drygol]’s exceptional work in the retrocomputing sphere has delighted us many times on these pages. There are too many examples to link here, but one we particularly liked was this nearly-all-new Amiga 2000.

Wico Boss Joystick Modded To Use Cherry MX Keyboard Switches

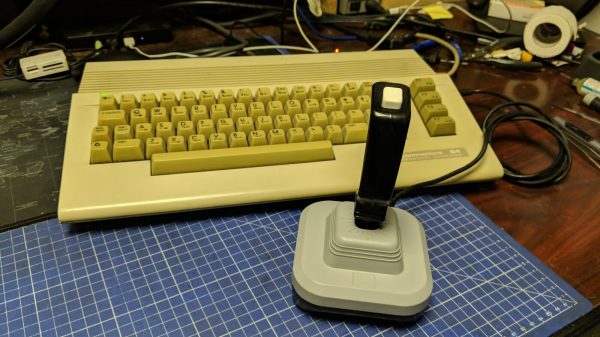
The Wico Boss joystick was one of the better designs of the 1980s. Yours truly had one, and put it through many brutal hours of Amiga-based gameplay. [Drygol] was recently asked if he could alter some of these sticks to be even clickier than stock, and jumped at the change to do some modding.

[Drygol]’s idea was to swap out the original microswitches in the sticks for keyboard switches instead. In particular, the idea was to use the Cherry MX Blues which have a particularly nice click to them. But this wasn’t just going to be a straight swap. Instead, since the hardware was retro and preservation was desired, the modification had to be reversible.

The result was a drop-in 3D-printed bracket that holds four Cherry switches around the joystick’s central bauble. Thus, when the stick is moved, it actuates the keyboard switches with a satisfying click. A 12mm tactile switch was also installed in the base to be activated by the fire button. Then, it was a simple matter of  tidying up some of the sticks during reassembly and wiring up the original cables to the new switches.

It’s a neat way to give an old-fashioned digital joystick a new lease on life. This would be a particularly great mod for tired sticks with worn out microswitches, too. Hilarious archaic marketing video after the break. They really are whacko for Wico.

Continue reading “Wico Boss Joystick Modded To Use Cherry MX Keyboard Switches”

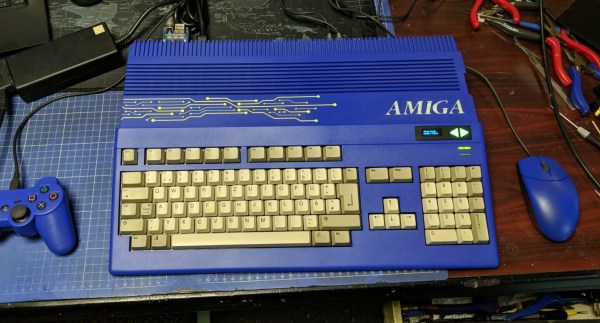
An Amiga 500 with a blue case and blue accessories

Restored Amiga 500 Is Blue – And Glows In The Dark

Few things are as satisfying to watch as a good retrocomputer restoration project – we’re always happy to see someone bring a rusty old Commodore, Apple or Atari back to life. The goal is typically to get the machine as close to its original state as possible, except for perhaps a few non-intrusive mods like memory upgrades. [Drygol] however, had already done this so many times that he thought it was time to take a different route for once, and apply some creativity to an old Amiga 500 case. Originalists may shudder, but we quite like his funky blue-and-yellow A500 mod.

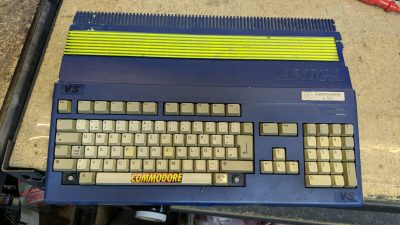
An Amiga 500 with a poor blue-and-yellow paint job
Missing keys, random stickers and an ugly paint job: the A500 wasn’t looking great at the beginning

To be fair, [Drygol] wasn’t the first one to modify this specific Amiga’s case: one of its previous owners had already applied a rather shoddy blue paint job and defaced it with some stickers. [Drygol] decided to stick with the basic idea, but do it right this time. First he removed the old paint using concentrated lye, then gave it a fresh coat of blue. He also applied glow-in-the-dark paint to the Amiga logo embossed in the case and added a fluorescent yellow laser-cut circuit board ornament. It took a bit of experimenting to get all these elements just right, but the end result definitely looks the part.

The insides of the Amiga also needed some TLC: [Drygol] competely cleaned and lubricated the floppy drive, gave the motherboard a good ultrasonic scrub, and replaced dodgy capacitors all over. He expanded the RAM from 512 kB to 1 MB and added a Gotek floppy emulator, which can work in parallel with the original disk drive. To make the Gotek easy to operate, [Drygol] placed its OLED screen and a pair of touch-sensitive buttons in a cutout on the front of the case.

A matching blue mouse and gamepad, both connected through the MouSTer adapter, complete the setup. The result is a good-looking A500 with some modern conveniences that’s perfect for exploring the Amiga’s extensive software library. If custom colors aren’t your thing, you’ll be happy to know that the original shade of grey or beige might be available for your retro console, too.

Continue reading “Restored Amiga 500 Is Blue – And Glows In The Dark”

Commodore Floppy Drive Fixing Chaos

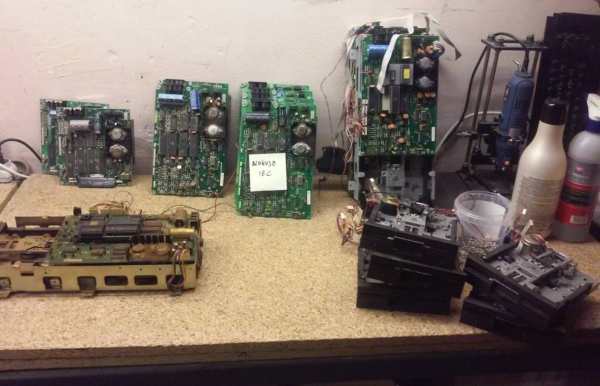
One of the best parts of retrocomputing is that you can obtain so many broken systems and peripherals for repairing and other assorted fun. This was the wholesome activity that [Drygol] embarked on recently with a gaggle of Commodore floppy disk drives that he obtained, involving a lot of cleaning, soldering, calibrating and other assorted entertainment. This follows cold on the heels of an earlier repair session of a stash of Commodore 1541 FDDs.

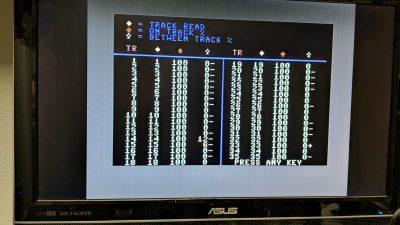
Testing Commodore FDD head alignment using the 1541 diagnostic cartridge.

As with any such devices, the first thing to do is to clean the heck out of them, to remove forty-odd years of dust and other debris, followed by testing of functionality, replacing dead ICs and the usual round of (electrolytic) capacitor replacement. Retrobrighting gives it that fresh-out-of-packaging look, which leaves just the calibrating of these drives. This procedure is essential to make sure the read/write head is aligned with the tracks on the disks, and is the most fiddly part of the process.

What helps a lot here is the 1541 diagnostic cartridge by [World of Jani] that displays real-time information on the drive while you are tweaking its speed and head alignment. All you have to do is tweak the speed potentiometer, and adjust the position of the drive motor, which takes a bit of patience and a steady hand. After this repair session a few Mitsumi drives unfortunately remained dead due to busted coils. Despite a valiant repair attempt on the heads by manually rewinding the coils, this remains a topic for a potential part III.

Restoring Dot Matrix Printer Cartridges For 2023

The noise of a dot matrix printer is probably as synonymous with 1980s computing as the modem handshake would become with the desktop experience a decade or more later. But unlike the computers that would have driven it, a dot matrix printer can still be a very useful device here in 2023. And why not? They’re cheap to operate and can produce surprisingly good quality when paired with suitable drivers. There is a snag though; while cartridges for popular models can still be found, there are plenty whose consumables are long gone. [Drygol] had an Apple ImageWriter II with exactly that problem, and after finding all his cartridges were non-functional, took a look at how to bring them back.

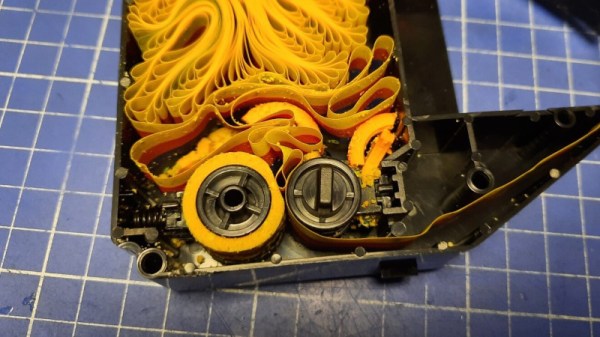
Inside a dot matrix cartridge is a fabric ribbon similar to the one that might once have been found on a typewriter. It’s not on a roll but folded into the space, and it’s drawn through by a pair of rollers. Not only had the ink on the fabric dried out, but the foam on the rollers had also disintegrated. Some careful dismantling, and a solution presented itself in the form of O-rings to replace the rollers. Those and a bit of mineral oil to soften the ink had the vintage Apple printing again as though it was the ’80s once more.

It’s a subject we’ve looked at before, as it turns out WD-40 makes a good ink solvent.

A New Commodore C128 Cartridge

A new Commodore C128 cartridge in 2023?  That’s what [idun-projects] set out to do and, as you can see in the video below, did. I did the original C128 hardware design and worked with the amazing team that turned this home computer out in 1985. Honestly, I am amazed that any of them are still working 38 years later, let alone that someone is making new cartridges for it.

I also never thought I would hear about someone’s in-depth experience designing for the ‘128. The post takes us through [idun-project’s] decision to use the ‘128 and how modern expectations apply to all computers, even the old ones. Hot on the list was connectivity and reasonable storage (looking at you, floppy disks).

Continue reading “A New Commodore C128 Cartridge”