Everyone has their preferred method of making (and consuming) coffee. While modern coffee makers are starting to come standard with IoT and ‘smart’ capabilities, owners of older models should fear not, as [Andreas Skoglund] shows how just about any old machine can be upgraded with the latest automation wizardry.
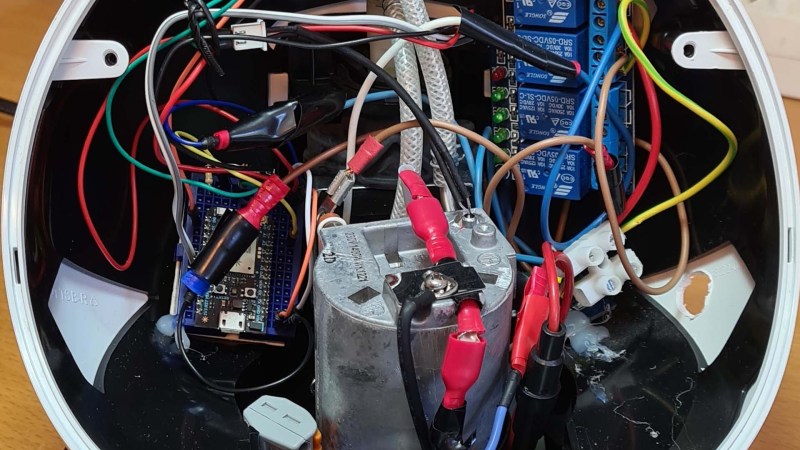
The most involved part of this conversion is removing the electronic guts of the Dolce Gusto donor machine, leaving just the original heater, pump and the control levers. With safety in mind, the user must make the machine ‘hot’ by configuring the levers and replacing the coffee capsule manually, otherwise no automated coffee magic can take place.
A low-tech relay powers on the coffee maker, with the entire logic supported by an off-the-shelf microcontroller. If you’re using a Particle.io controller, the provided instructions offer some helpful tips on automatically brewing your first beverage. From there it’s trivial to start using Home Assistant to set up various rules and schedules for your coffee drinking pleasure. You can even select whether you want a small or large cup.
There’s a few improvements that our coffee-starved hero suggests implementing, such as upgrading the power supply, as well as investing in refillable capsules to spite a certain global conglomerate corporation (plus it’s cheaper and much better for the environment). We’re not short on coffee-inspired hacks, so why not also check out this AI Powered Coffee Maker.


It’s good to see that Stevie Wonder is still in the connector crimping business
hahahah
LOL! That’s not just a burn, it’s an electrical burn. :)
“…modern coffee makers are starting to come standard with IoT and ‘smart’ capabilities.”
Oh no :-(
Yes, but is it RFC 2324 compliant?
Wow, I missed out on a opportunity to implement HTCPCP.. That’s actually embarrassing! I definitely have to correct this wrong, redeem my esteem, and follow proper standards here!
I love to see IoT done in a way that doesn’t have third party server dependence or even internet dependence.
Buuuuut , there’s no way that that wiring can be given a safety pass. I see bare live connections. I see non-captive mains connections. I see low voltage connections that can easily disconnect and contact mains voltages.
It needs a circuit board. with the relays on it to minimize external mains wiring.
Some tips. JST connectors are semi-captive but when you poke a pin or wire into the socket then that pin or wire is free to come out and make contact with live parts.
Crimped Quick-Disconnect Connectors (that’s actually what there called) are not suitable for mains wiring. In some cases they can be used (when they have locking pins) but here I see Automotive quality connectors crimped by a crimping tool designed for 12v-24v automotive applications. There is no way that the crimp connectors on the thermal fuse are establishing enough friction to make the connection stable. You can buy thermal fuses with Quick-Disconnect terminals WELDED to them as that is what is needed for thermal fuses. You could use a screw barrier strip if you wrap the solid wire from the thermal fuse so that even if the screw get loos it can’t come out (captive connection). I know thermal fuses are a pain to connect to, and so does everyone else and that’s why you can buy them with any imaginable connector pre-fitted (welded).
Hey, all good points RÖB. The creator themselves points out numerous safety issues in their build log, it’s worth checking out. I would say that the wiring is acceptable as a ‘hack’, but it would need the improvements you describe before being left unattended overnight on the kitchen benchtop.
Hi RÖB!
Thank you very much for your input, I’ll definitely look into that for a potential more permanent solution!
This project was very much a prototype, using spare parts I had laying around for a fun weekend time-waster. (though I admit that all working prototypes have a usual tendency to stay longer than their welcome before being refined)
Using this as a base to learn basic PCB design, and improve the safety of the device would be a fun next challenge.
I should probably better highlight that my “solution” here is not something I would leave behind and connected while on away on vacation in my original post too.
I looks like a duck is puking into his coffee mug.
I tore down my old Keurig machine when it stopped working. It’s staggering what technology is inside a machine that sells for $99.
Sometimes I stop and ponder that DIY hacks like this are only feasible because some company spent a million dollars inventing a machine first.
So now I have to grab my phone to start it even though I’m 1m away?