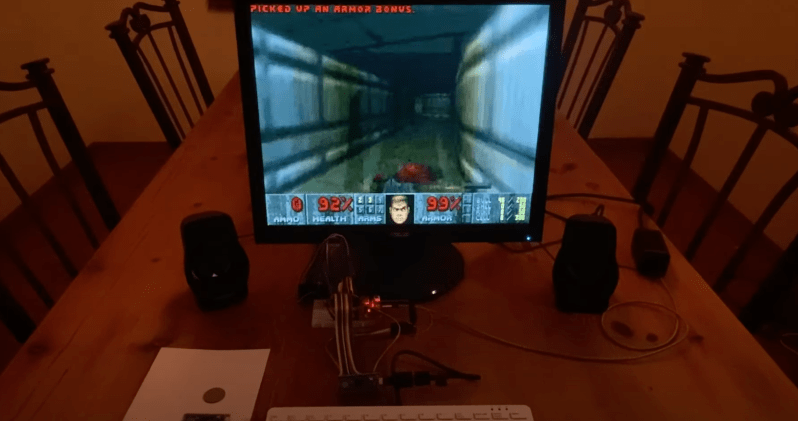
To the point of being a joke, it seems like DOOM is adapted to run on everything these days. So it was only natural that we would see it ported to the RP2040 by [Graham Sanderson], the tiny chip powering the Raspberry Pi Pico.
You might be thinking, what’s different about this port? There have been 55 articles about DOOM here on Hackaday, showing it running on everything from web checkboxes to desk phones. The RP2040 has 256 K of RAM, two decently clocked processor cores, and 2 MB of flash, so it’s not the most constrained platform ever to have DOOM run it. But [Graham] also set some very lofty goals: all nine levels needed to be playable, faithful graphics and music, multiplayer, and it would output to VGA directly. It should play just like the original. DOOM has a demo that is stored as a sequence of input events. They form excellent regression tests as if the character gets stuck or doesn’t make it to the end; then you’re not accurate according to the original code.
There are two big problems right out the gate. First, a single level is larger than the 2 MB storage that the RP2040 has. And to drive the 320×200 display, you either need to spend a lot of your CPU budget racing the beam or allocate a vast amount of RAM to framebuffers, making level decompression much harder.
A default compression scheme wouldn’t cut it because it needed a high compression ratio and random access since decompressing into RAM wasn’t an option. However, carefully optimizing and compressing the different data structures yielded great results. Save game files are given a similar treatment to ensure they fit into the remaining flash after all the levels (34k).
The result is fantastic, and it supports DOOM, Ultimate DOOM, and DOOM II. The write-up goes into far more detail than we could here; enjoy the read. If you decide to make a day trip to the depths of Hell on your own Pi Pico, be sure to let us know in the comments.
Thanks to [Xark] on the Hackaday Discord server for the tip.


What is that DOS prompt when they exit the game?
It’s a gag. “Since, I had the text mode, I added a little DOS shell easter egg which is a good way to check the size of your saved games!”
That was a refreshing article to distract me a couple minutes from the whole installation (on Windows, naturally) of the toolchain to debug the thing. Perfect timing.
The genuinely scary aspect of Doom is how well I know some of those levels, how much of my life I have spent there!
And I was wondering what I could possibly use a good quality but old 4:3 monitor for…
If you had three of them (and three networked computers), then you could do something very cool https://doomwiki.org/wiki/Three_screen_mode
Doom with a physical “virtual reality” style.
The writeup on four-player multiplayer over I2C is, uh, interesting. I can only dream of the day that I understand microcontrollers this well.
I want the same with TFT screen and buttons :)
320×200 x 8-bits = 64kB. Did Doom really use a lot of frame buffering? According to this article, no. It used BSP trees and a simplified Z buffer to generate each new frame with relatively low memory usage. This implies that no more than 128kB is needed for frame buffers themselves (i.e. one for rendering and one for viewing).
https://arstechnica.com/gaming/2019/12/how-much-of-a-genius-level-move-was-using-binary-space-partitioning-in-doom
The original DOOM for PC specified 4 MB RAM minimum. So getting it to run in 256 kB is an achievement, and the frame buffers taking almost half of it (no need to double-buffer status bar) certainly makes it harder.
I certainly agree that getting it to run in 1/16th of the RAM is a real achievement (though of course it can use MB of flash for the program). Good point about not needing to double-buffer the status bar. So, I guess the RP2040 does use about 1/2 the ram for frame buffering then?
Original Doom 1 and 2 didnt use any frame buffer. They rendered straight to Video RAM on your VGA card in mode Y (offshoot of mode X, 4 paged 320×200). This seemed clever in 1992 but tuerned out very inefficient with Fastdoom (github viti95/FastDoom) fixes proving healthy speed boost from rendering to ram first.
Awesome. Now the Pico “counts”!
The writeup is excellent, well worth a read!
May someone reveal where the wiring diagram is for this project? Thanks.